Loading...
Loading...
Loading...
Loading...
Loading...
Loading...
Loading...
Loading...
Loading...
Loading...
Loading...
Integration SCIM v2.0 with Basic
Any application which supports SCIM v2.0 with basic authentication is workable for application.
Following are configuration which is used for SCIM with basic authenticator.
Base address - It is the endpoint of the target system which supports SCIM v2 API’s.
Username - Username to authenticate SCIM API endpoint.
Password - Password to authenticate SCIM API endpoint.
Authentication type - It is Fixed Bearer compulsory.
Update method - Patch or Put method.
Accept - Http header which accepts (application/json etc).
Content Type - Http header which accepts (application/json etc).
Pre-requisites:
Make sure you have the following information before you proceed further:
Cymmetri login credentials
Access to IIS (Internet Information Services) to install certificates.
Access to Windows Certificate Services
Active Directory Essentials:
Server hostname and password
OU (Organisation Unit) name, if any
SSL ports need to be enabled on your side
Export the CA Certificate from Active Directory and import it into the Connector Server.
Make sure the certificate is installed on the Connector Server
Exporting your Active Directory certificate to the Connector Server is a necessary and crucial step. This ensures that the Active Directory and Cymmetri Identity Server can communicate over LDAPS (LDAP over SSL). For this to happen, LDAPS requires a properly formatted certificate installed in your Active Directory Domain Controllers. Please refer to this link and follow the same steps: https://www.manageengine.com/products/active-directory-audit/kb/how-to/how-to-install-ssl-certificates-in-active-directory.html
Once the certificate has been imported per the above instructions, you must restart the application to apply the changes made.
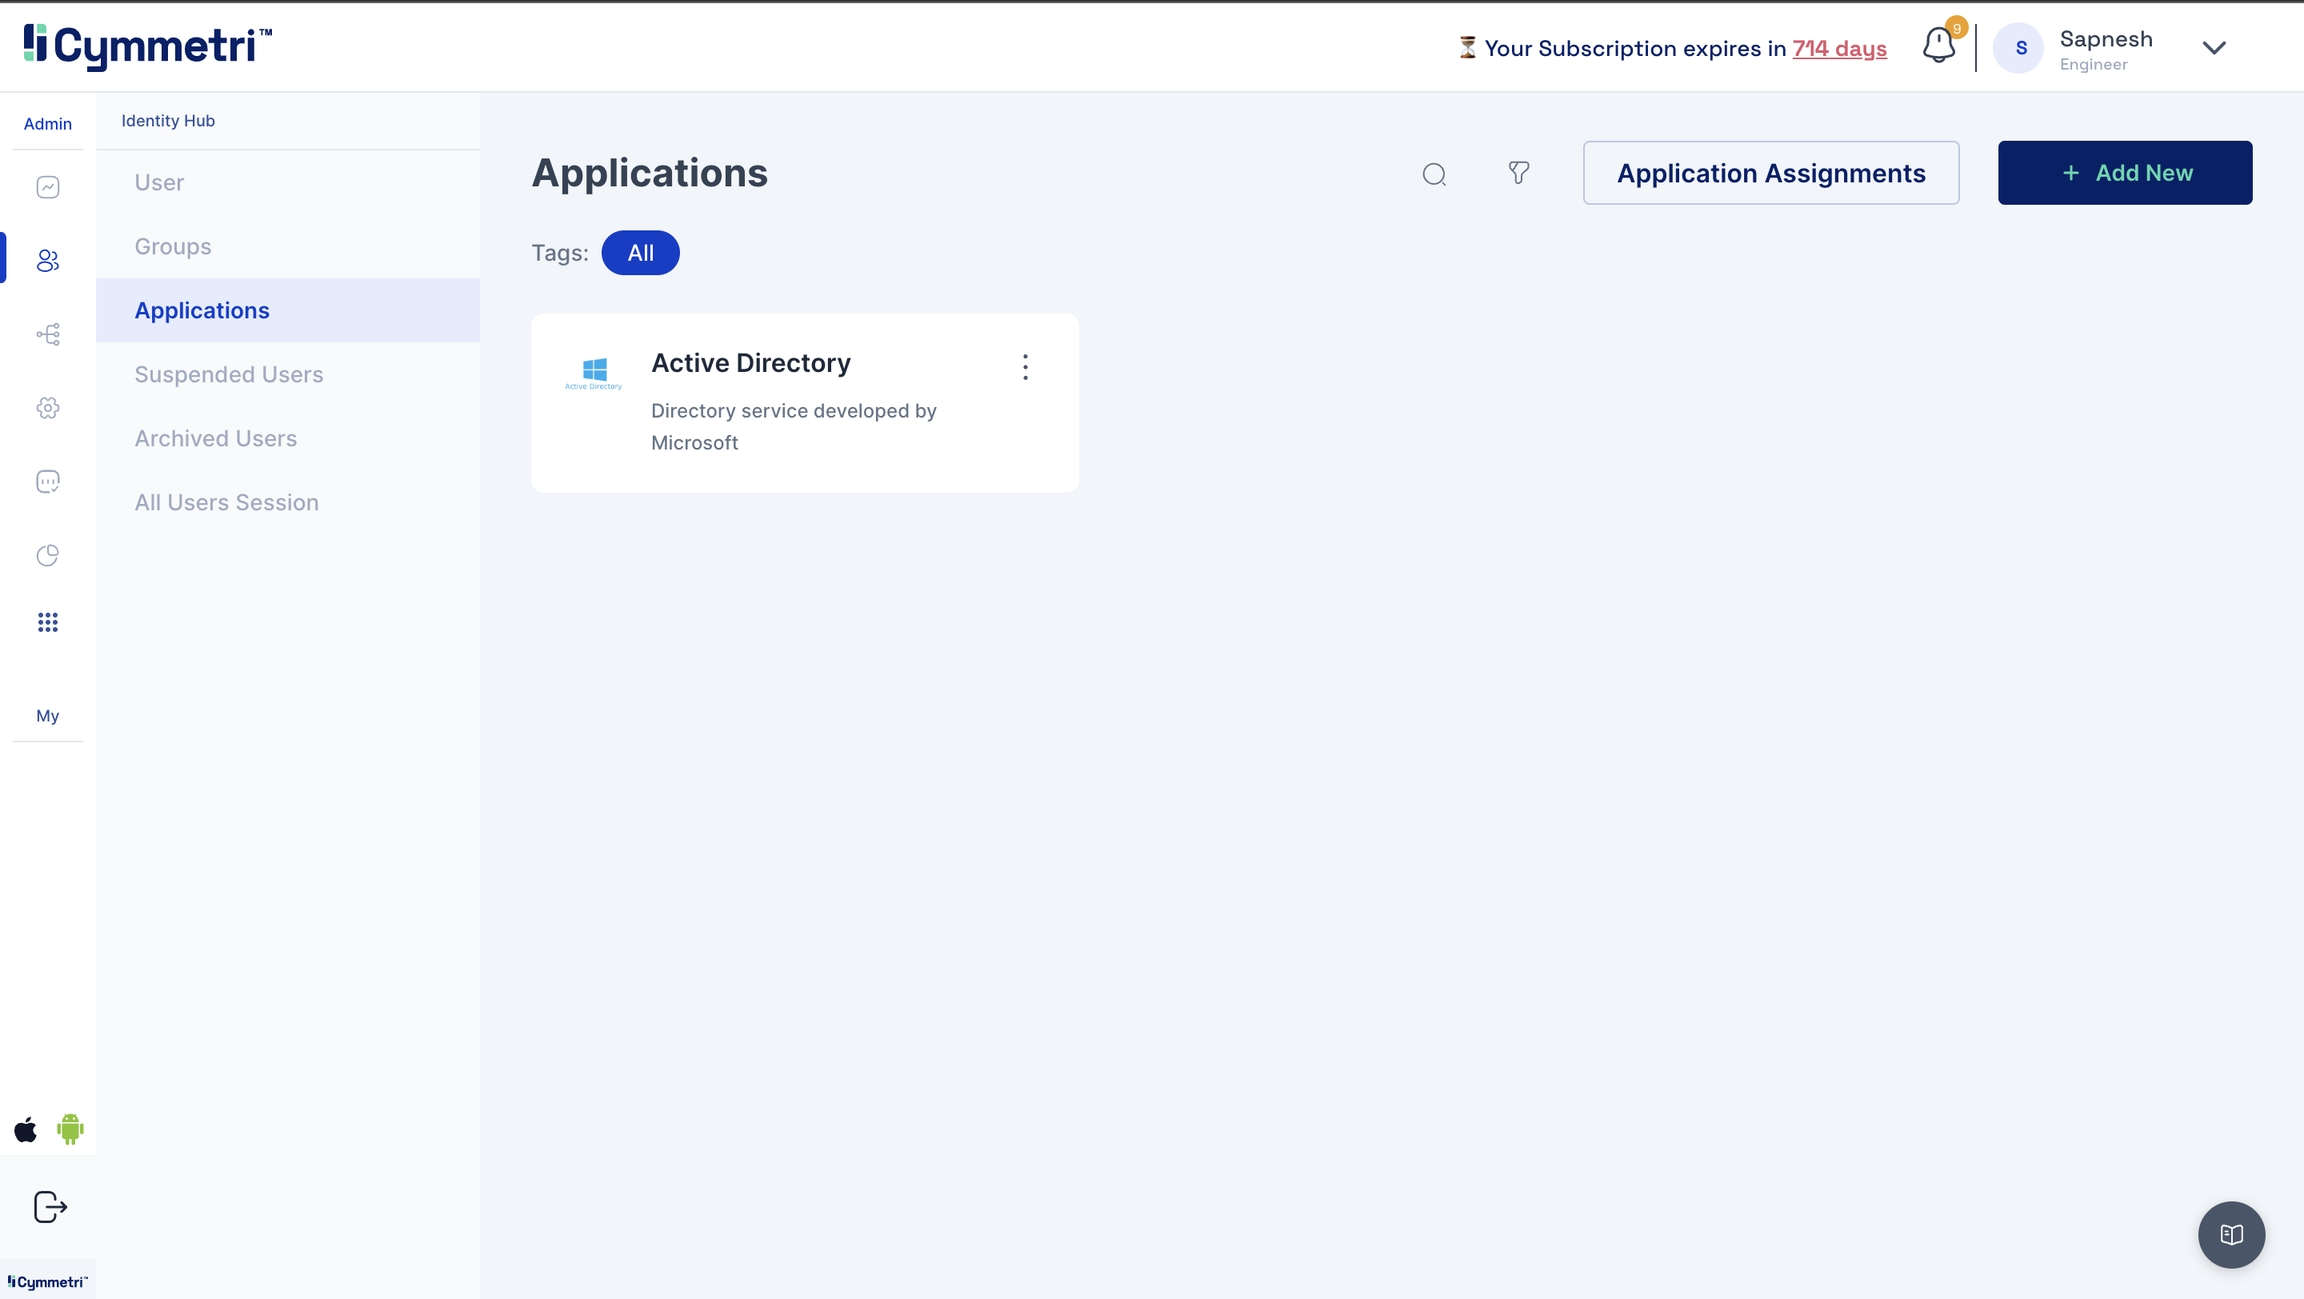
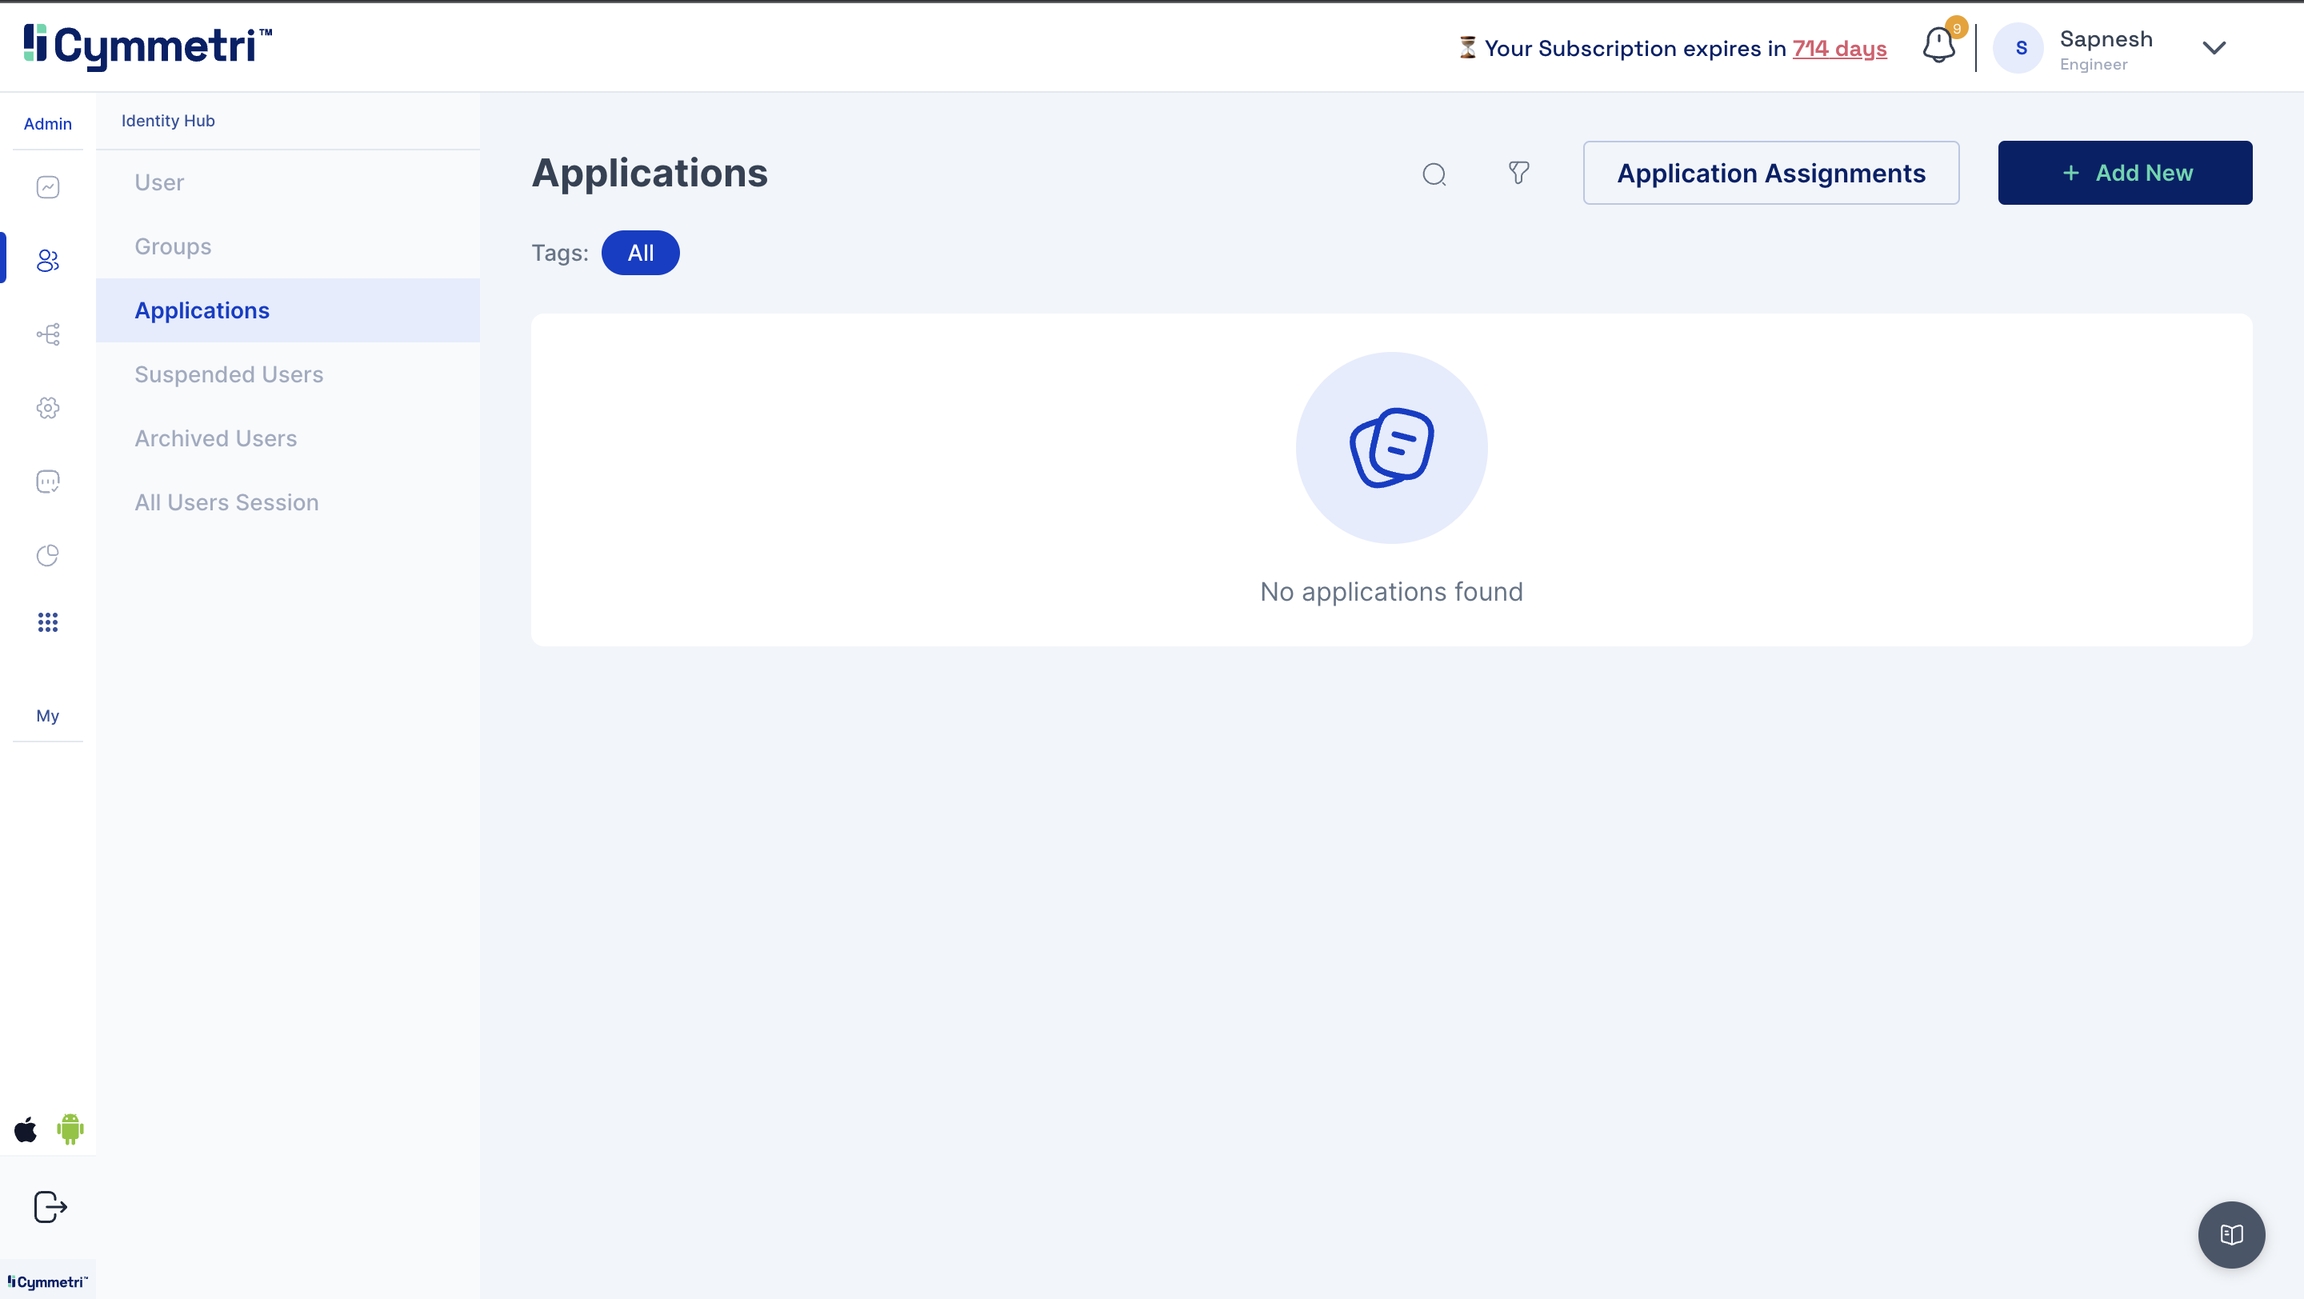
Navigate to the Identity Hub on the left navigation bar and click the Applications tab. You will see a list of existing applications.
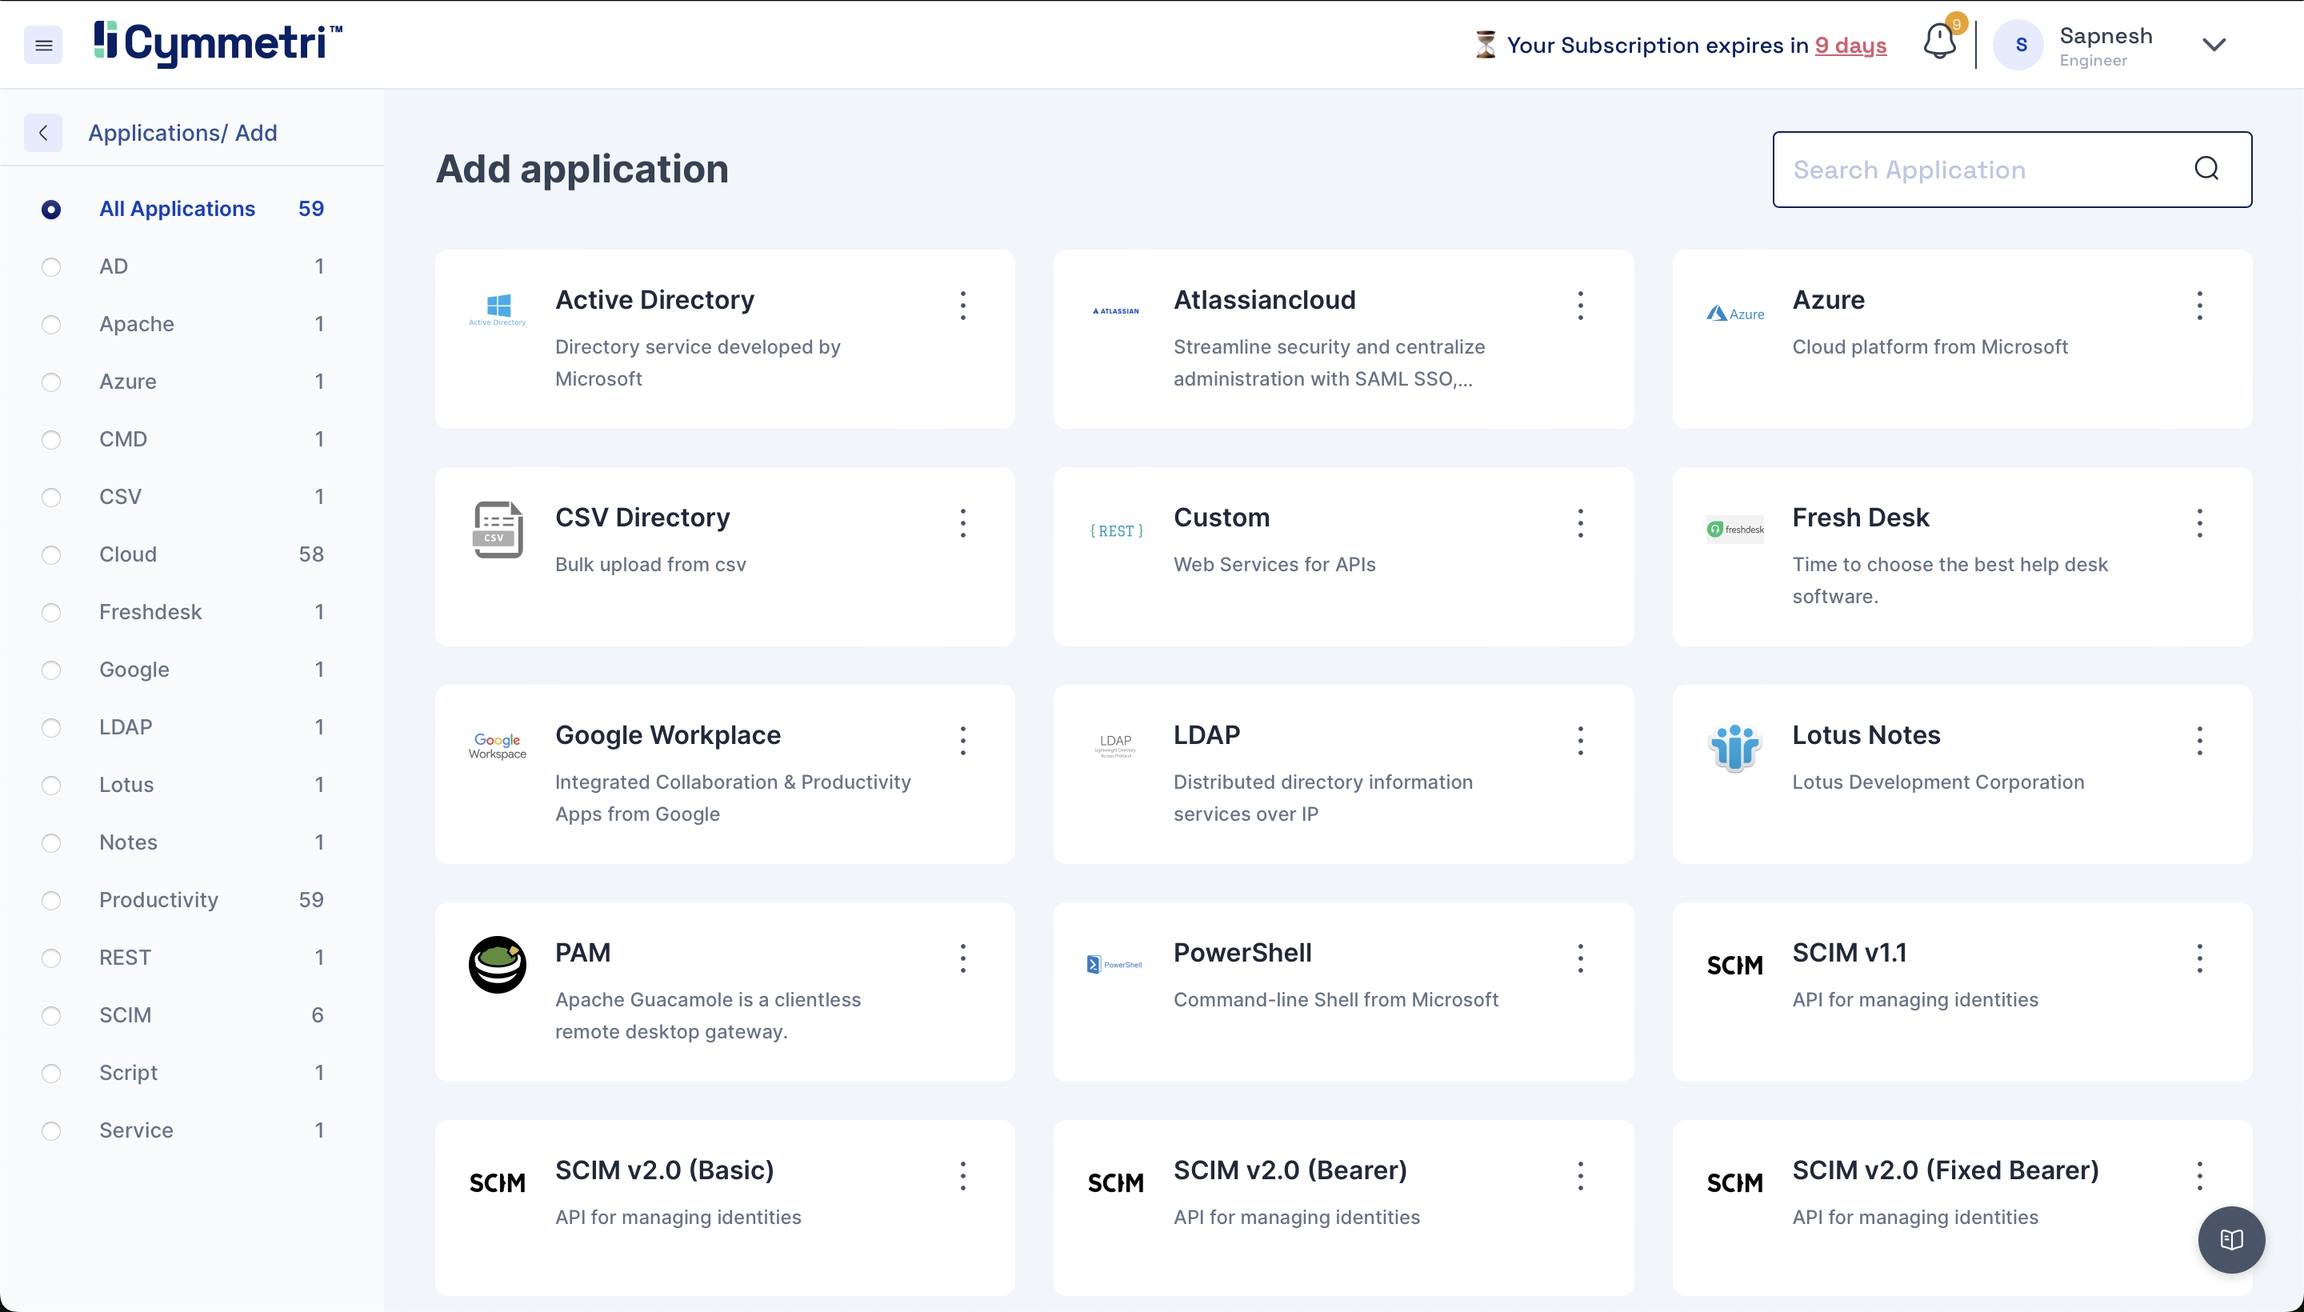
Click 'Add New', and you will find the entire list of all available applications.
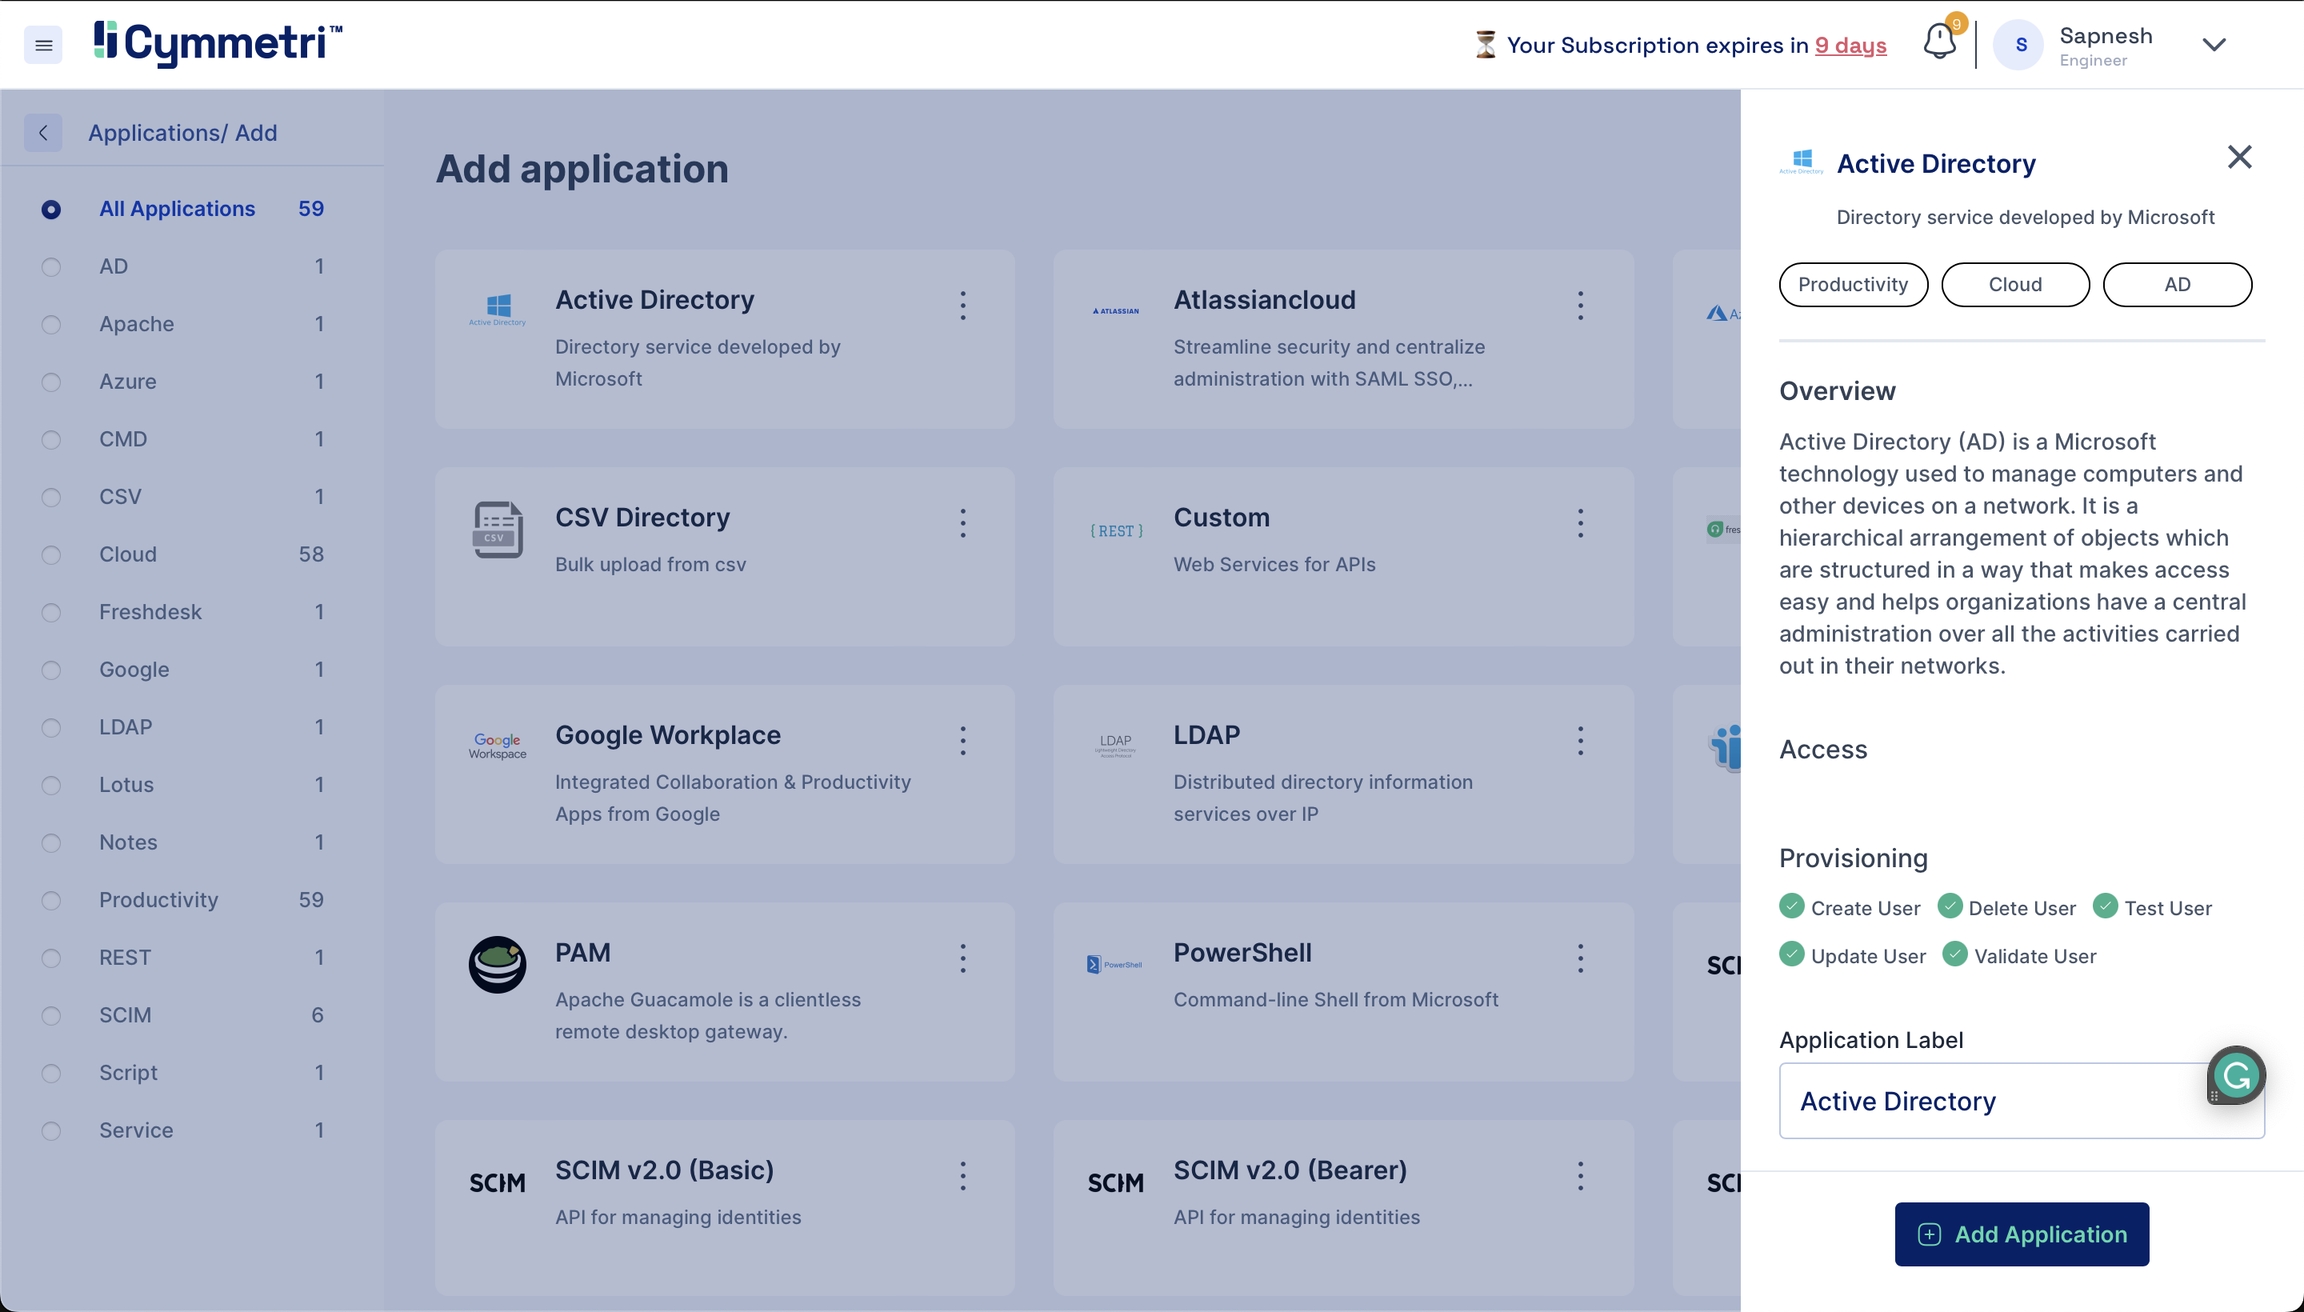
Search for Active Directory on the top right and click on it. You should see the Active Directory application sidebar on the right.
The Application Label has a default name for the Active Directory application and can be changed according to your choice. Click 'Add Application' from the bottom right to add the Active Directory application to your Cymmetri profile.
You have now added an Active Directory application to Cymmetri.
After adding the Active Directory, the 'Configure Now' button is enabled. Click this button to start setting up your Active Directory application.
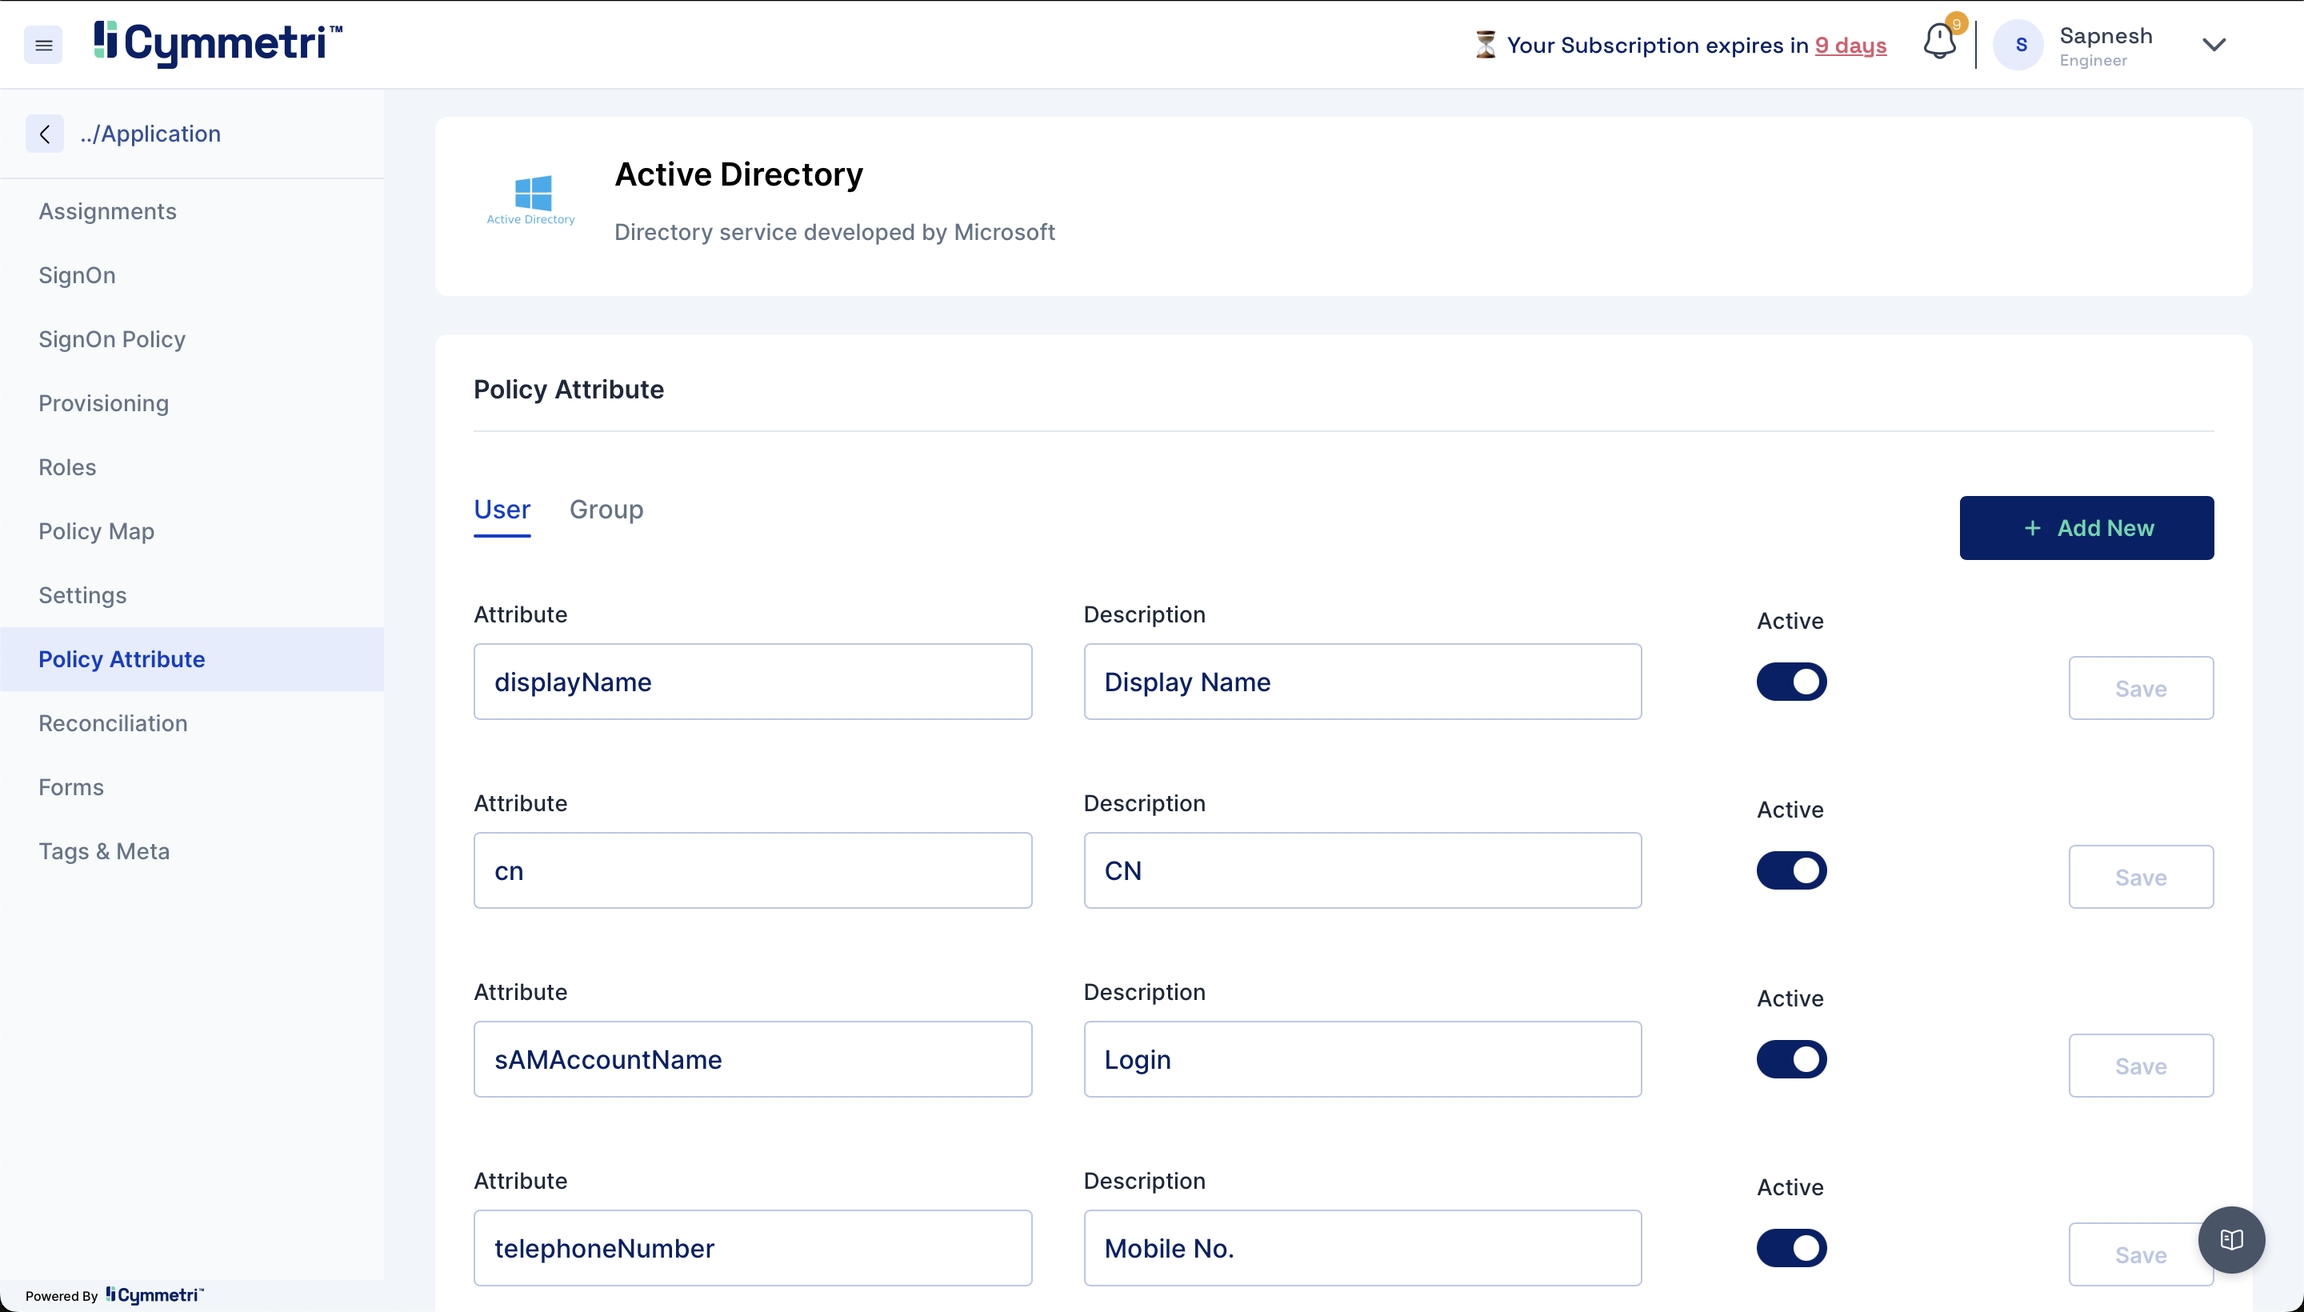
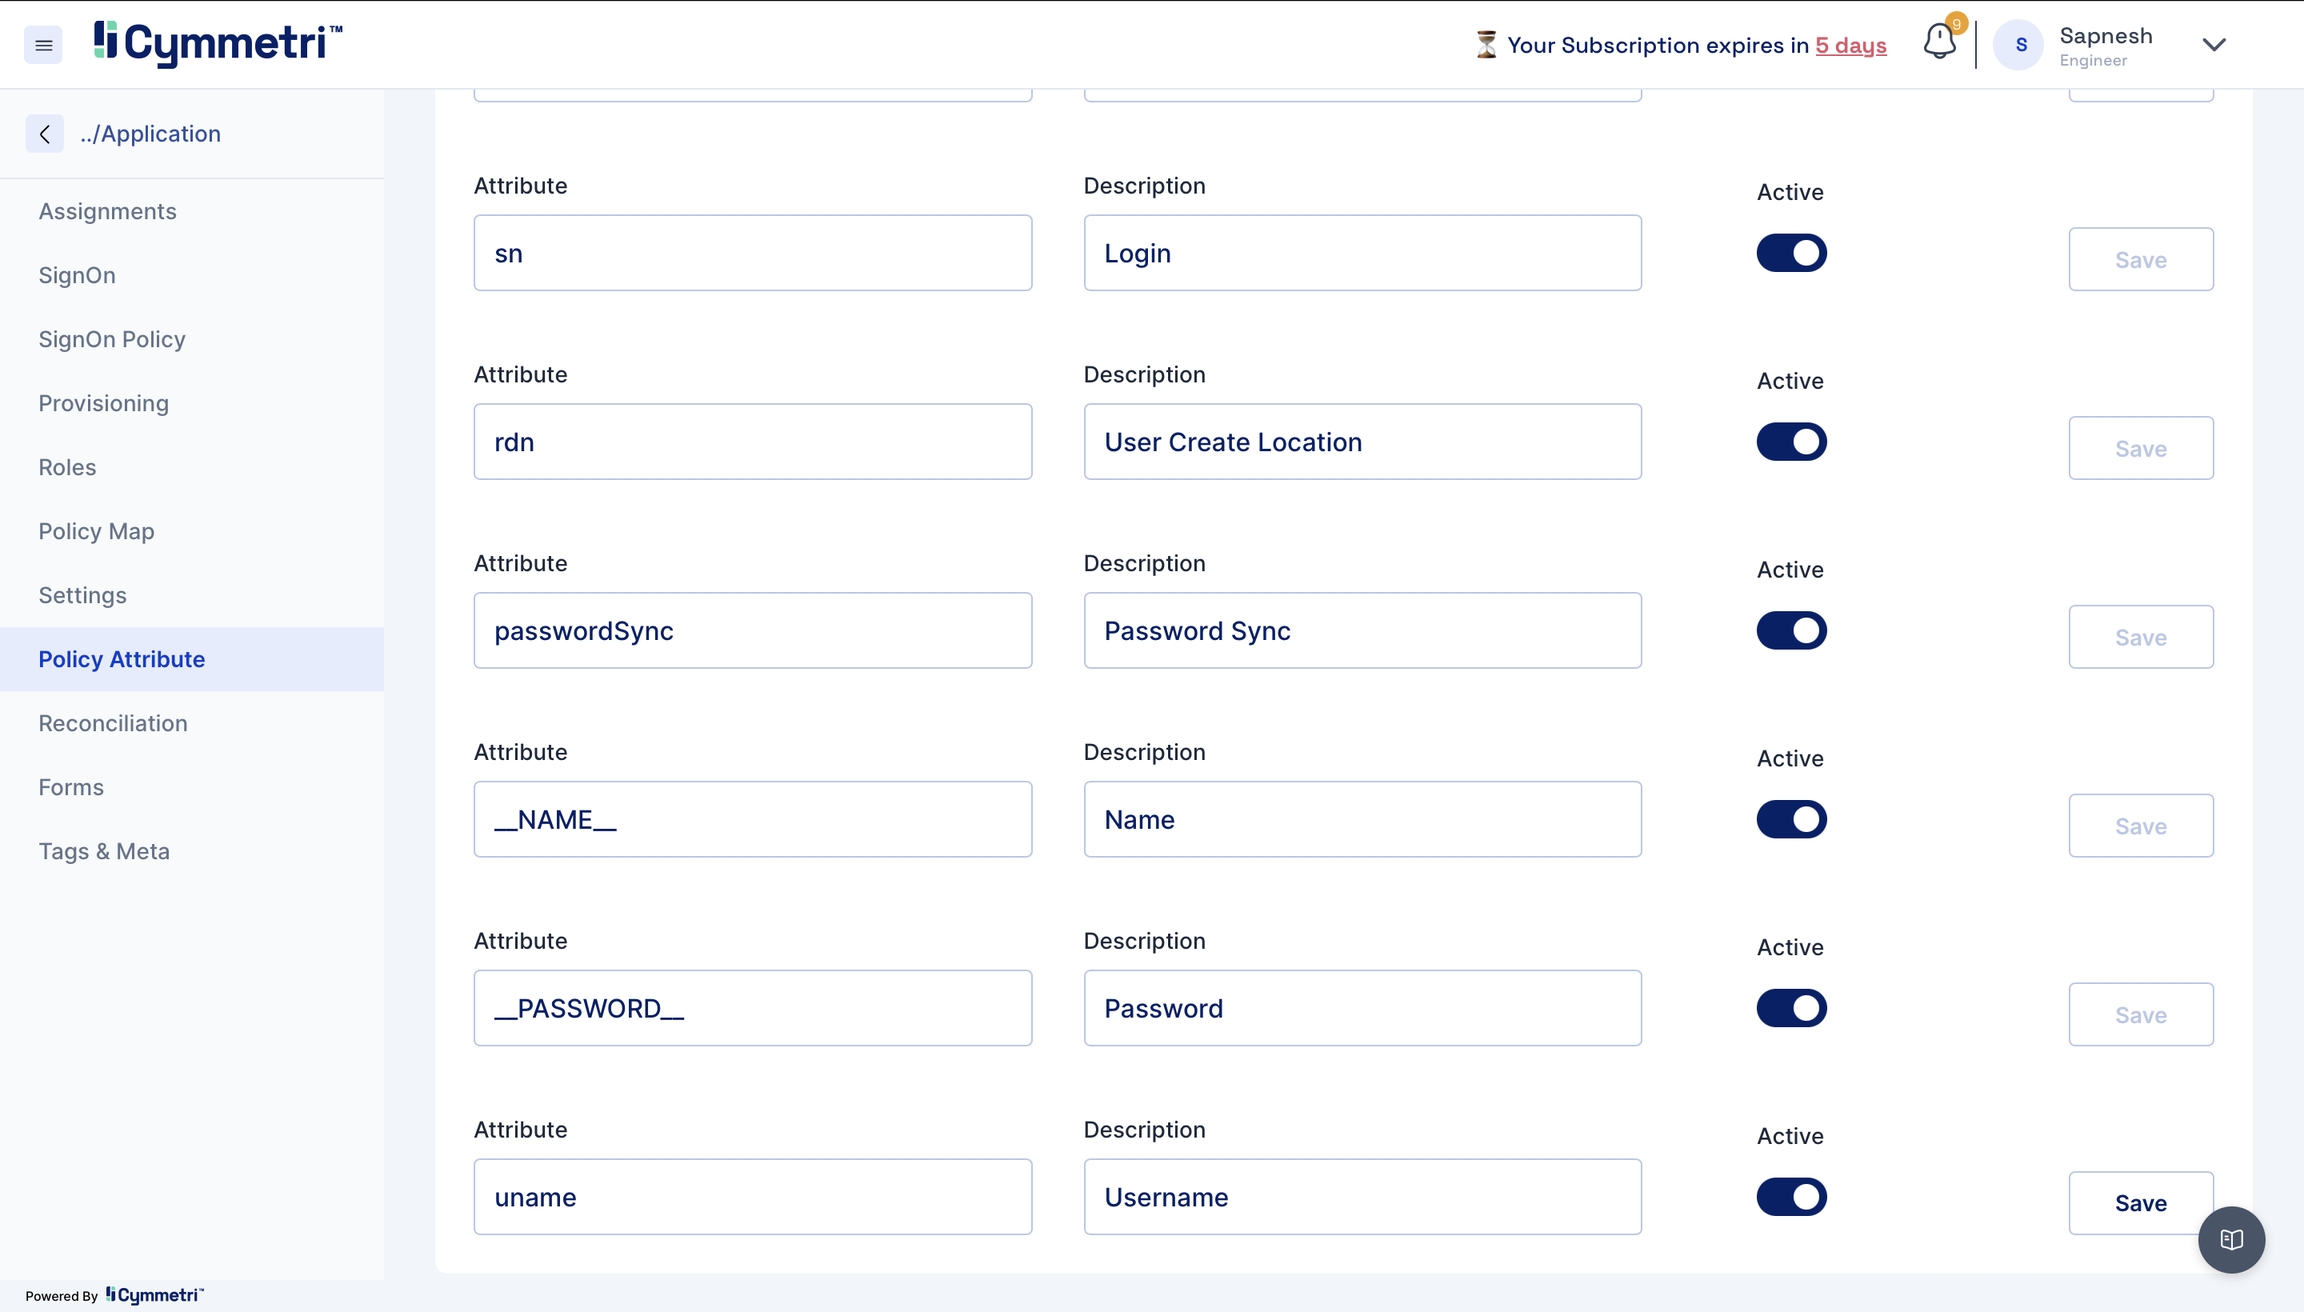
Define which attributes should be fetched from your Active Directory. You can do that by going to the Policy Attribute section.
Here below are shown some Active Directory attribute descriptions
CN
Common Name/ Display Name
RDN
Relative Distinguished Name - An RDN is the relative portion of a Display Name (DN).
SN
Surname
Policy Attributes - Policy attributes are user attributes (field names) in the Active Directory.
The policy attribute table is prefilled with standard Active Directory Attributes by default. Please verify if it works for you. If not, follow the below mappings for the provisioning to work.
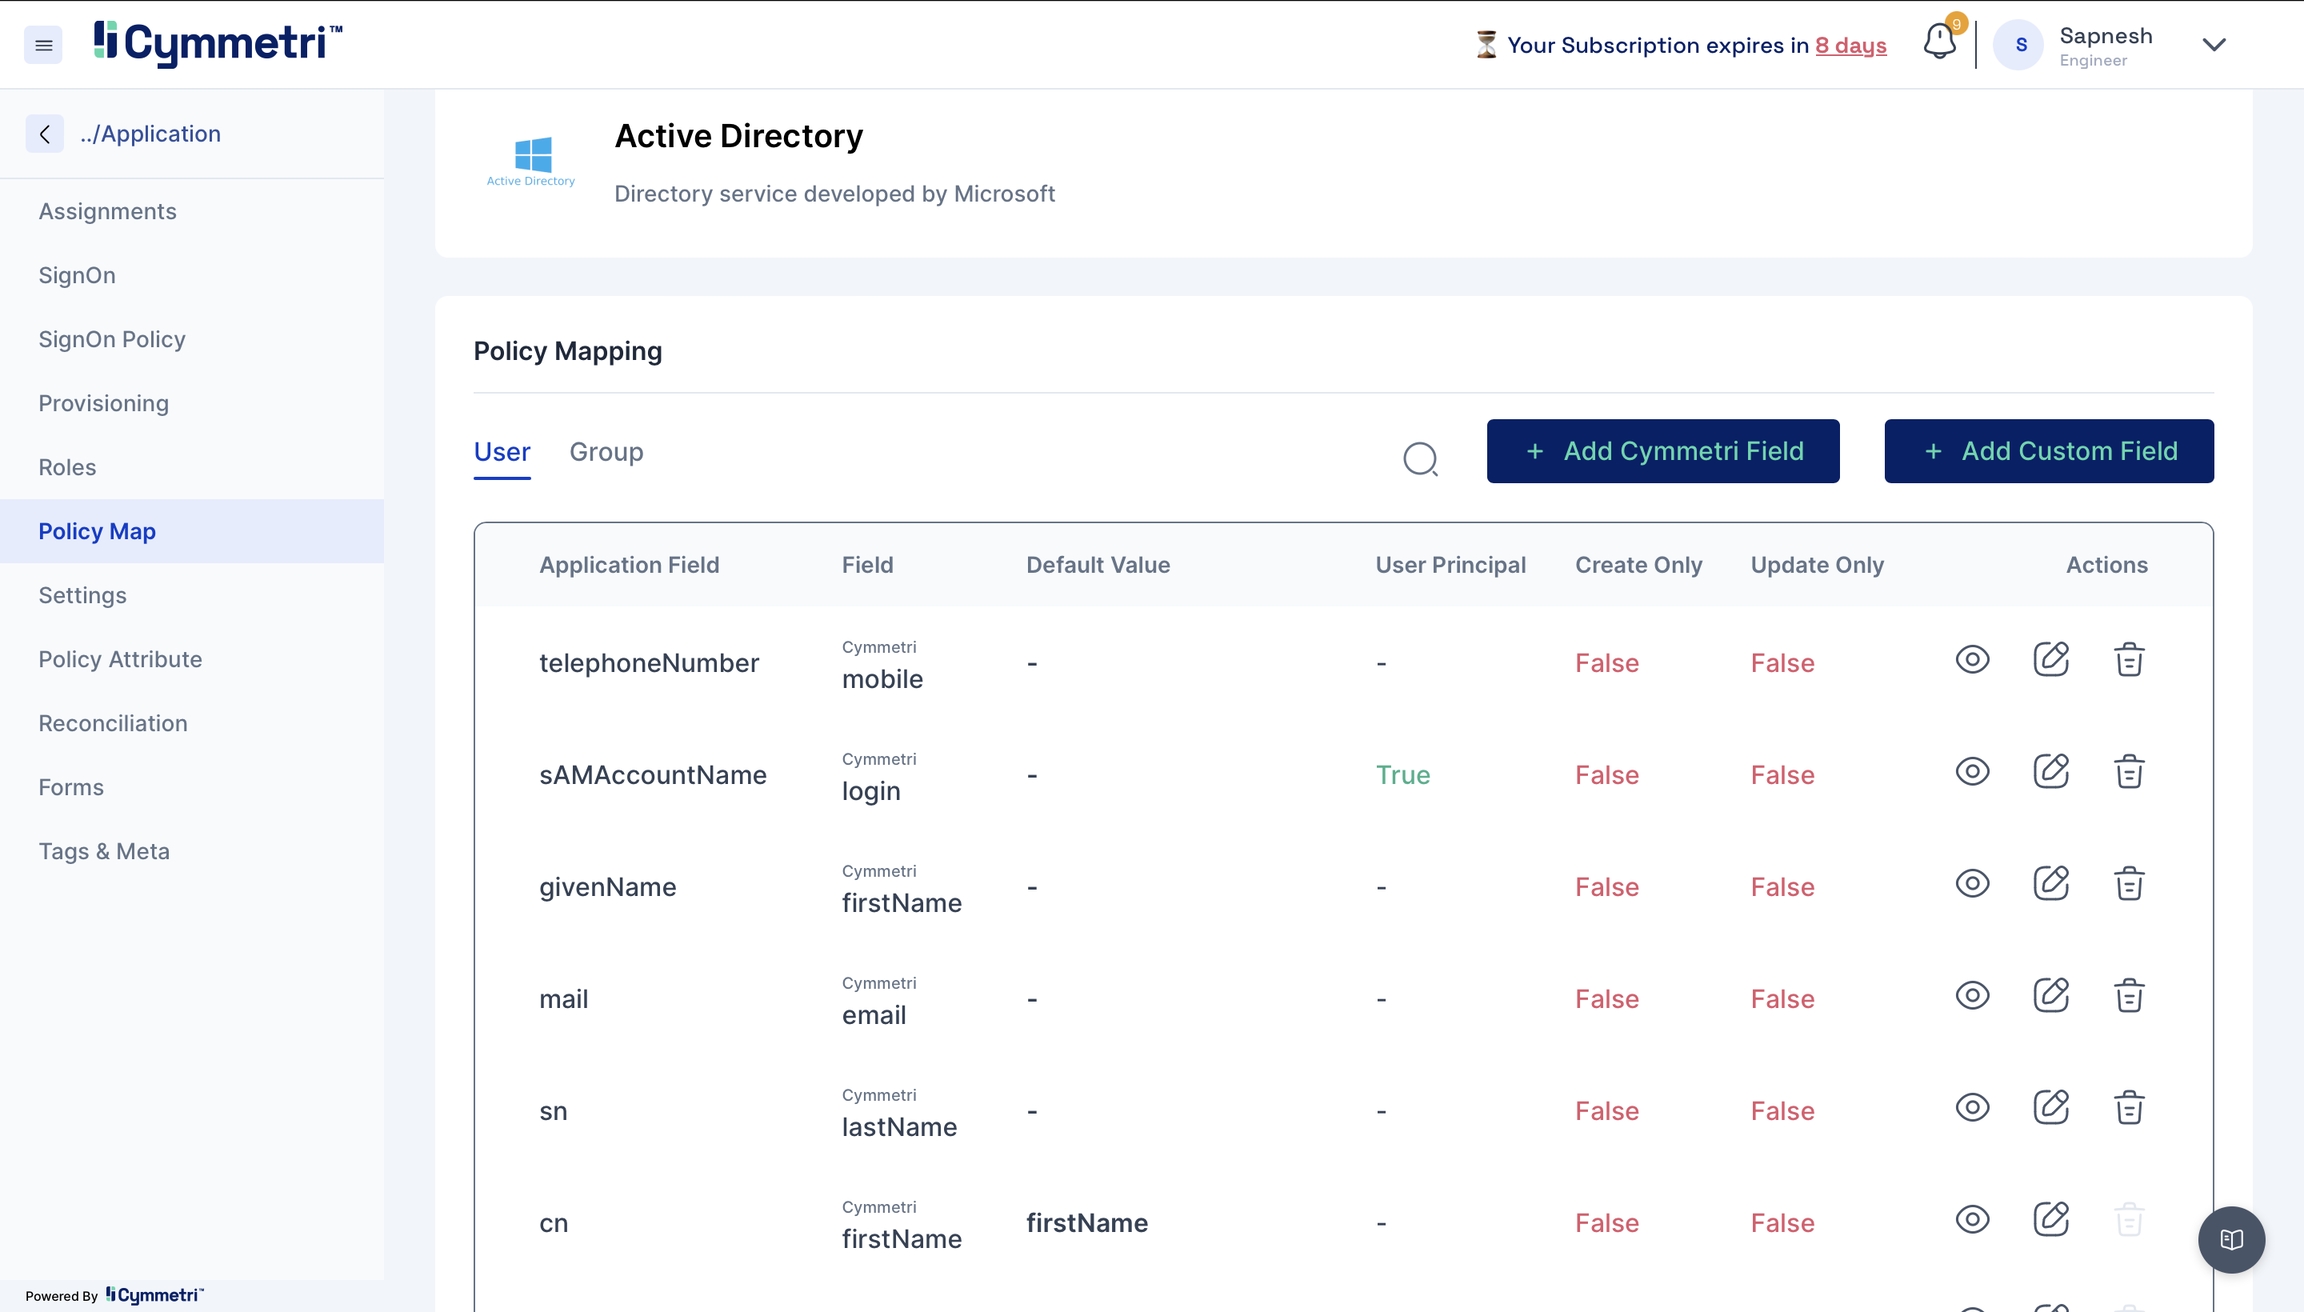
telephoneNumber - mobile
sAMAccountName - login
givenName - firstName
mail - email
sn- lastName
cn - firstName
2.1 Adding new attributes
If the standard list does not contain the attributes you want to include, you can add new attributes by clicking the 'Add new' button on the right.
Fill in the attribute name, and description and click Save.
Also, toggle the Active switch to enable this new attribute.
Besides the present policy attributes, you need to add a custom attribute in case you're going for group provisioning, i.e. memberOf attribute.
Now that you've defined what attributes to fetch from Active Directory, you will map these to Cymmetri user attributes.
On the same window, navigate to the policy map in the left navigation bar.
Policy Map - Mapping of Cymmetri and Active Directory attributes.
You will see that the attributes are set to False by default. Our first step in the mapping process is to enable the attributes for syncing.
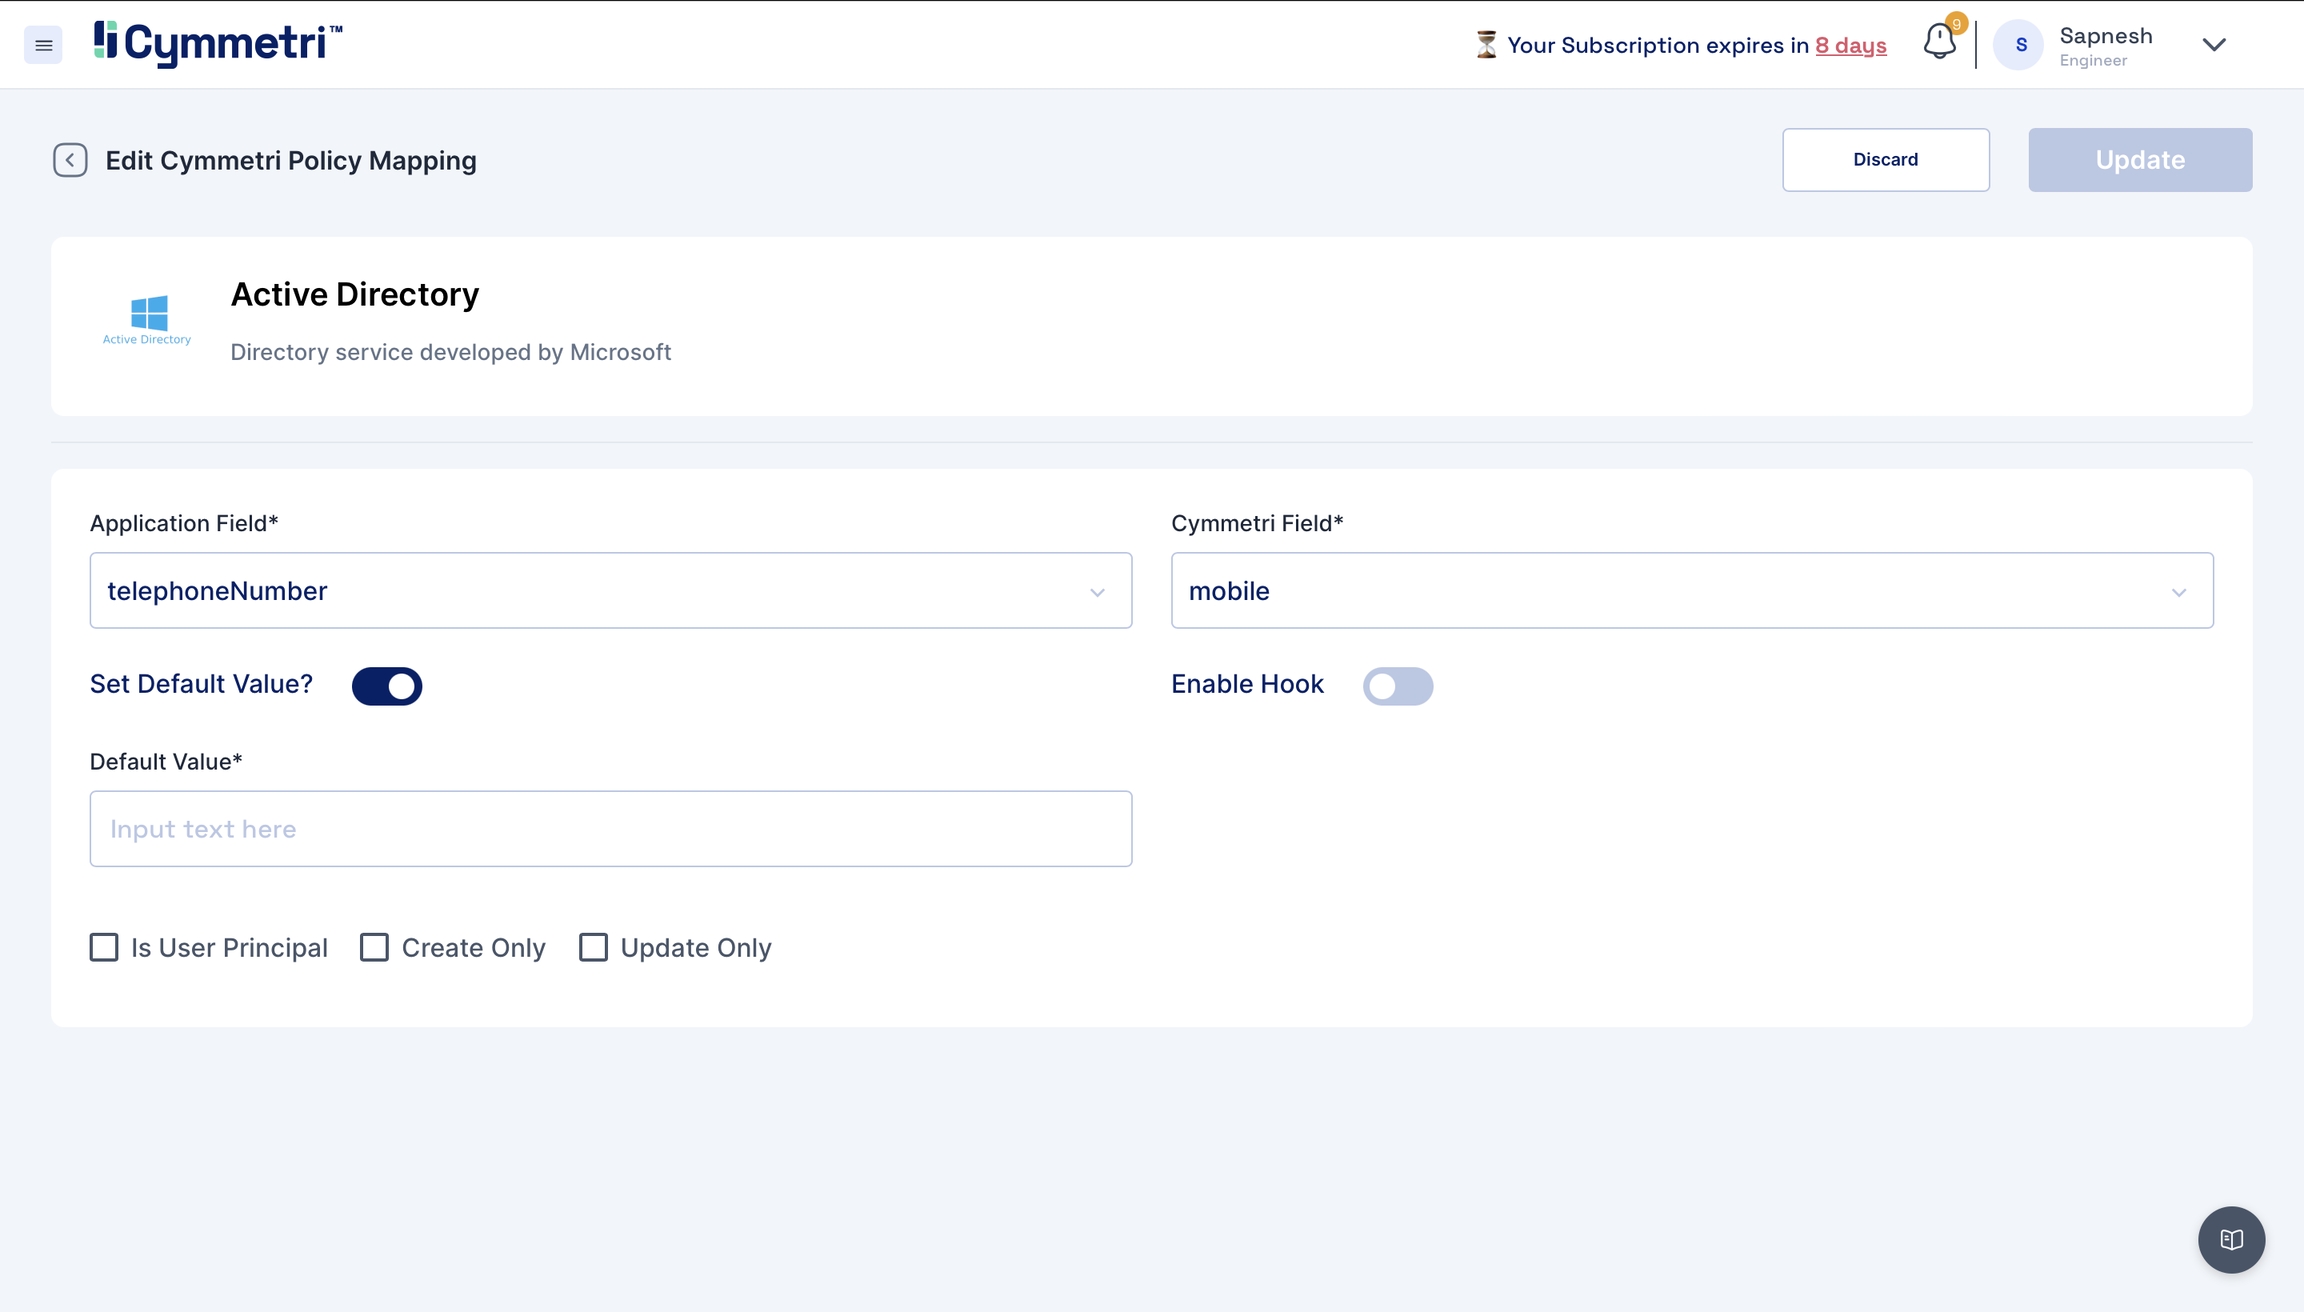
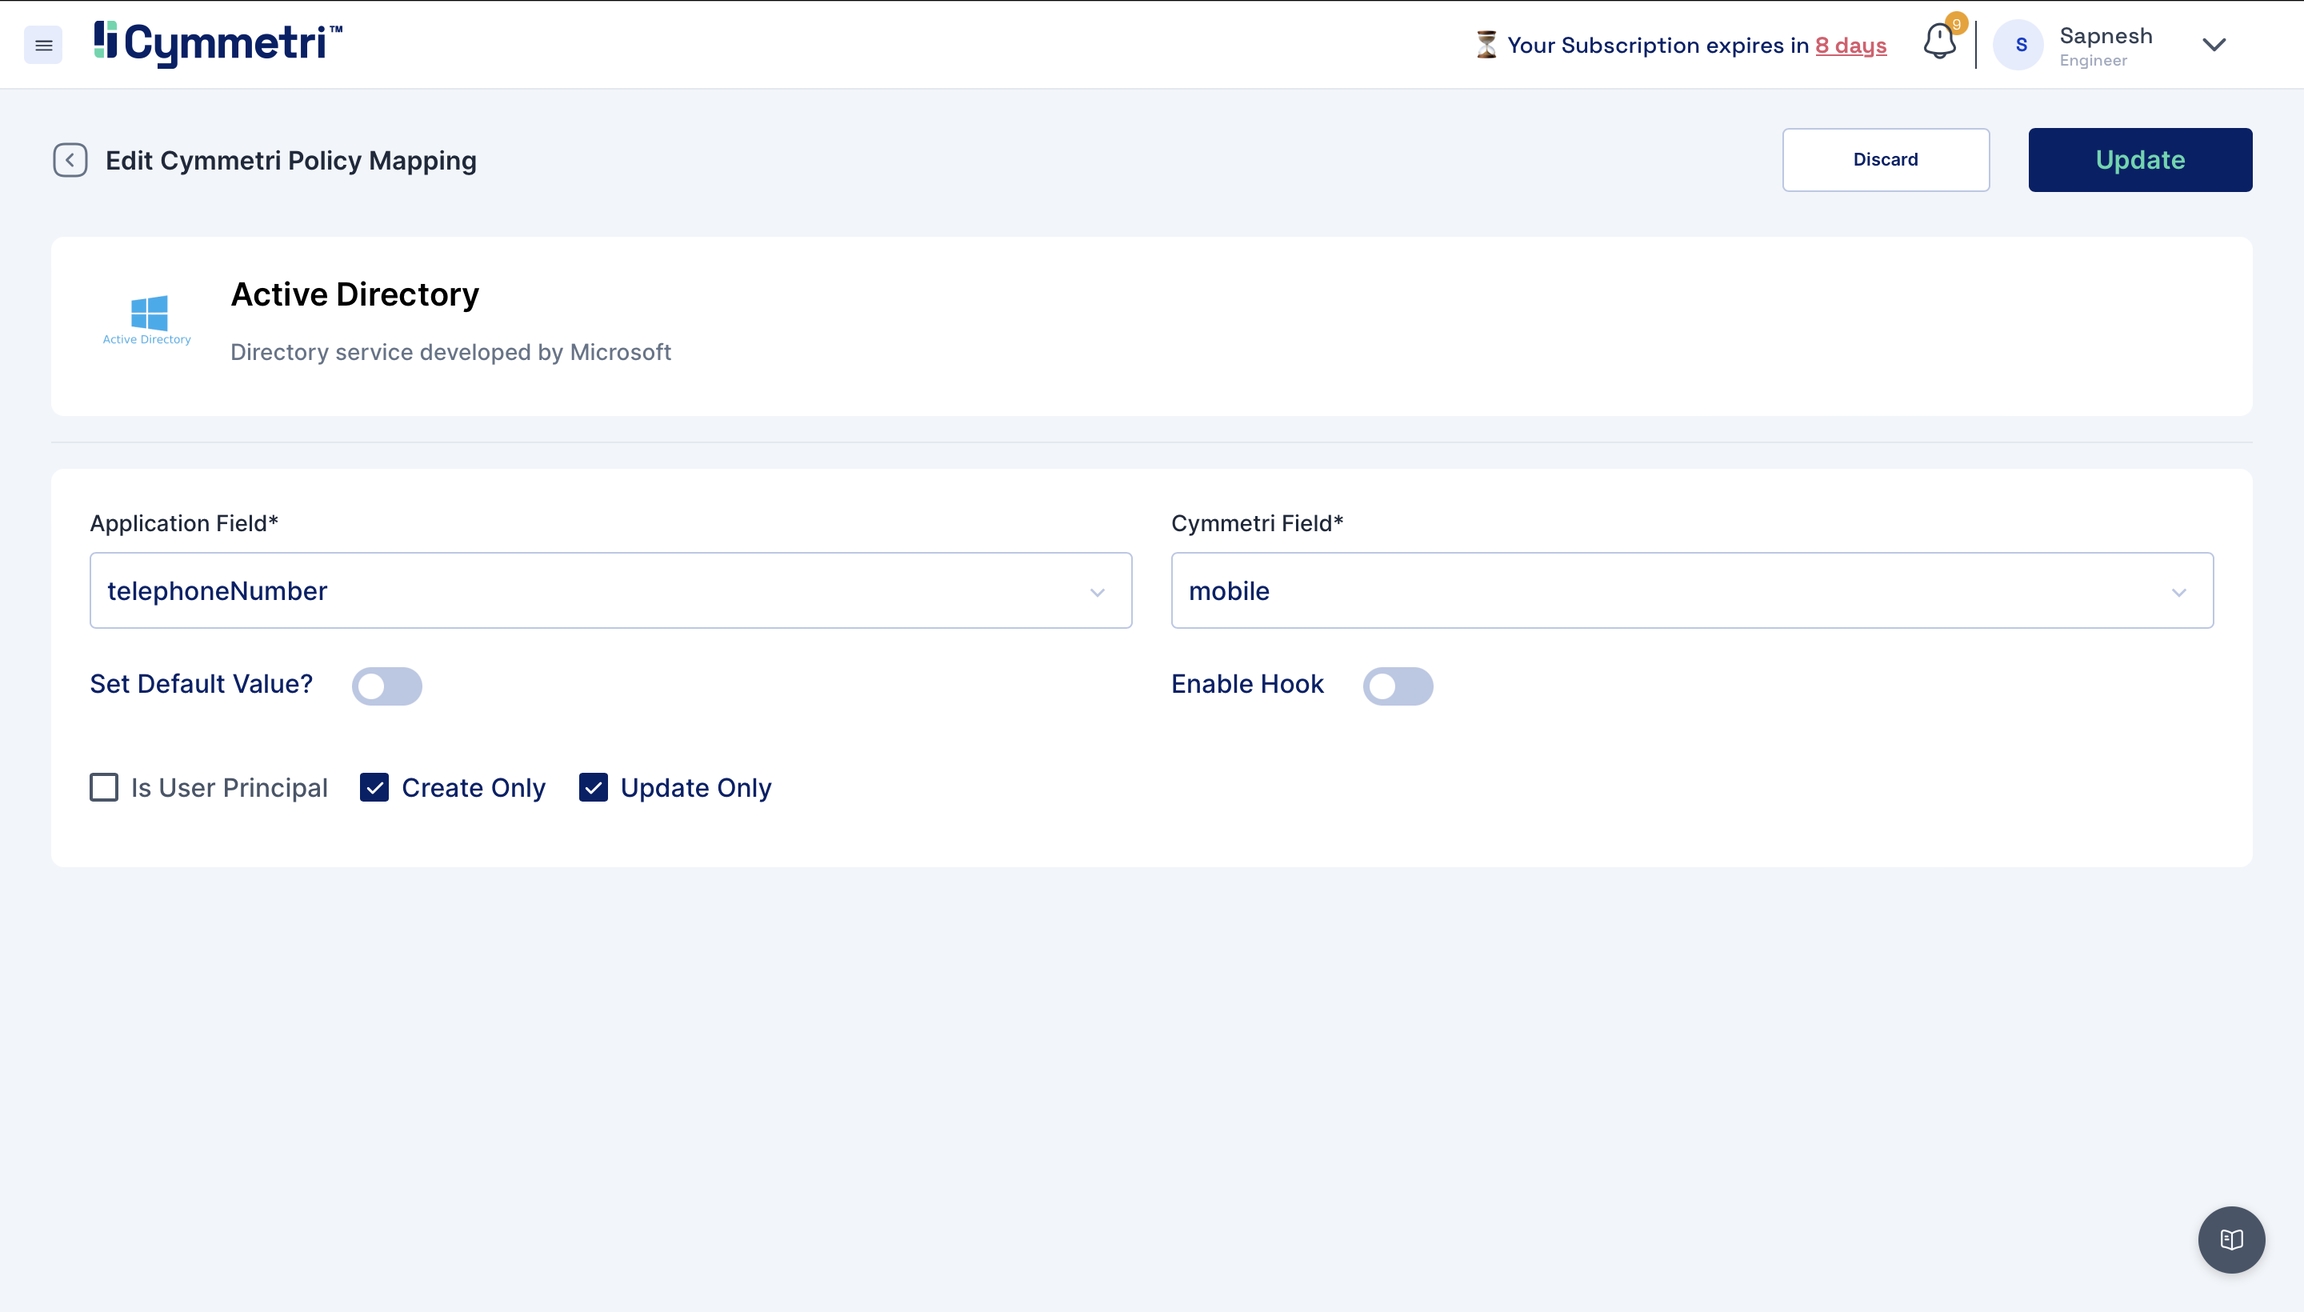
Click on the edit button next to the 'Application Field' name.
The 'Application Field' indicates the Active Directory field name, and the 'Cymmetri Field' indicates the Cymmetri field name.
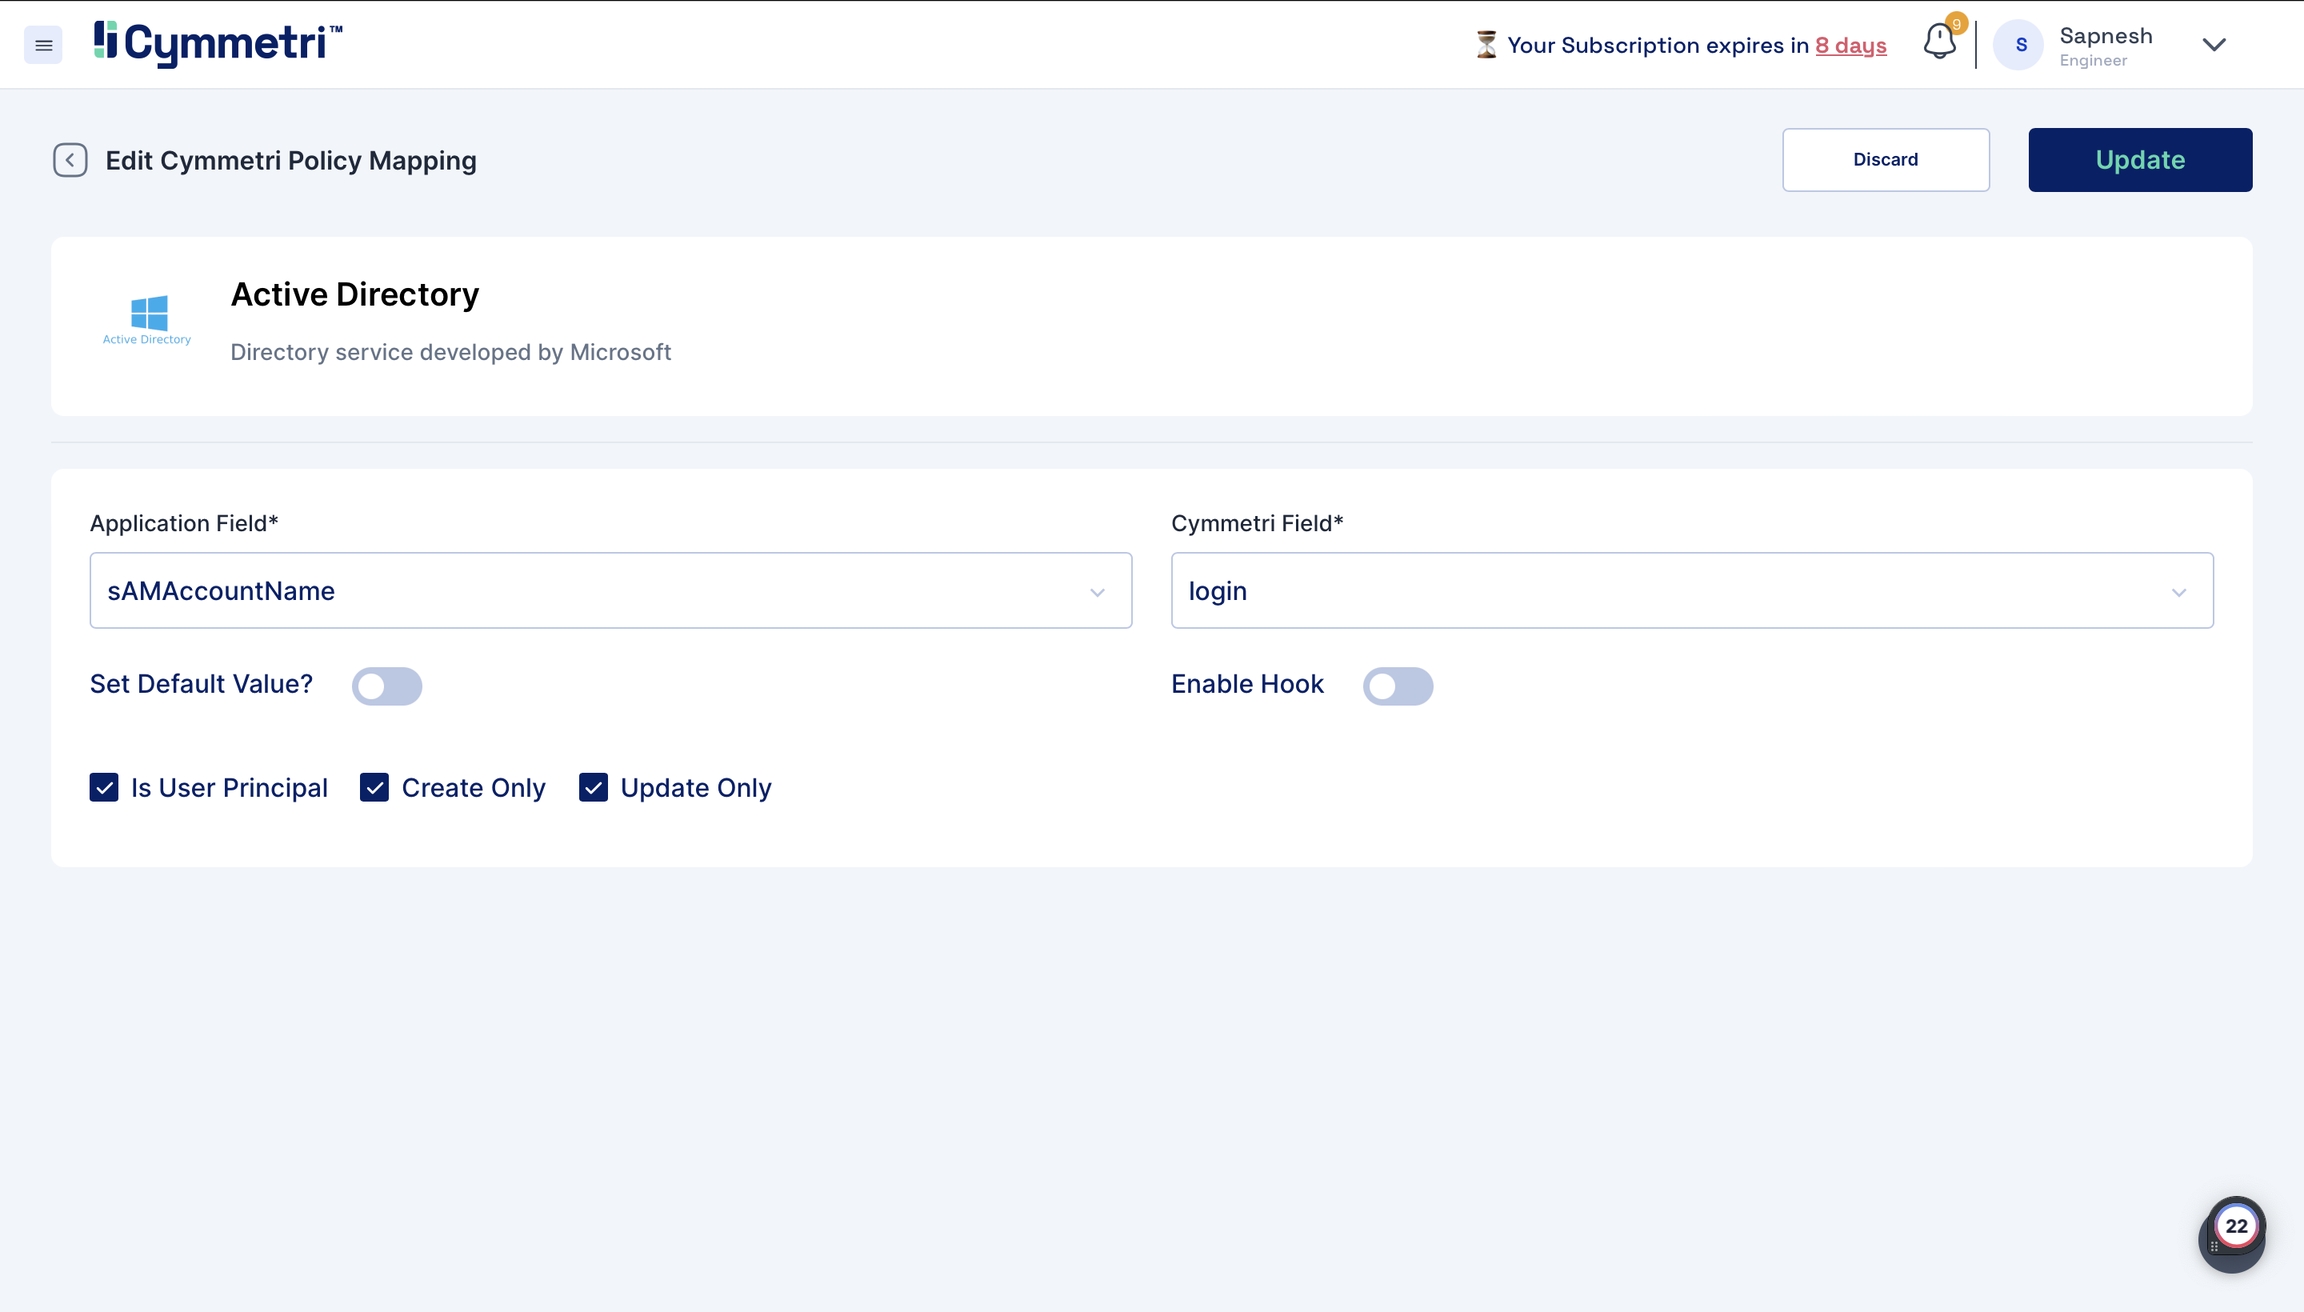
To map the attributes, we need to sync the attributes on create and update only. Hence, these checkboxes need to be checked.
The 'Set default value' field accepts the default value you enter here if the field is empty in Active Directory.
Next, click on the 'Update' button.
Similarly, repeat this for all attributes.
One exception is the sAMAccountName field. The 'Is User Principal' checkbox is enabled by default because it is the primary key (unique data) on the Active Directory side, and login is the primary key on Cymmetri side; leave it checked.
Some important policy map fields which need to be declared in the policy map are as follows.
__NAME__
Users Display Name
__PASSWORD__
Users password
sAMAccountName
Unique login attribute
cn
Unique login attribute (specific to user)
rdn
Used to pass the OU (Organization Unit) path
If any attribute is missing from the policy map but present in your policy attribute. Add it by clicking the 'Add Cymmetri Field' and follow the same steps to map it to the appropriate field.
If you want to add a new field that is not present even in Cymmetri, click on the 'Add Custom Field' button. For group provisioning, the memberOf attribute must be configured with the memberOf attribute from the custom attribute.
The connector server is a tool that provides different connectors that enable various provisioning operations from different sources to Cymmetri. In our case, we will prepare the connector server to work with the Active Directory source.
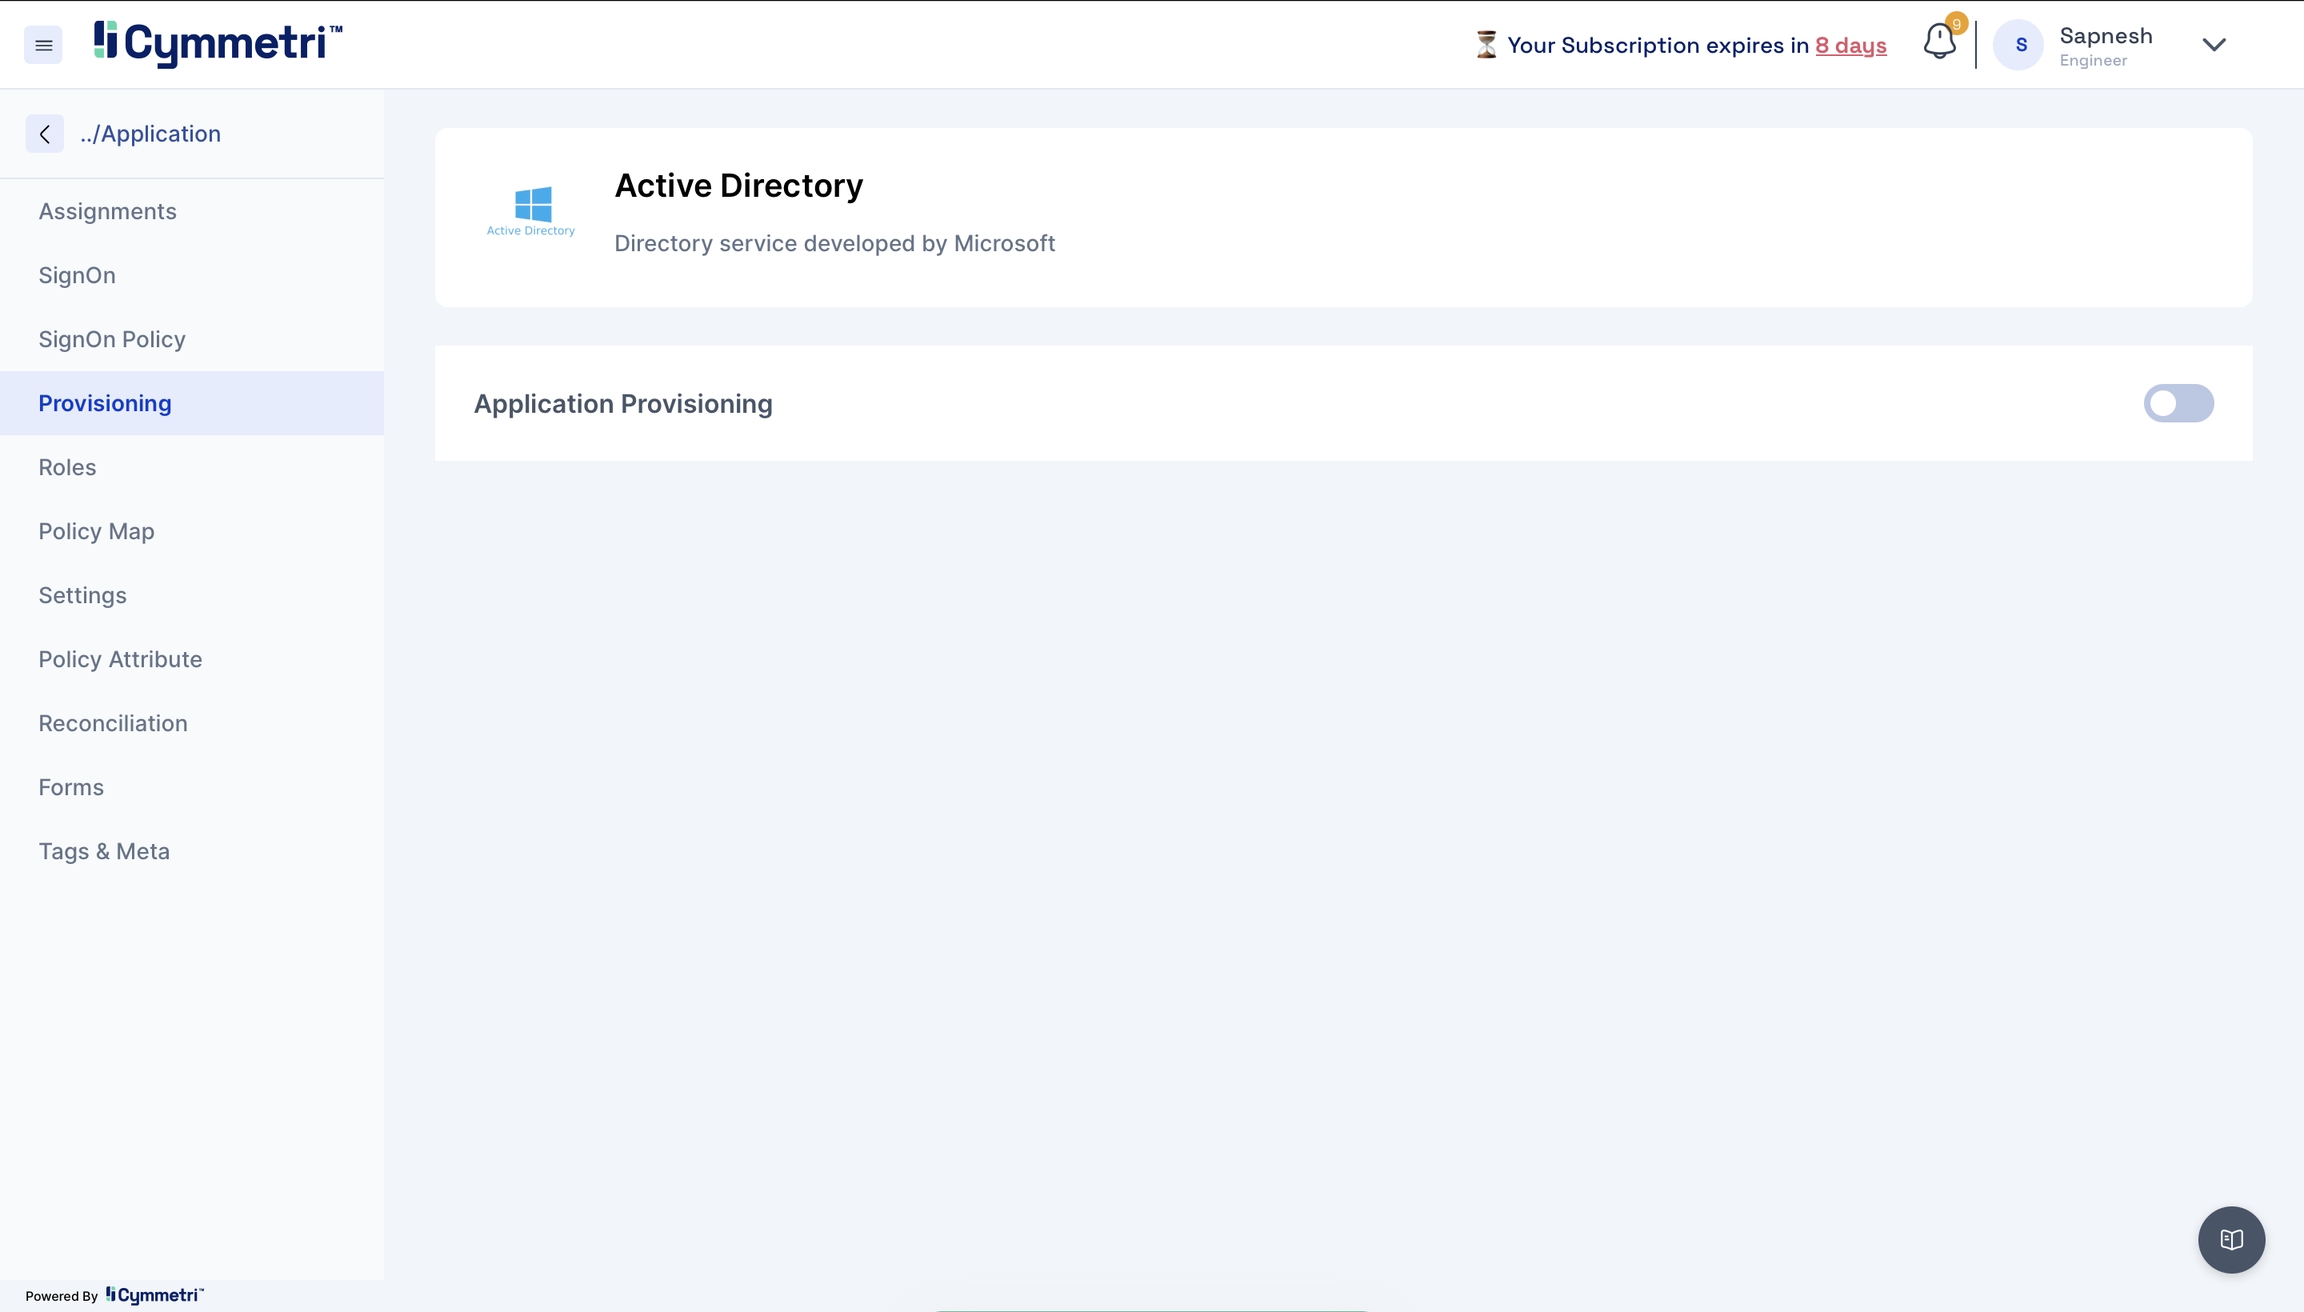
Click Provisioning from the left navigation bar and enable application provisioning by sliding the slider button.
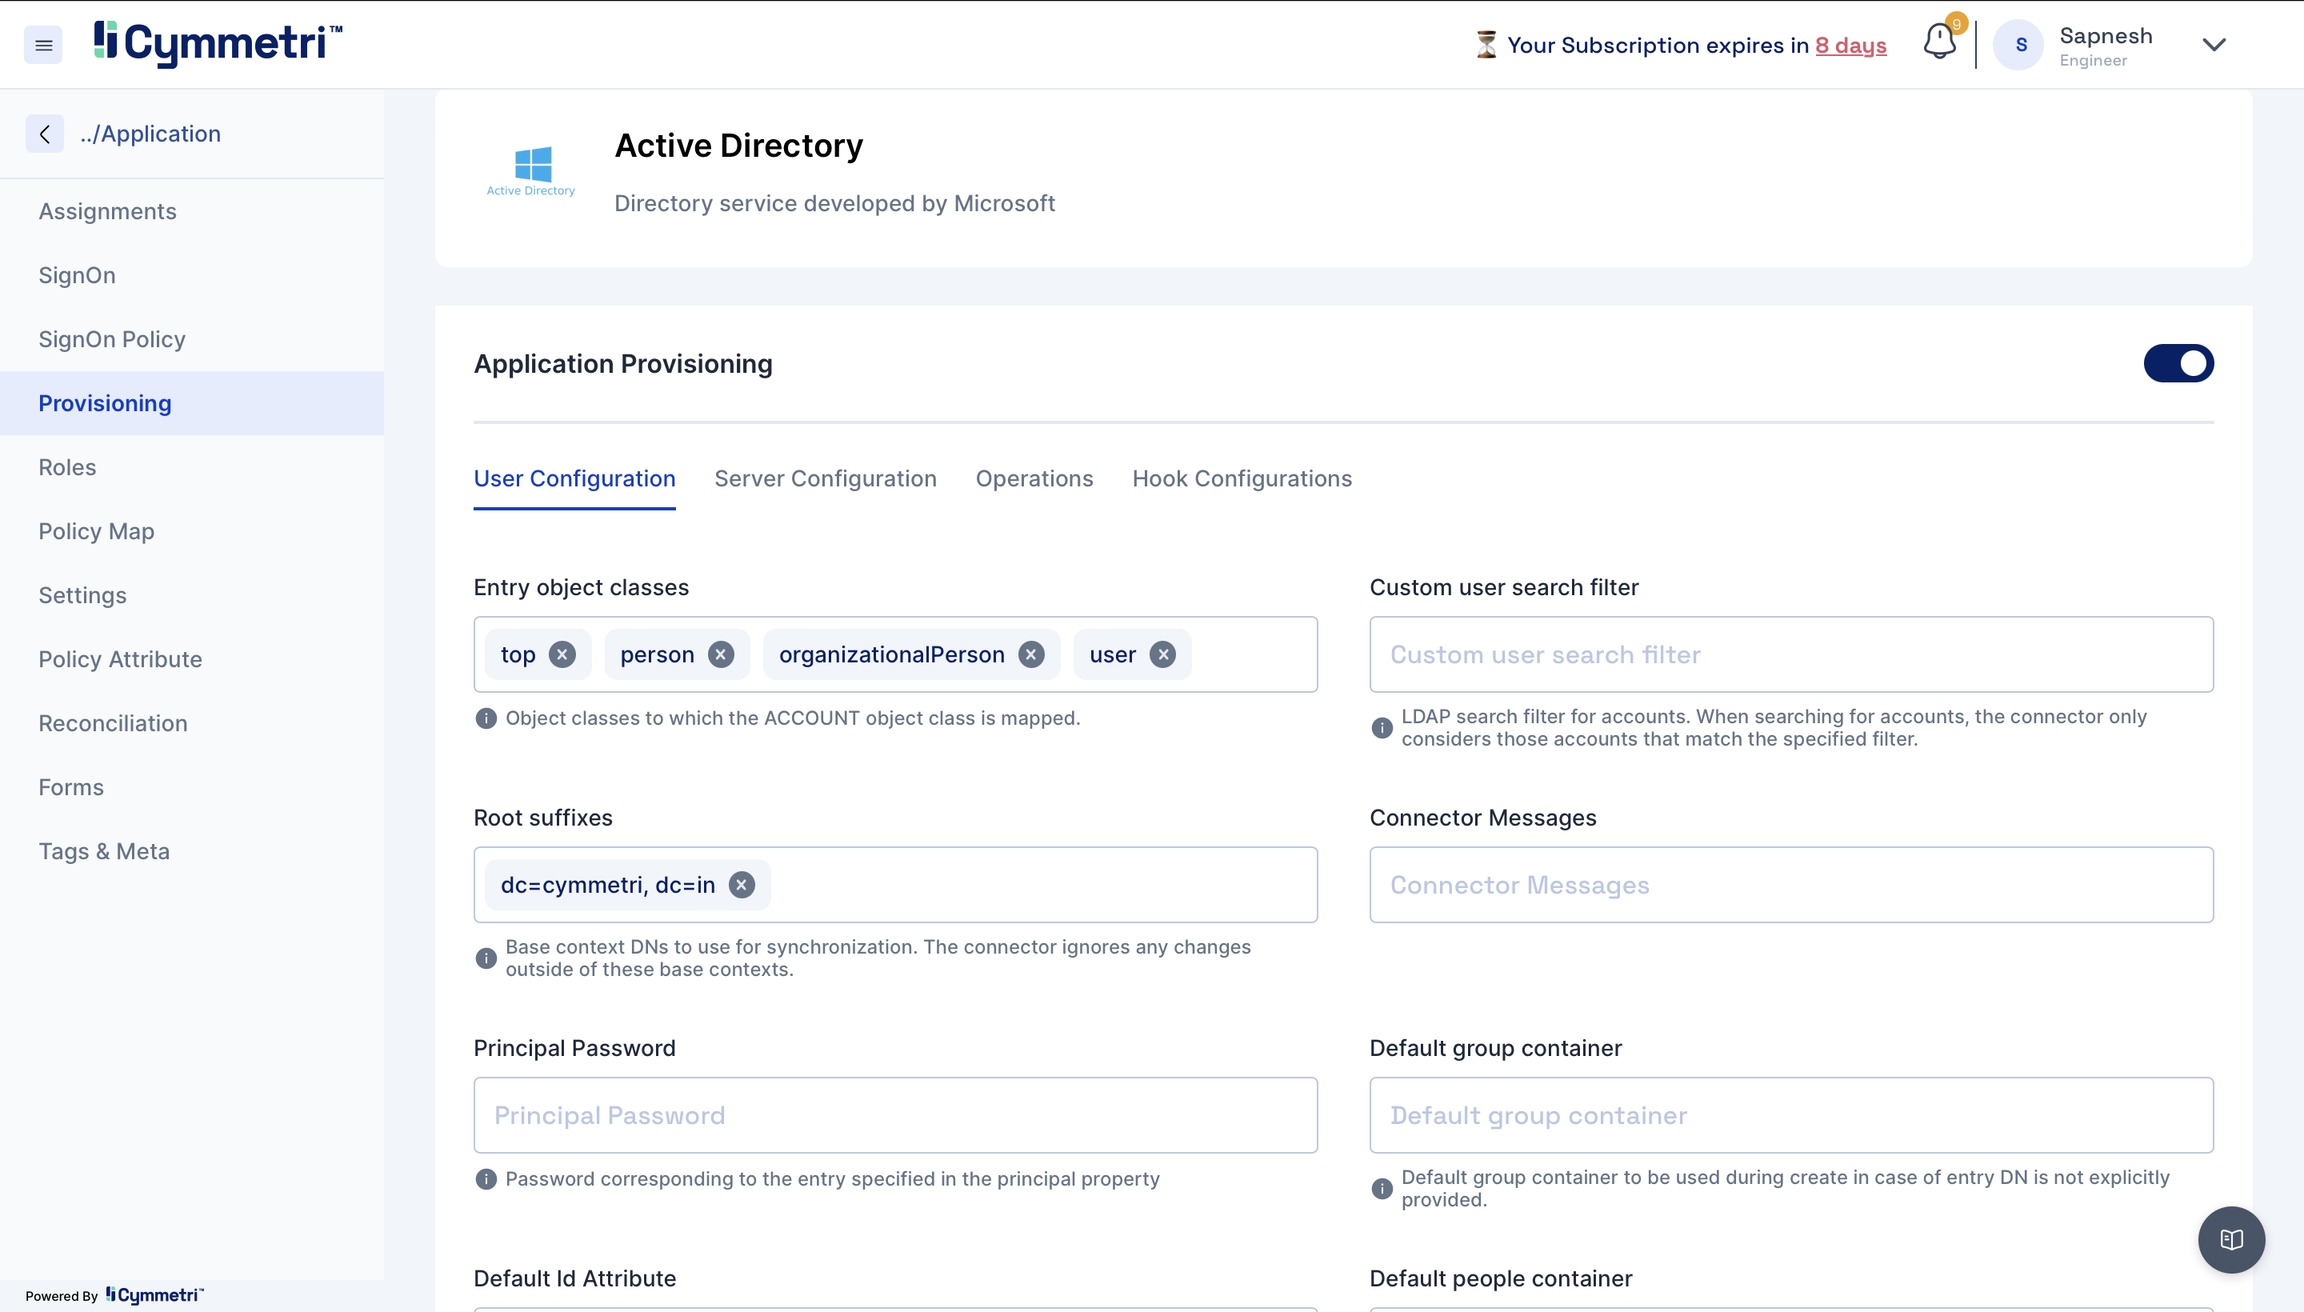
Once you enable the application provisioning, you must take care of two configurations to successfully provision Active Directory data to Cymmetri.
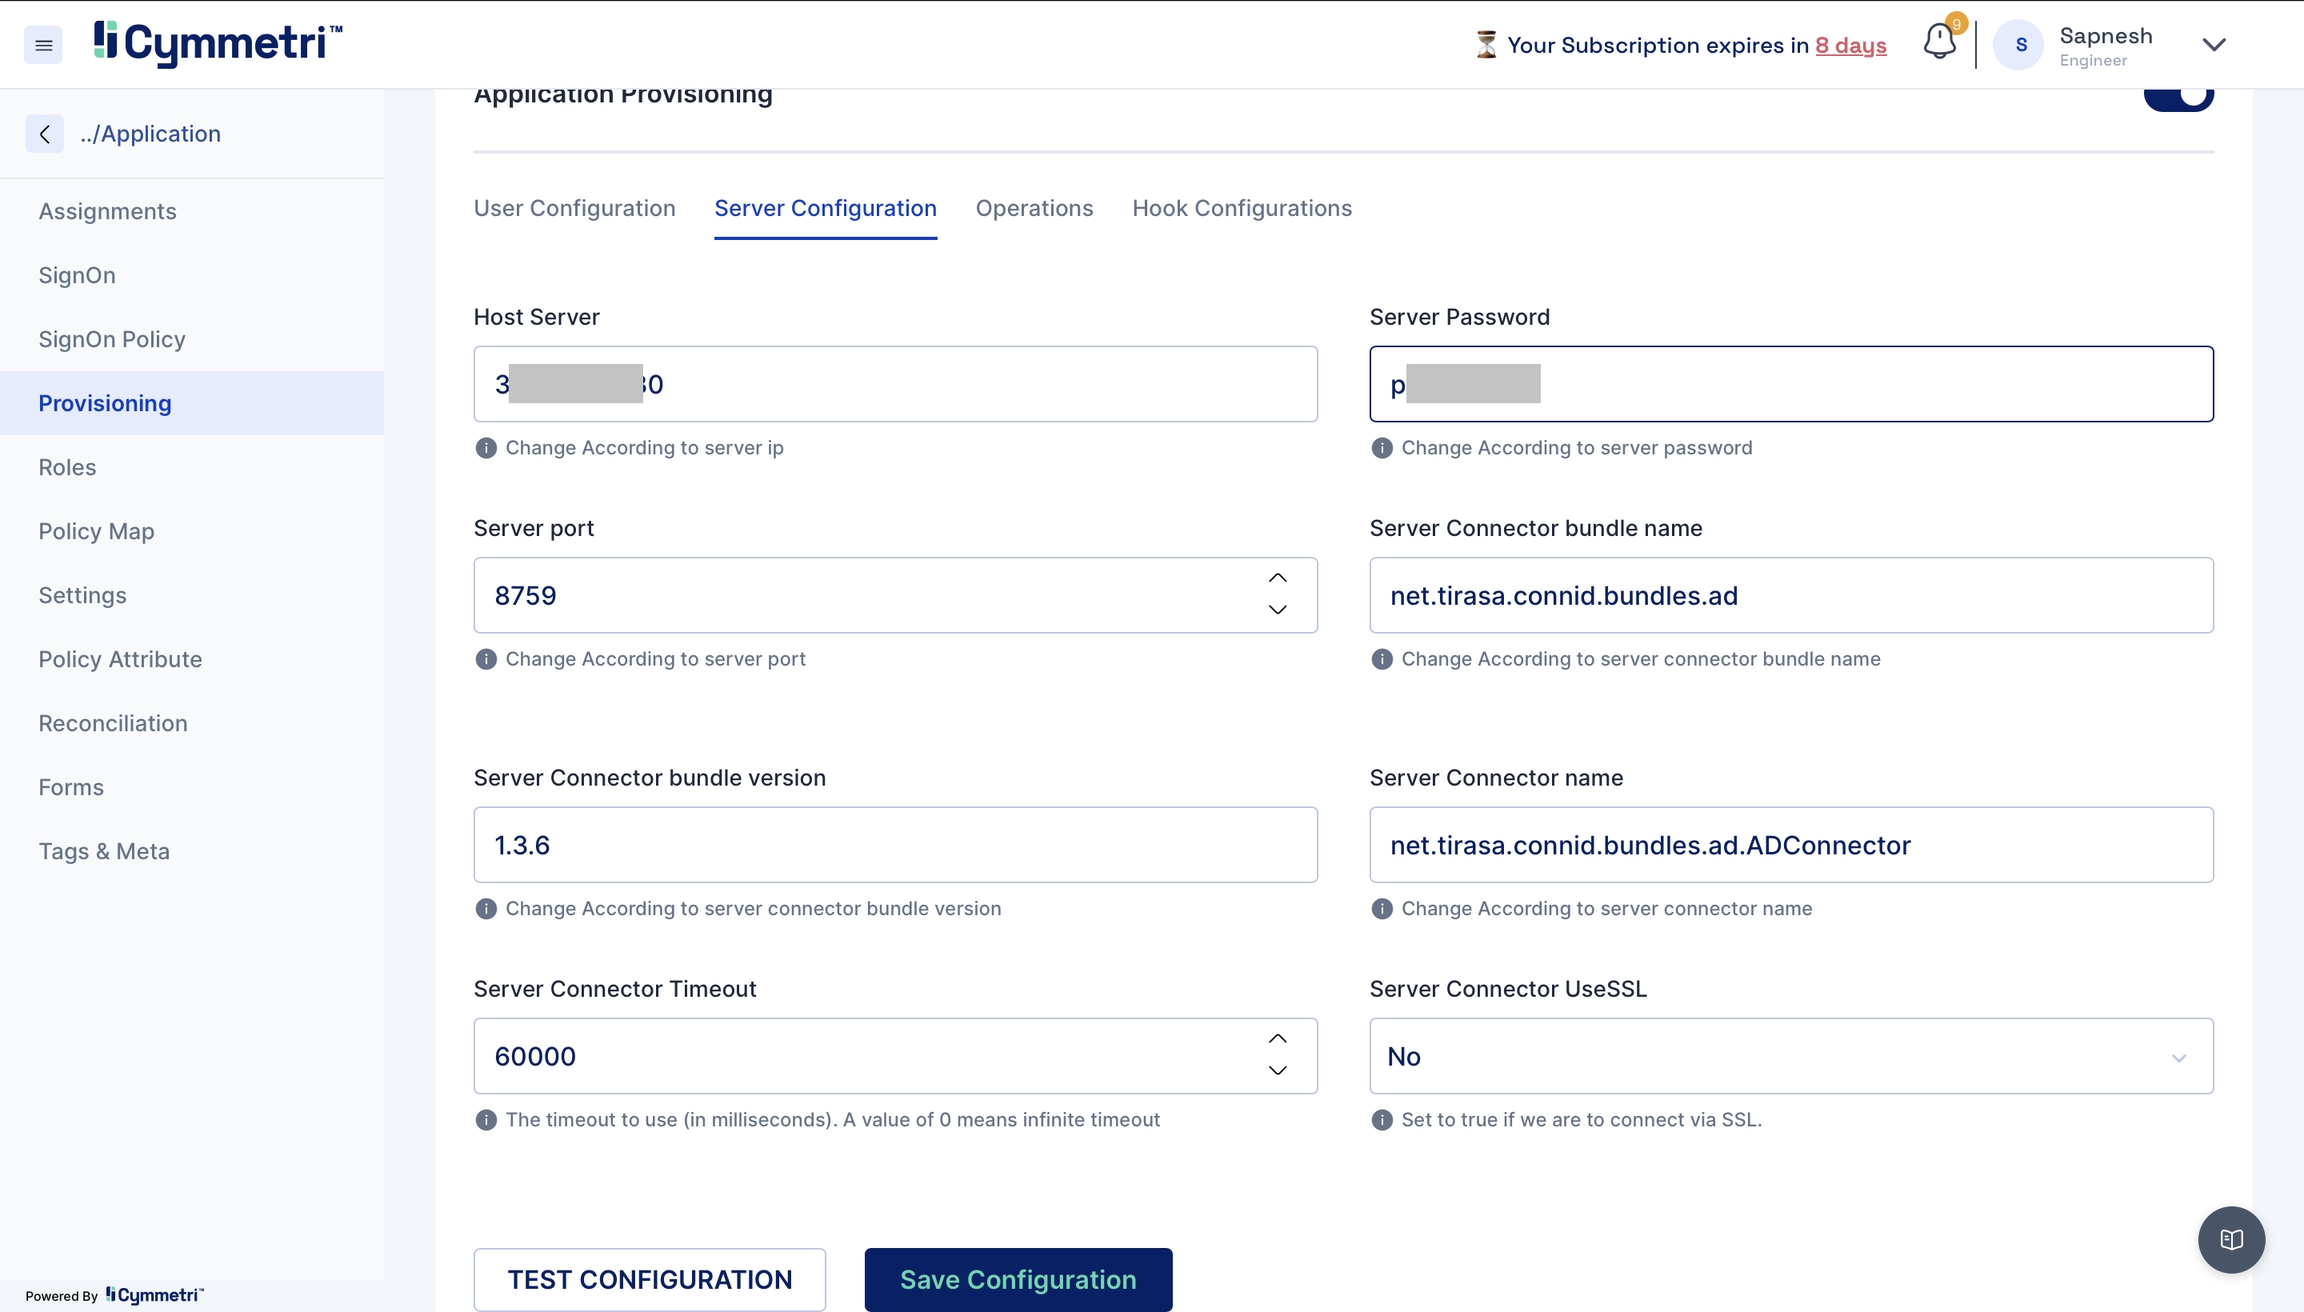
Server Configuration - Consists of configuring the connector server.
Enter the IP address of the host server and its password. The rest of the fields come pre-filled with default values; you can change them according to your use case. Next, click on the save configuration button.
Host server
The IP address of the host server
Server port
Port of the host server
Server Password
Host Server password
Server connector bundle version
Version number of the connector server bundle
Server connector bundle name
Name of the connector server bundle
Server connector name
Given name of the connector server
Server Connector Timeout
Timeout of the connector server in milliseconds
Server Connector UseSSL
Connector server SSL configuration
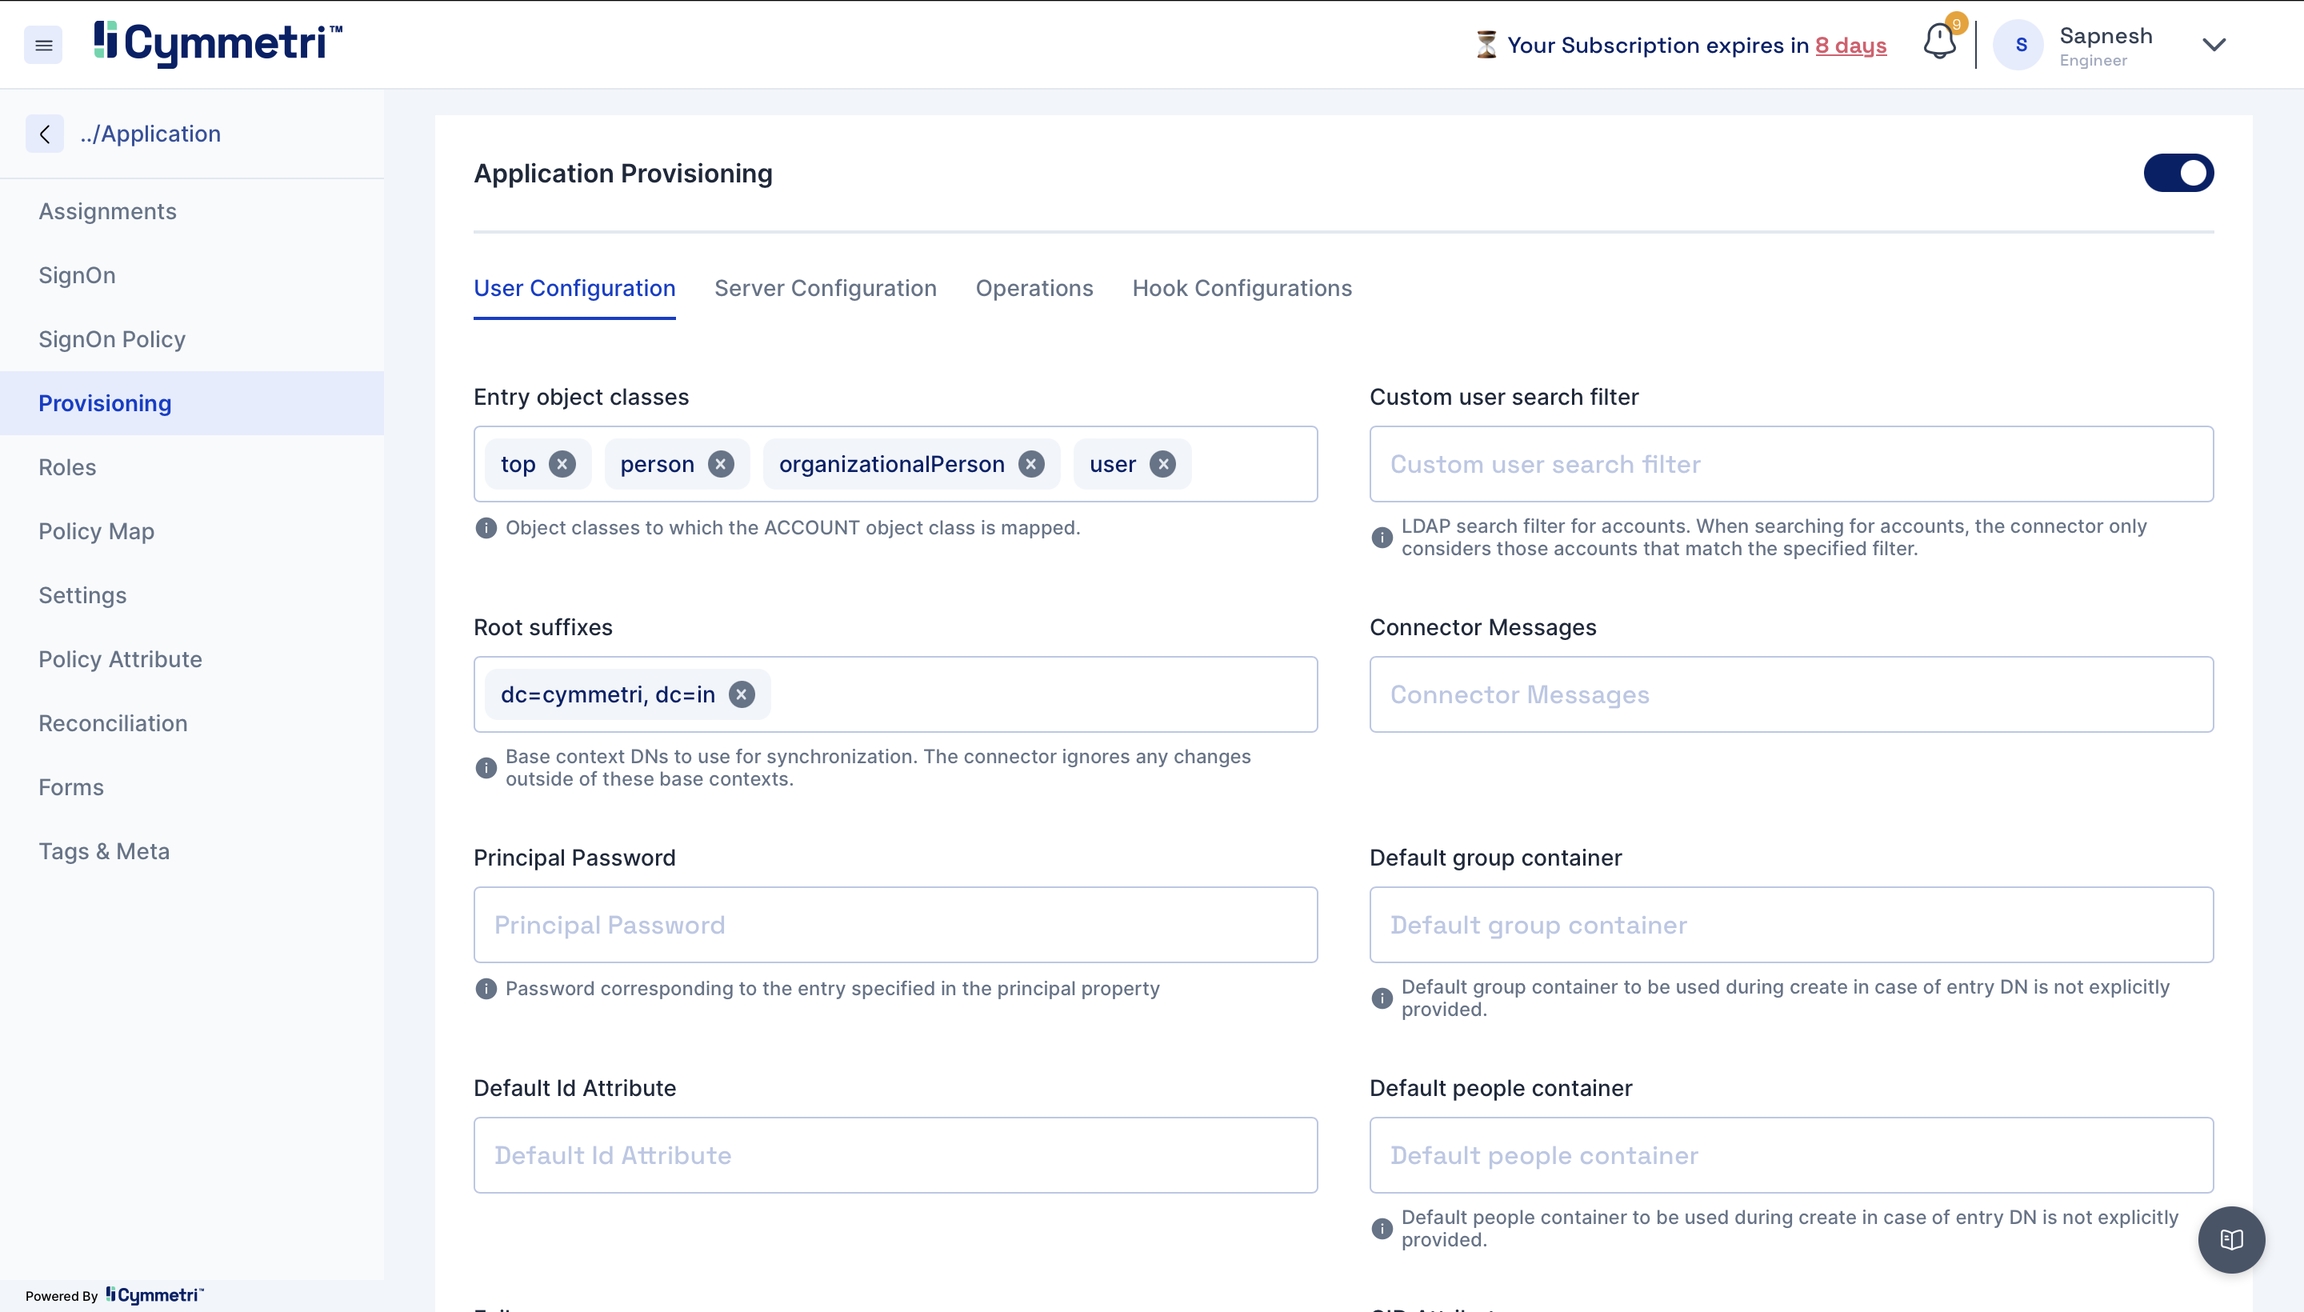
User Configuration - Consists of all user settings like domain name, search filter, etc. We can also configure an OU (Organisational Unit) in this window.
Entry object classes
Object classes to which the Account class is mapped
Root suffixes
Display names used for Active Directory synchronisation to Cymmetri, such as domain controller name
Principal password
Admin password to connect to Active Directory
Default id Attribute
Default attribute Id
Custom user search filter
Search filter used to search accounts
Connector messages
Custom connector messages
Default group container
Default group container can be used during create operation in case of entry DisplayName is not explicitly mentioned
Default people container
Default people container can be used during create operation in case of entry DisplayName is not explicitly mentioned
Group owner reference attribute
Group attribute referencing (by DisplayName) the users members of a group
Custom group search filter
User search filter for groups
Group search scope
Choose object, onlevel or subtree
Server hostname
Active Directory server hostname that would connect to Cymmetri
Conservative membership policy
Conservative management of assigned groups. The groups already assigned to an user on Active Directory will not be removed.
Memberships
Groups to identify users to synchronize. The connector ignores any changes about users not member of indicated groups.
Verify memberships in OR
Indicate if specified memberships must be verified using 'OR' logical operator.
Object classes to synchronise
User object classes to synchronise. The connector ignores any changes if it cannot find modified entry object classes in this property.
Page size
Get users from Active Directory with the provided size
Pageable result
Get users from Active Directory with the provided size pageable result
Server port
Port of the Active Directory connector server
Principal
Admin username of the Active Directory
Permit password update only
Permit password update only.
Create/delete operation will be denied, while other attributes update requests will be ignored.
Retrieve deleted groups
Indicate if deleted groups must be synchronized also.
Retrieve deleted users
Indicate if deleted users must be synchronised also.
SSL
True if the SSL certificate is configured
Trust all certs
Indicative if all server certificates can be trusted
UID attribute
Unique Identifier Attribute
Base context for user entry searches
Display the Name of OU (Organization Unit), Root domain or Root controller required for user entry search
User search scope
The scope could be a subtree or object for user search
Note - You would need to change the below fields as per your organisation:
Root suffix - Add your domain name here.
Principal Password - Add your server password here.
Server Hostname - Add your server name here.
Principal - Add your admin Display Name of the Active Directory.
The base context for user search - You can add your Organisation Unit here.
The base context for group search - Add the base context to enable group search
Server port - Ensure that it is set to 636 for push
Page size- Define pageable result count for users
SSL - True is SSL is configured
Trust all certs - True.
Disable User OU Movement - Provide the path for disabling OU movement here.
Click on the save configuration button. Next, click on test configuration to see a successful toast message if your configuration is successful.
While configuring, you might encounter errors like:
Authentication exception - Failure due to incorrect username and password.
Solution - Keep all your necessary credentials handy and enter the details carefully
Socket timeout - Connection refusal by the target system
Solution - Please ensure your network connections are accurate to avoid socket timeout errors.
SSL issue - SSL issue occurs mainly if certificates are not configured correctly.
Solution - Follow the steps mentioned in Step 1 rigorously to import the Active Directory certificate to avoid SSL-related errors.
The last step of onboarding users is to add the users from Active Directory to Cymmetri by Reconciliation.
Pull users from your Active Directory to Cymmetri.
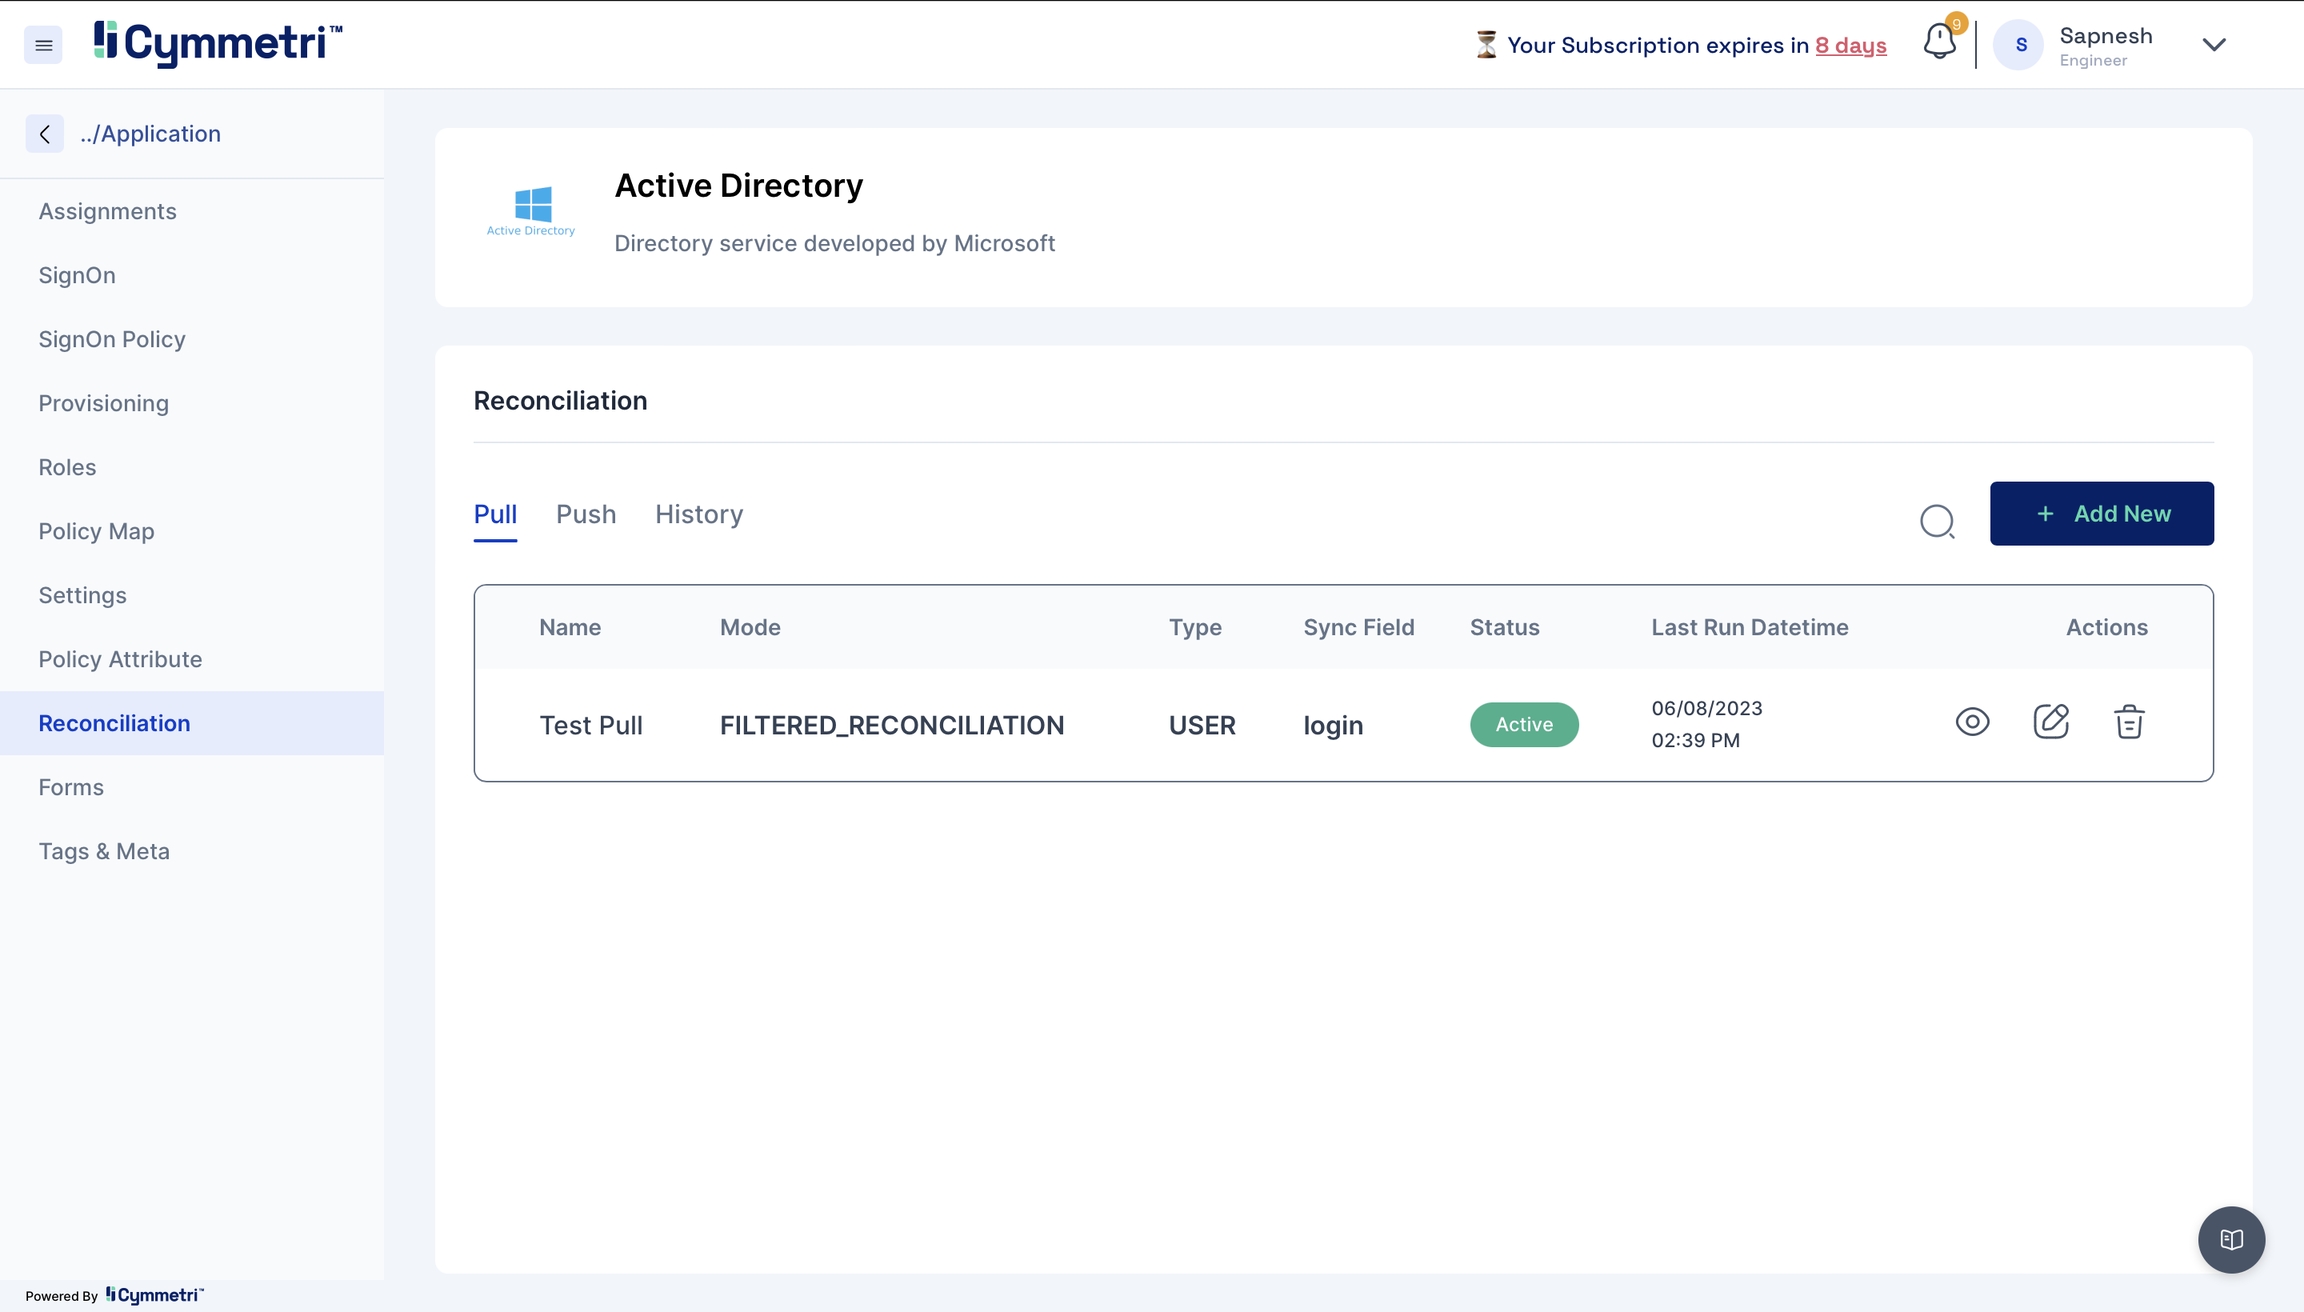
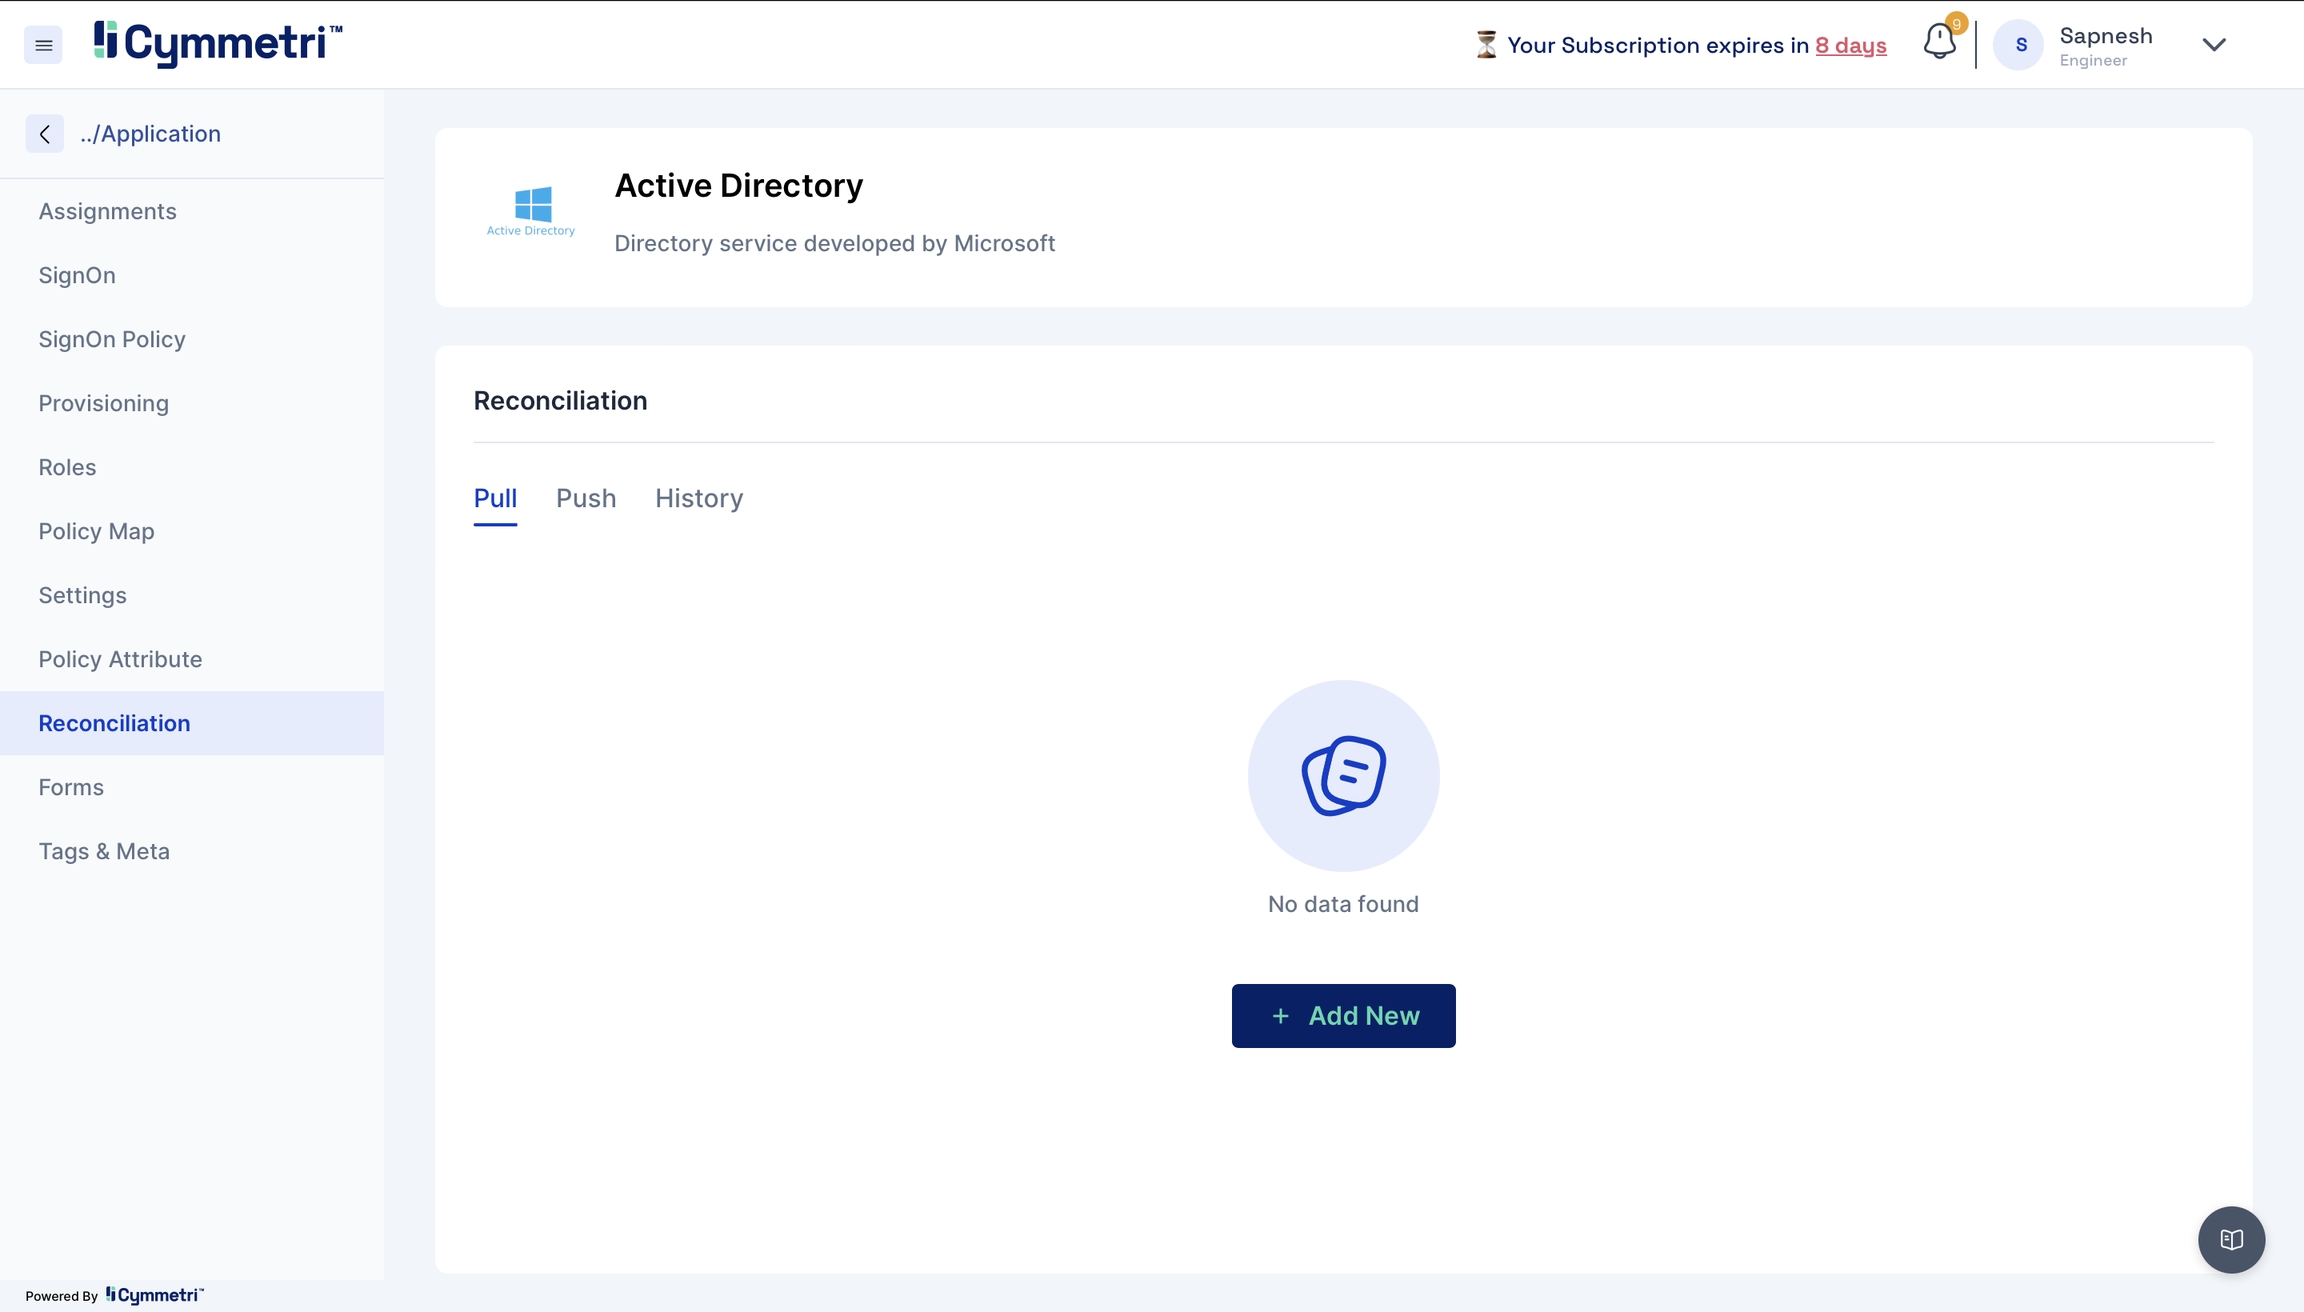
Click the 'Reconciliation' tab on the left navigation bar on the same page.
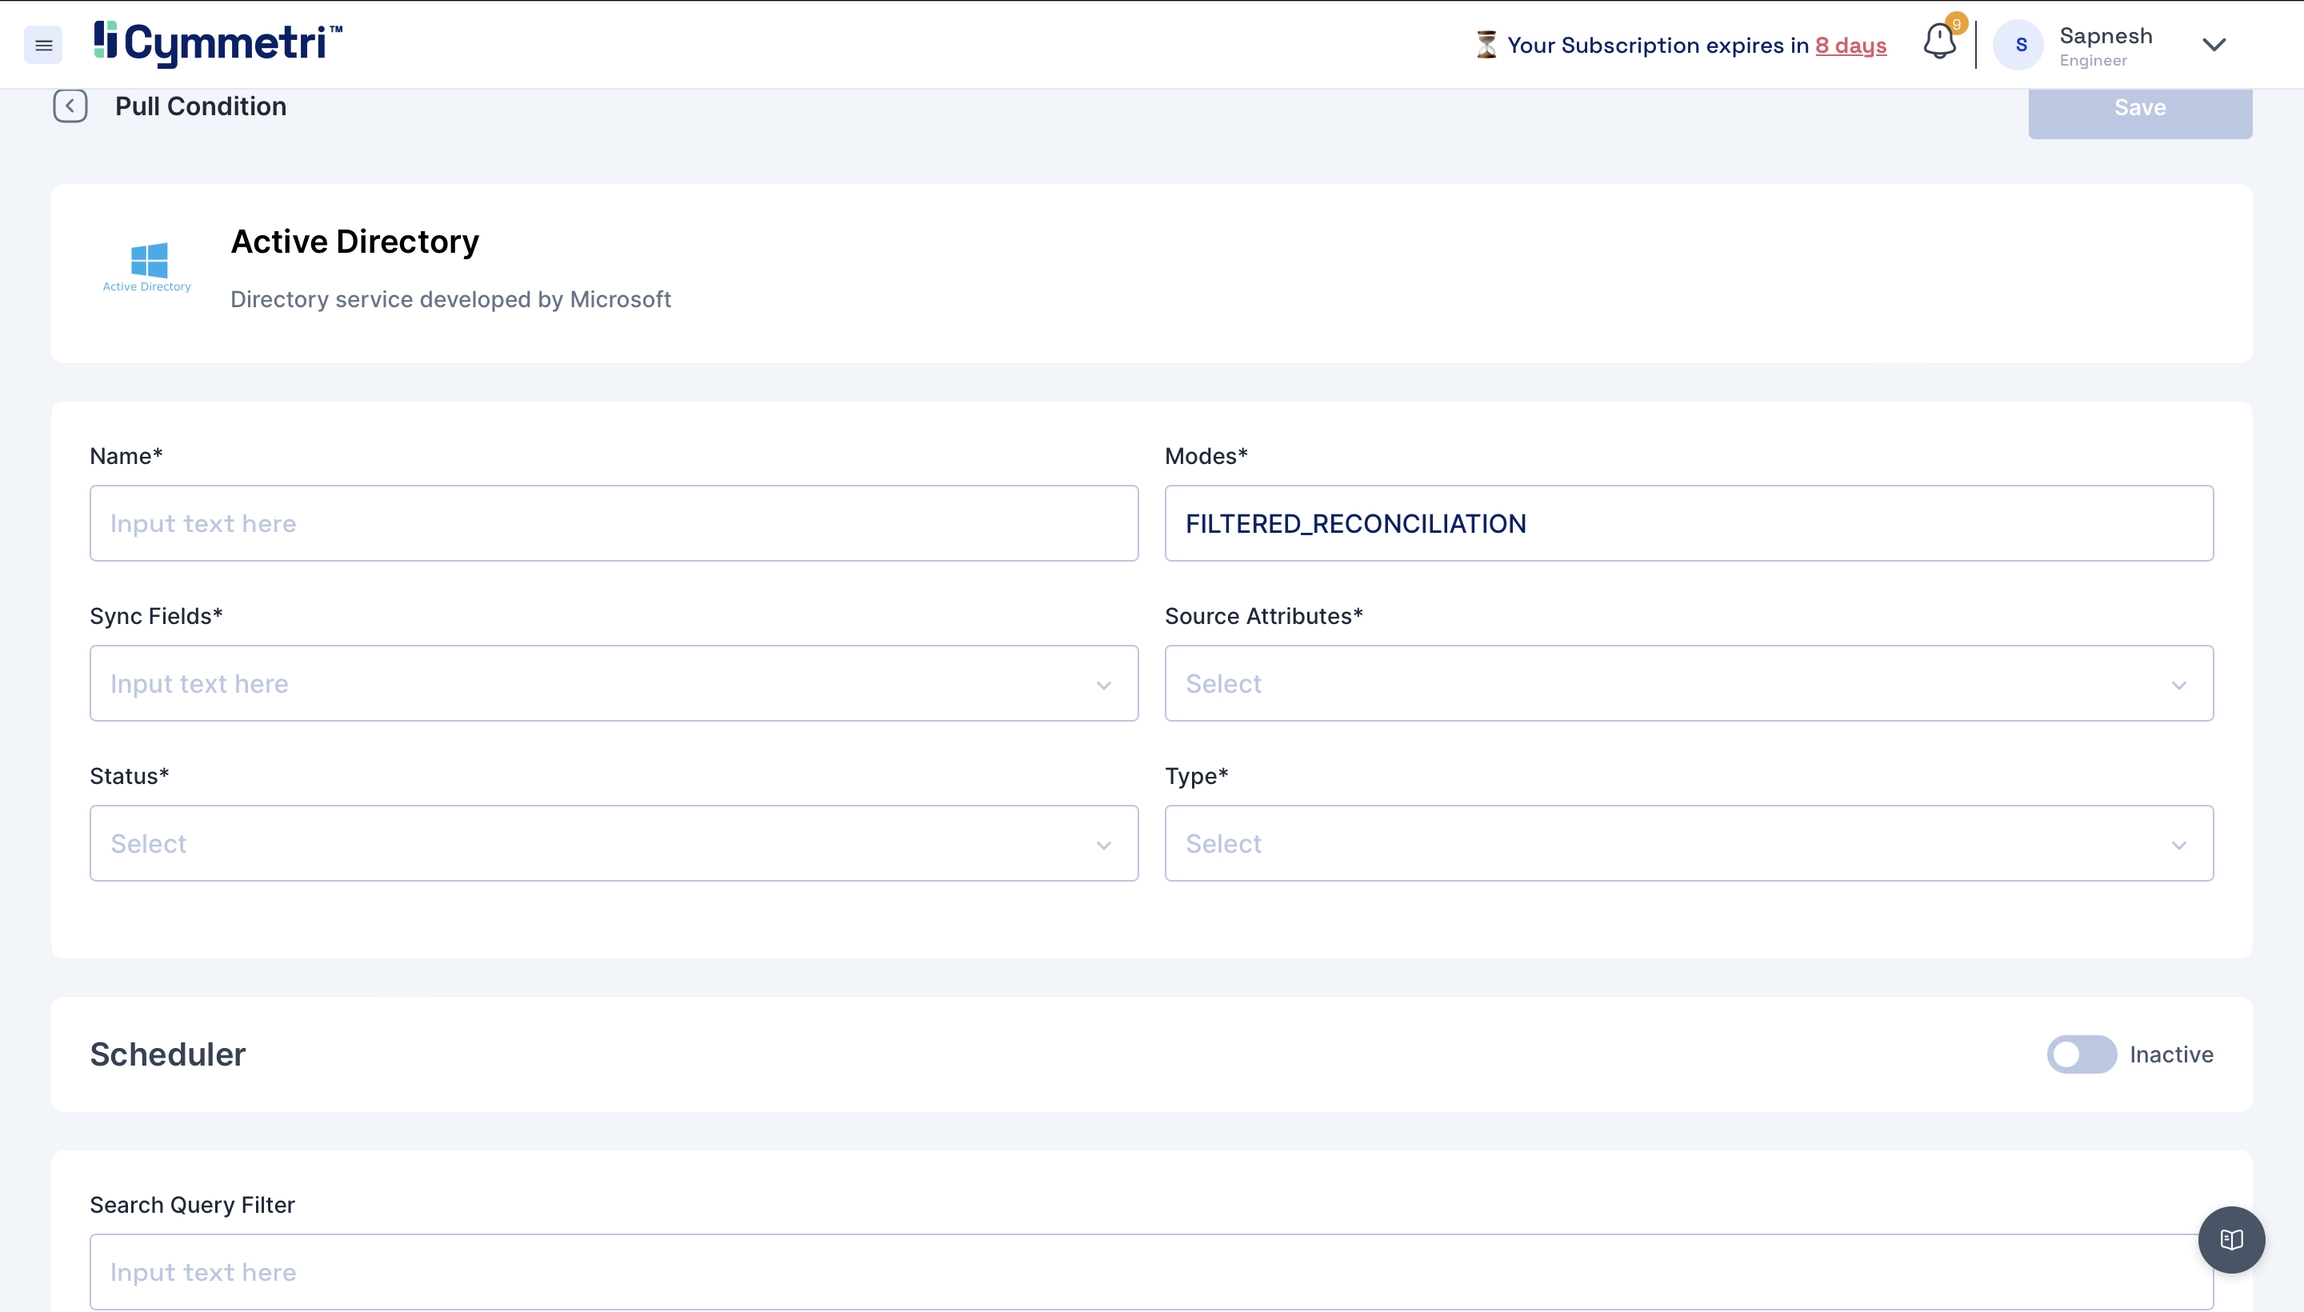
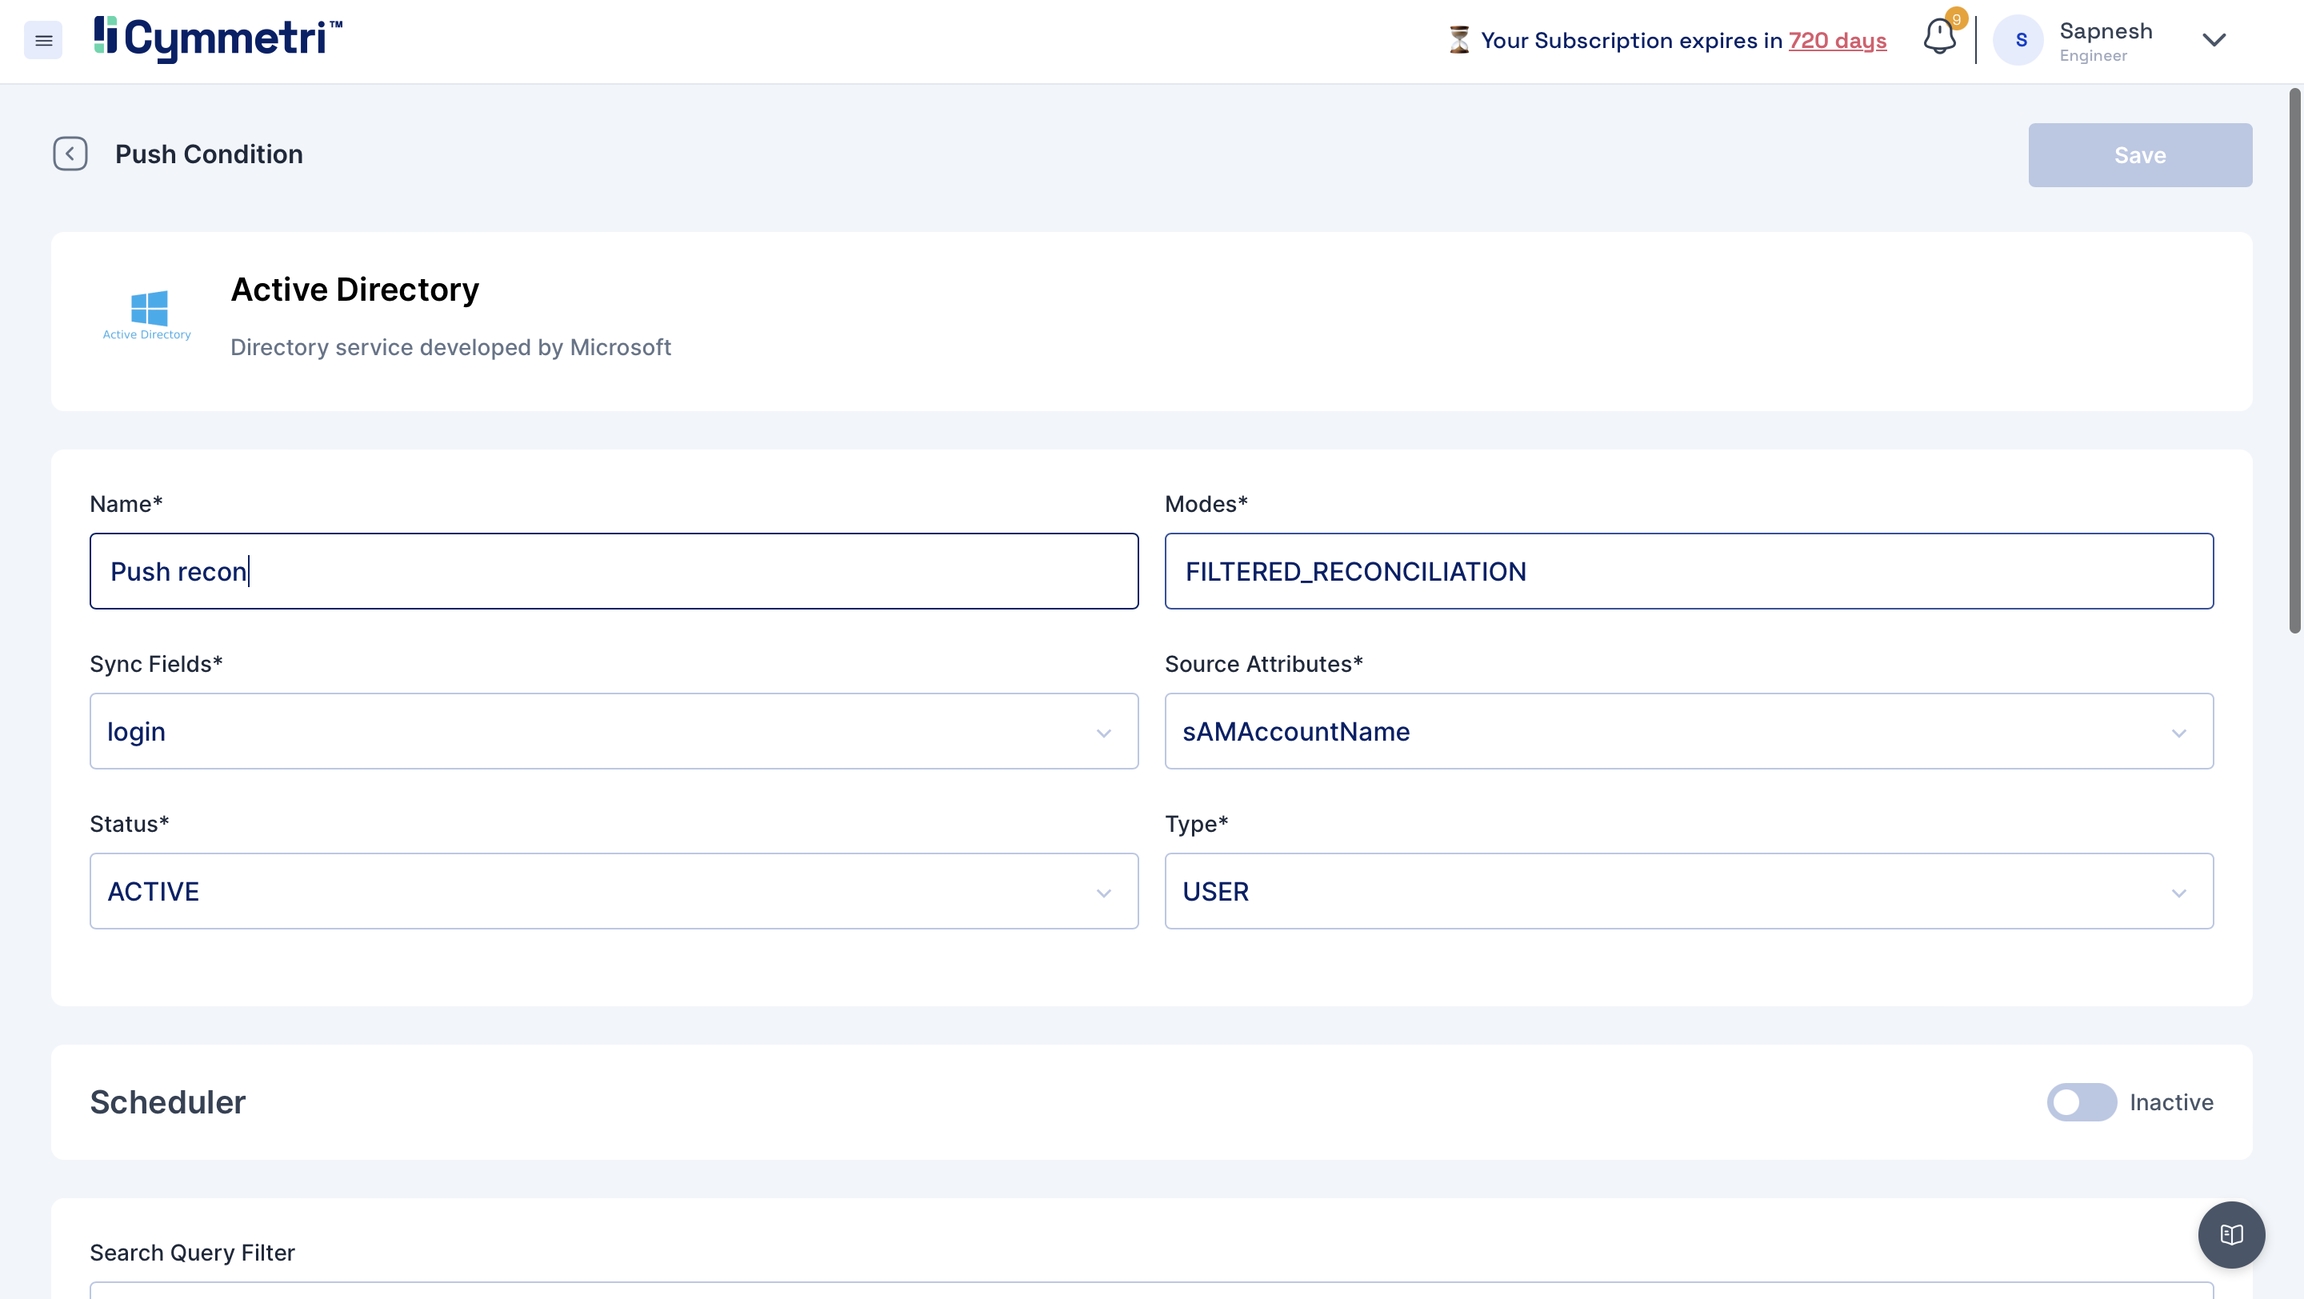
Next, click the 'Add New' button under the pull tab.
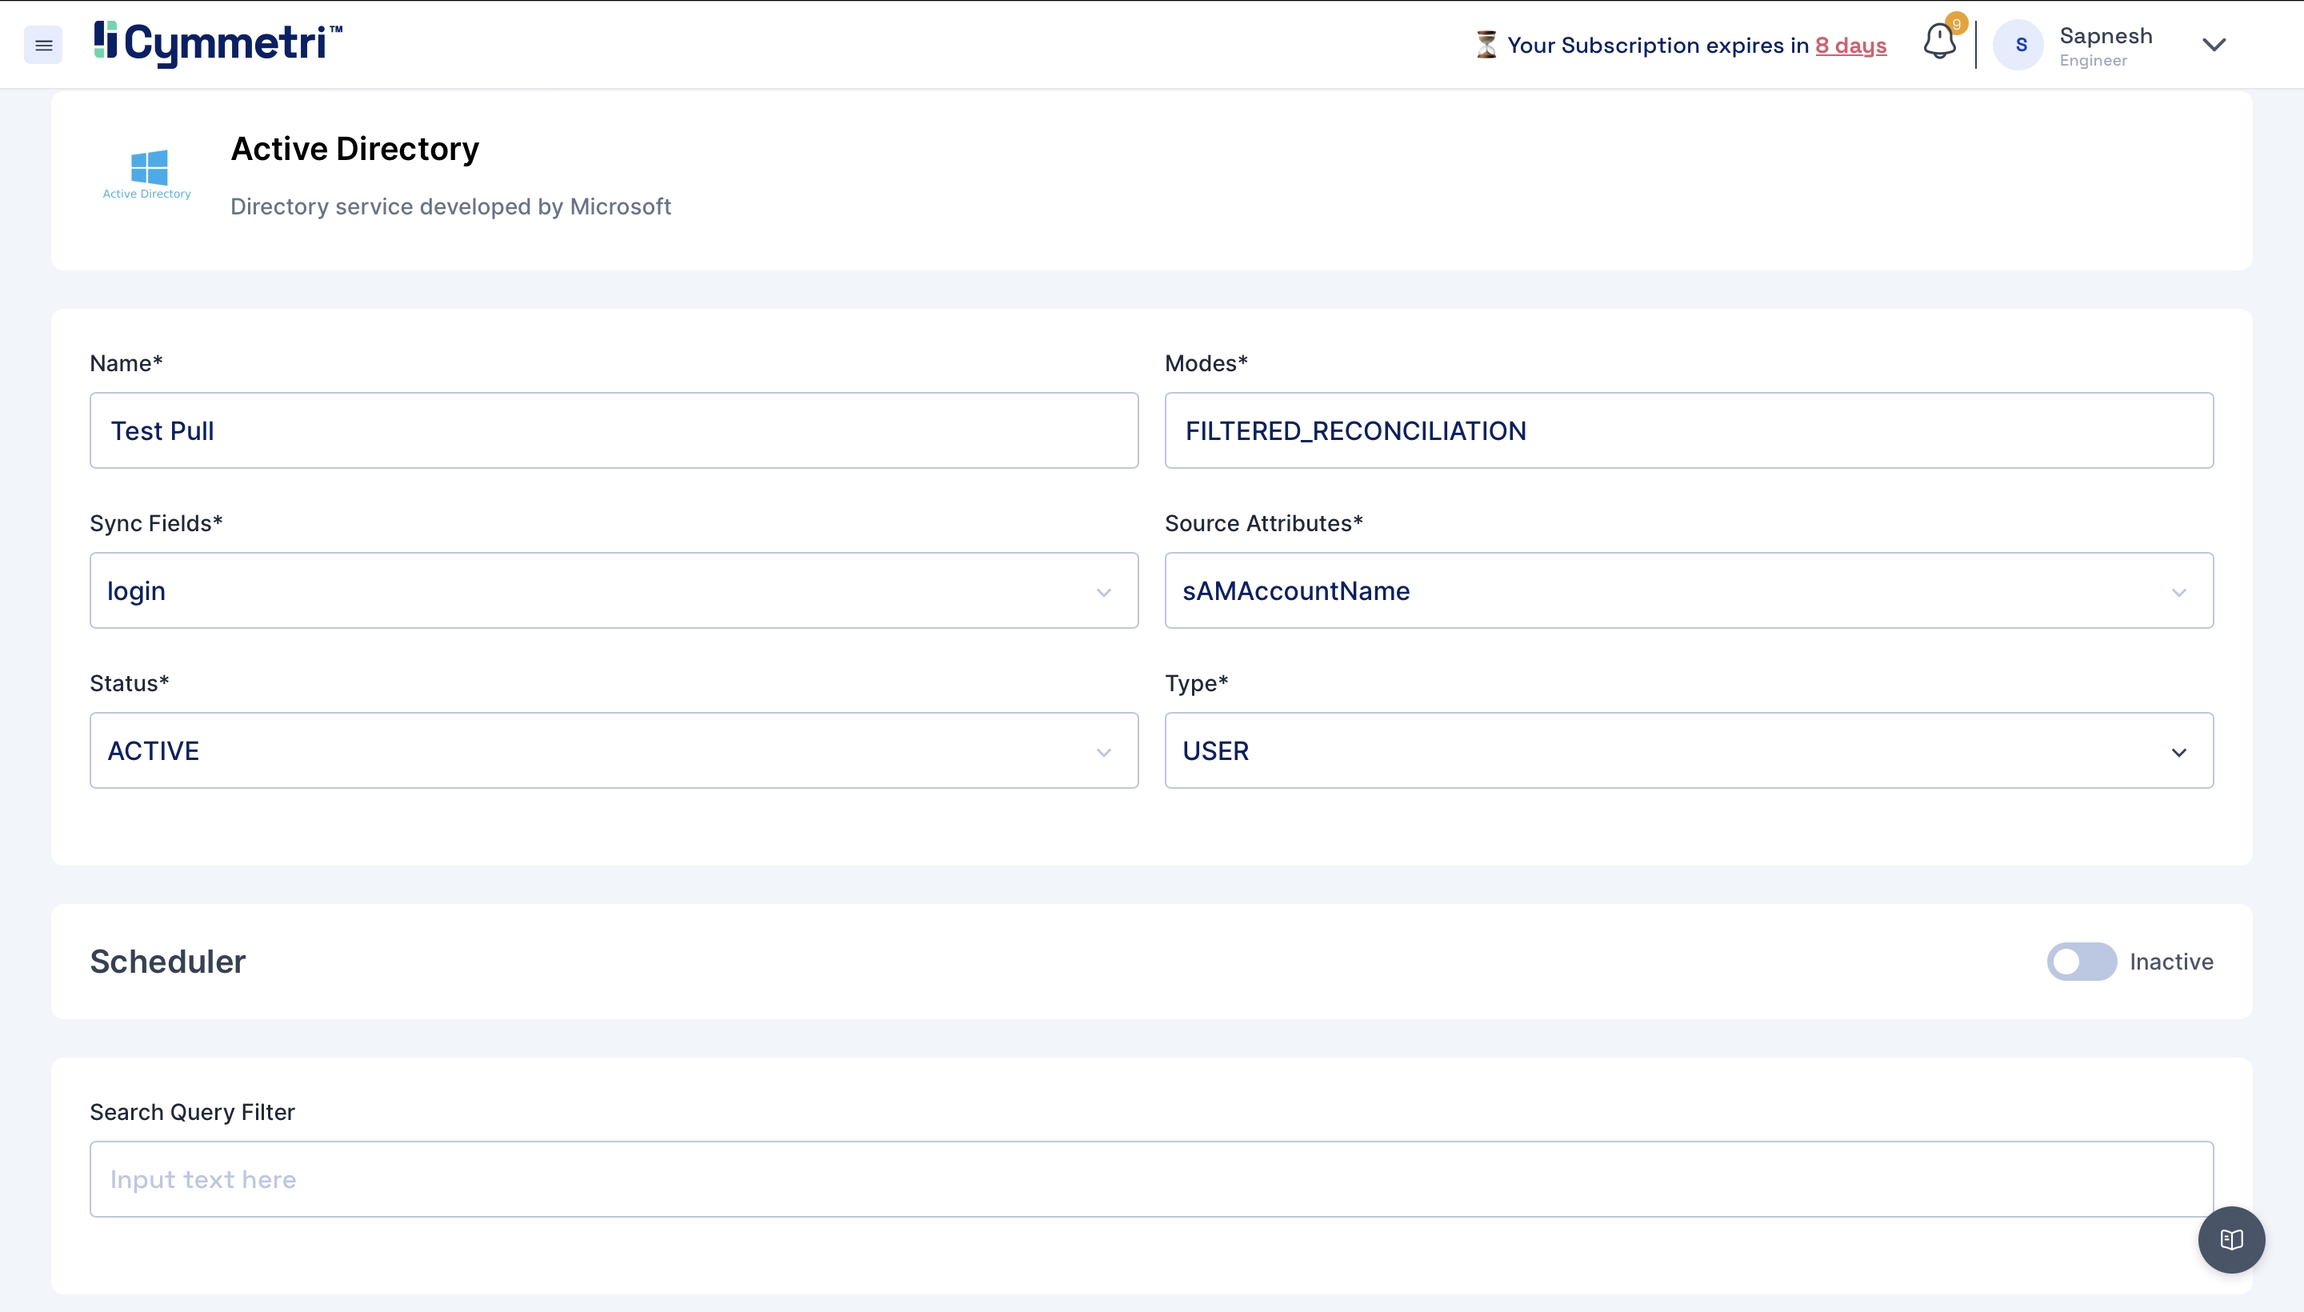
Add the field name details, and give a name to the pull reconciliation.
The modes field is prefilled with 'FILTERED_RECONCILIATION'; keep it as it is. It specifies the mode of Reconciliation.
The Sync fields are a drop-down menu with Cymmetri attributes that need to be mapped with the Source attributes, that is, your Active Directory attributes. Choose the correct mappings for these fields.
Keep the Status as Active.
Types are prefilled with the User. Keep it as it is.
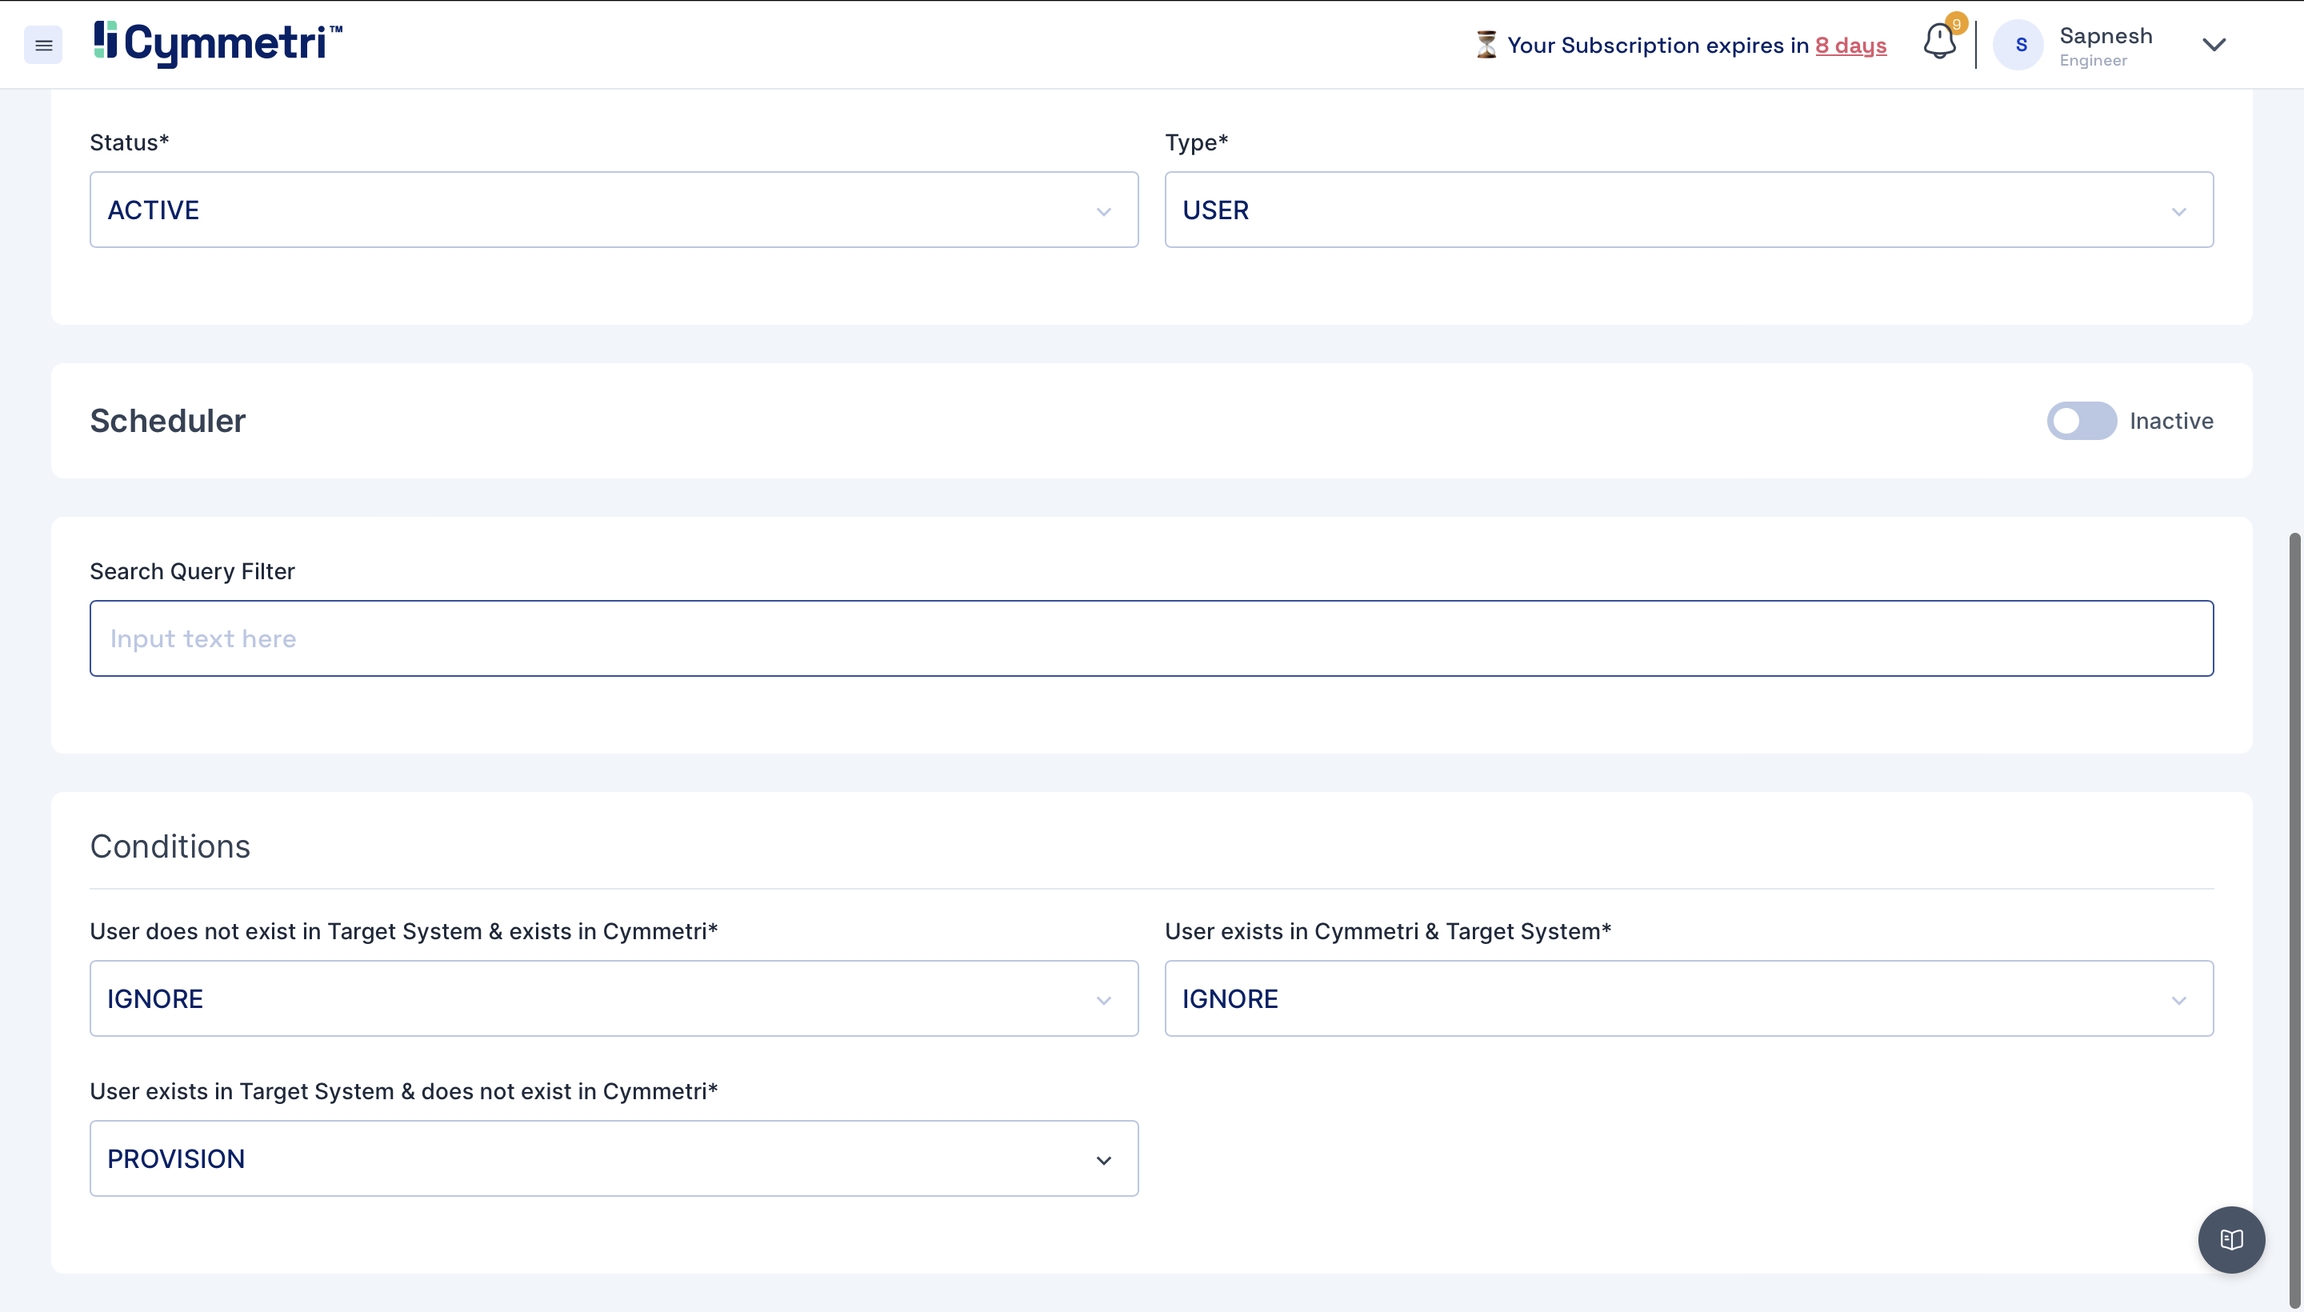
You can define the conditions for the Pull Reconciliation. It specifies the different scenarios of the Reconciliation. All the tabs have the same options in the dropdown: IGNORE, UPDATE, DEPROVISION, PROVISION, UNLINK, LINK, ASSIGN, UNASSIGN.
IGNORE
You can skip the process by choosing this option.
UPDATE
It can be used when you want to modify or reflect new changes.
PROVISION
You can use this option to onboard the users.
DEPROVISION
You can use this option to remove the users.
LINK
You can use this option to link the users to Cymmetri
UNLINK
You can use this option to unlink the users to Cymmetri
ASSIGN
You can use this option to assign the users to Cymmetri
UNASSIGN
You can use this option to unassign the users to Cymmetri
Here is an example scenario:
UPDATE
IGNORE
PROVISION
Update user details in the target system, ignore if a user is present in both systems and provision users that do not exist in the target system.
The options to choose in a Reconciliation operation depend on your use case and change accordingly.
In this case, we have chosen to IGNORE the users that do not exist in your Active Directory but exist in Cymmetri. Also, IGNORE users who are present in both the systems. PROVISION the users that exist in your Active Directory but do not exist in Cymmetri.
Hit the save button on the top left and click the 'Run now' button. The status of the recon changes to active.
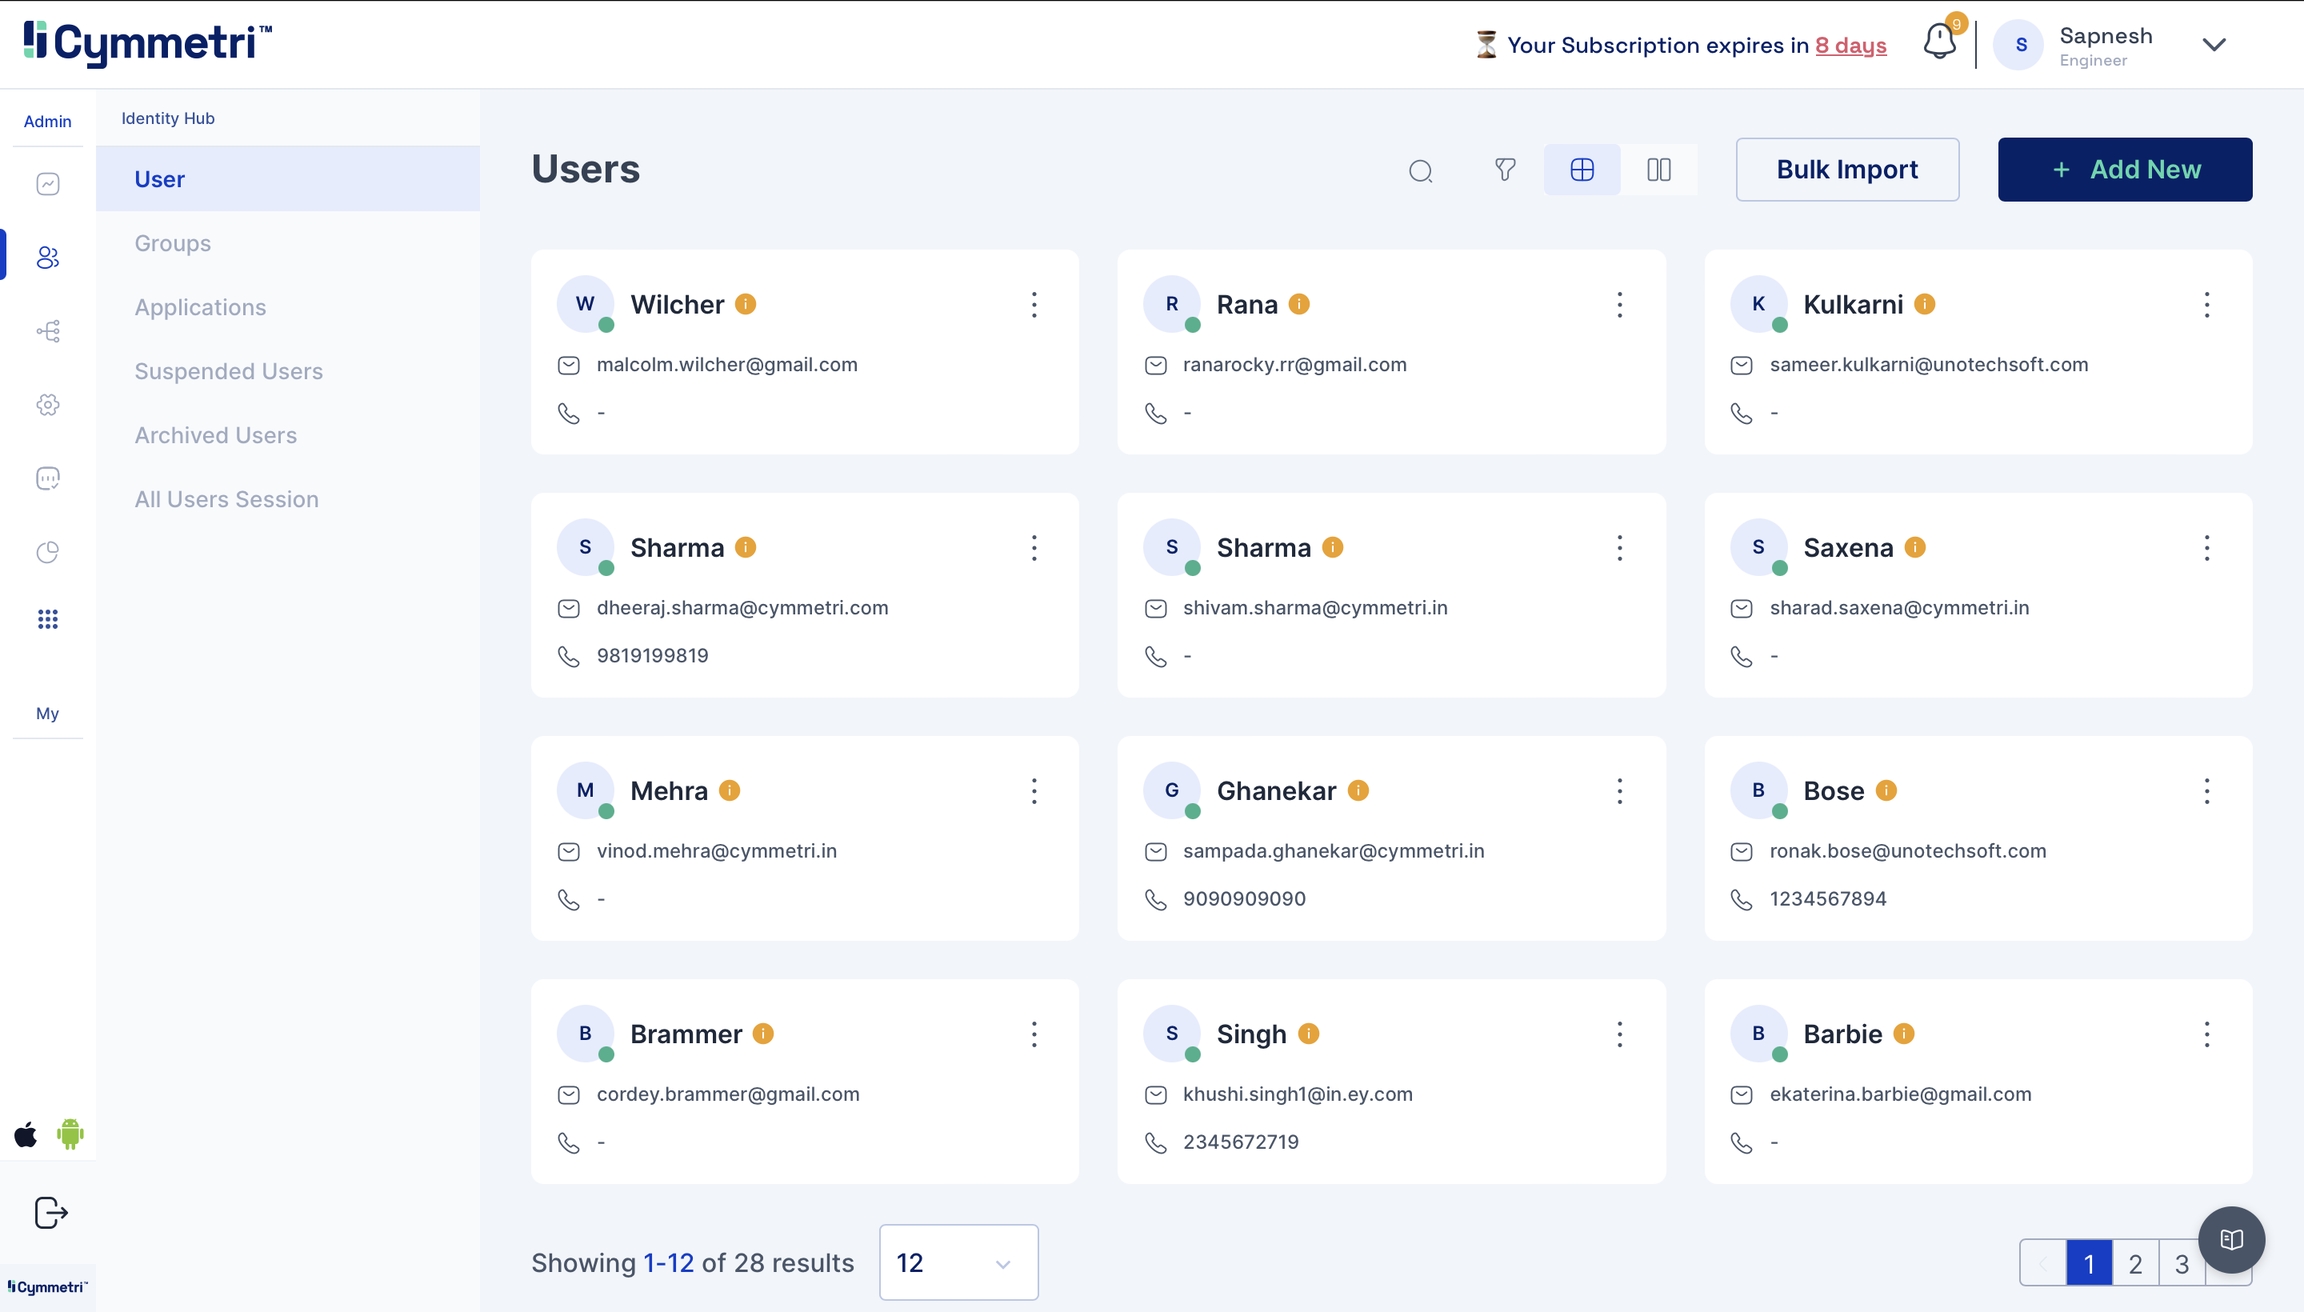
You can head to the users tab and check if users are synced. If the reconciliation is successful, the users start appearing in this tab.
Sync your user data to Active Directory.
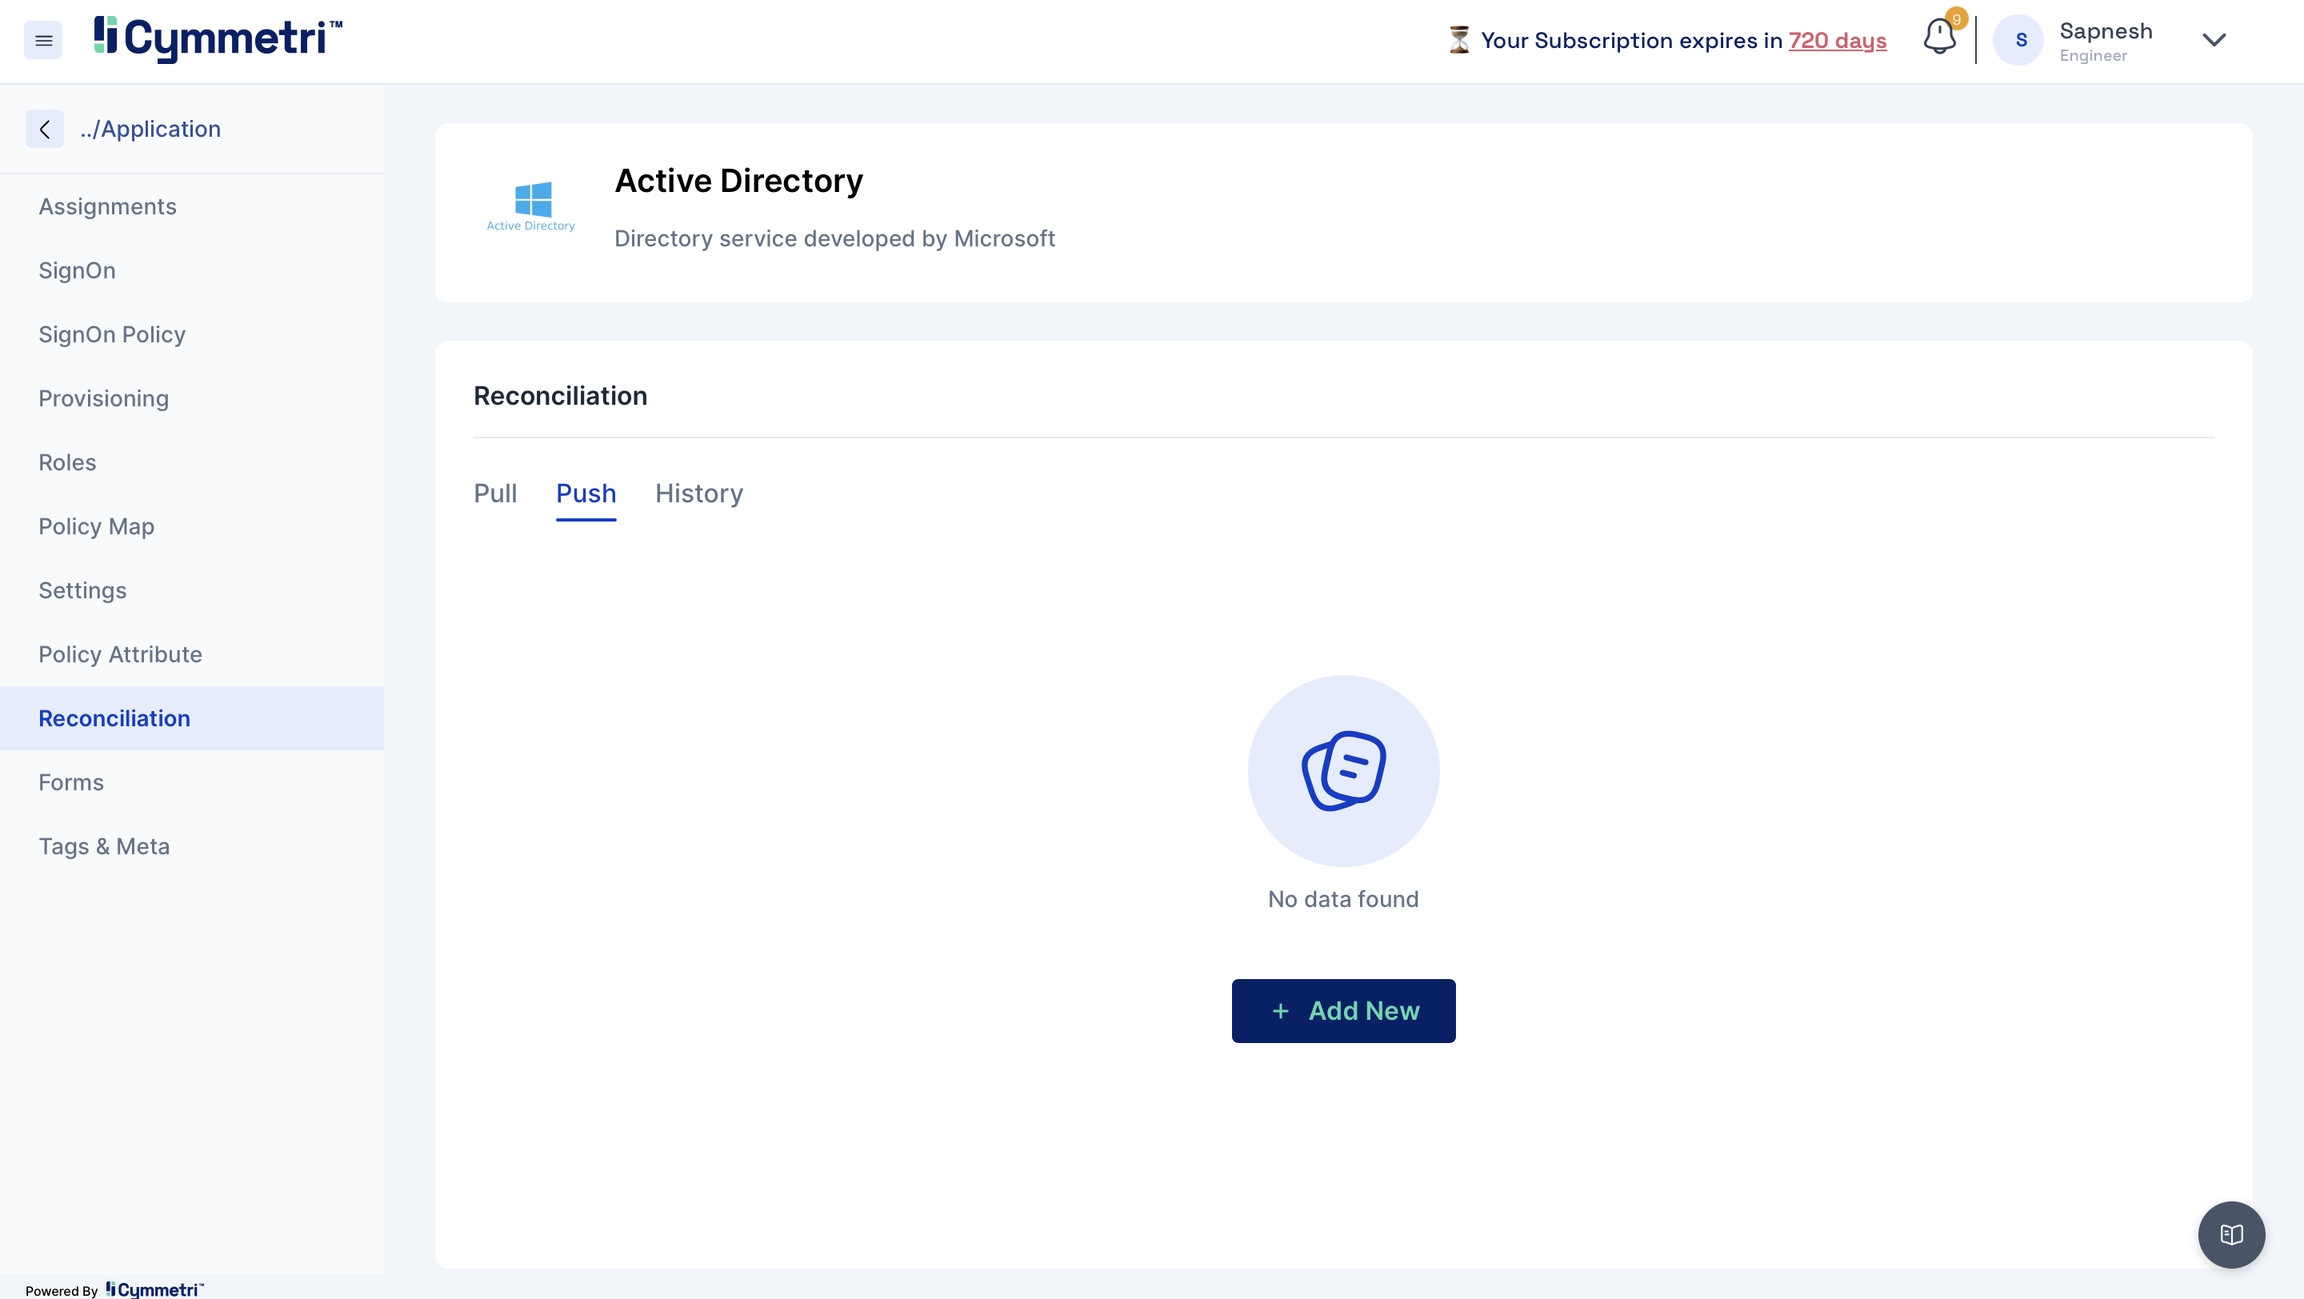
Navigate to the push tab and click on 'Add New'.
Repeat Steps 2 and 3 from Pull Reconciliation.
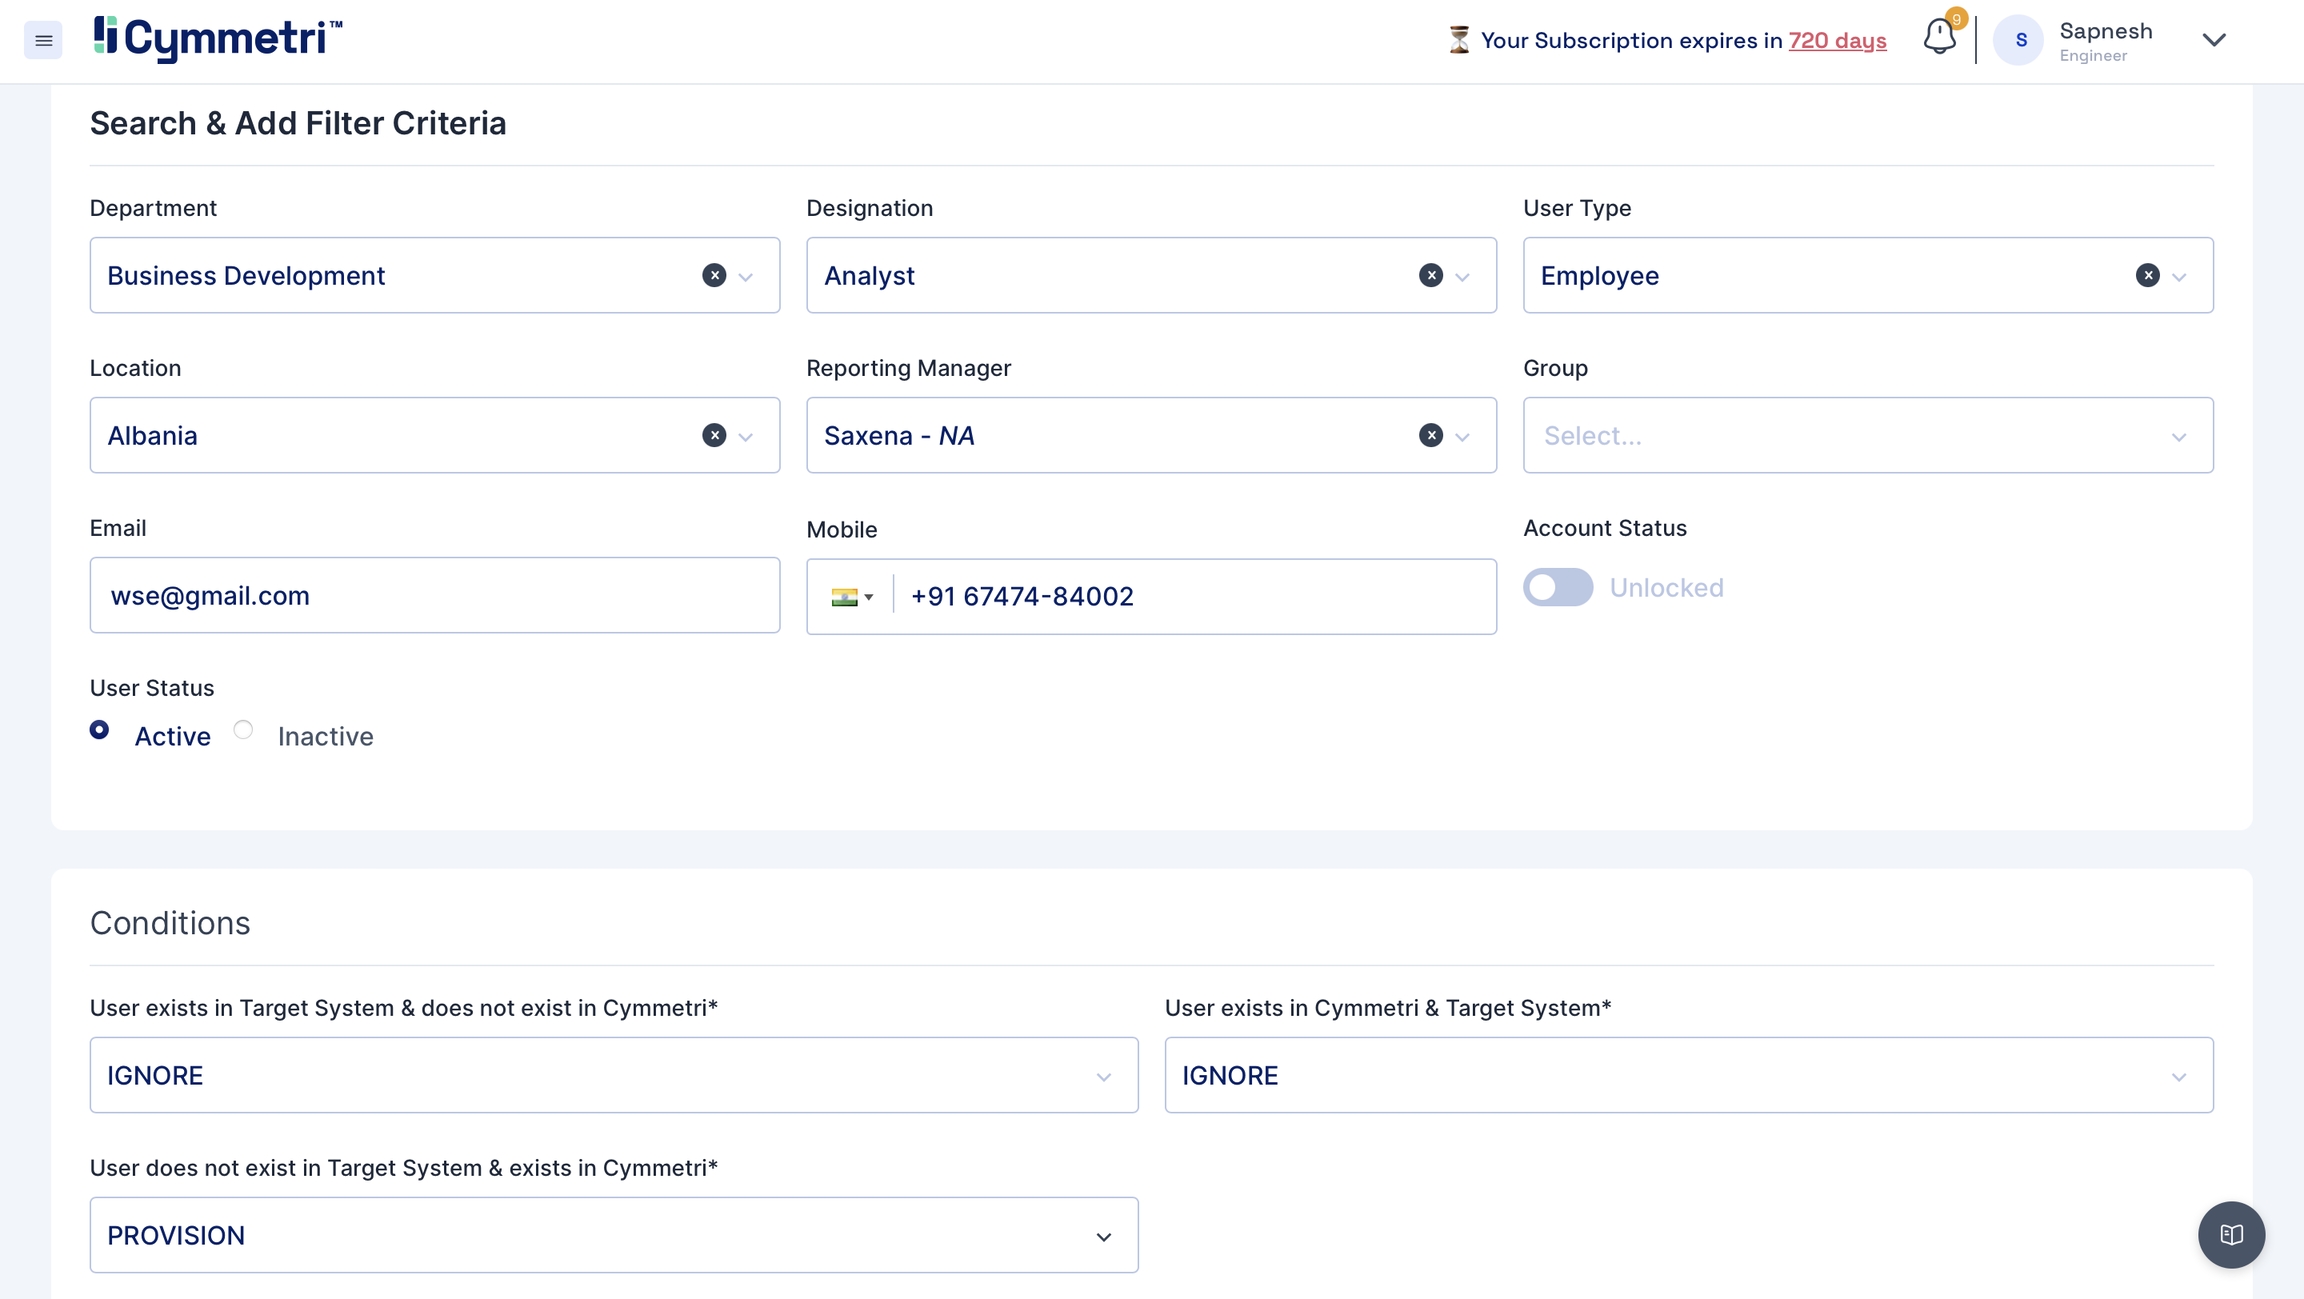
Move towards the Search Filter and Add Criteria section on the page.
Fill in all the user details like Department, Designation, User Type, Location, Manager, Group, if any, email and mobile number. Keep the account status slider in the unlocked option. Choose user status as 'Active'.
Set the conditions for the Push Reconciliation.
Click on Save at the top-right corner of the page.
Click on 'Run-now' to start the Push Reconciliation. You can check the status on the Reconciliation page.
Navigate to the users page to check the new users added to Cymmetri.
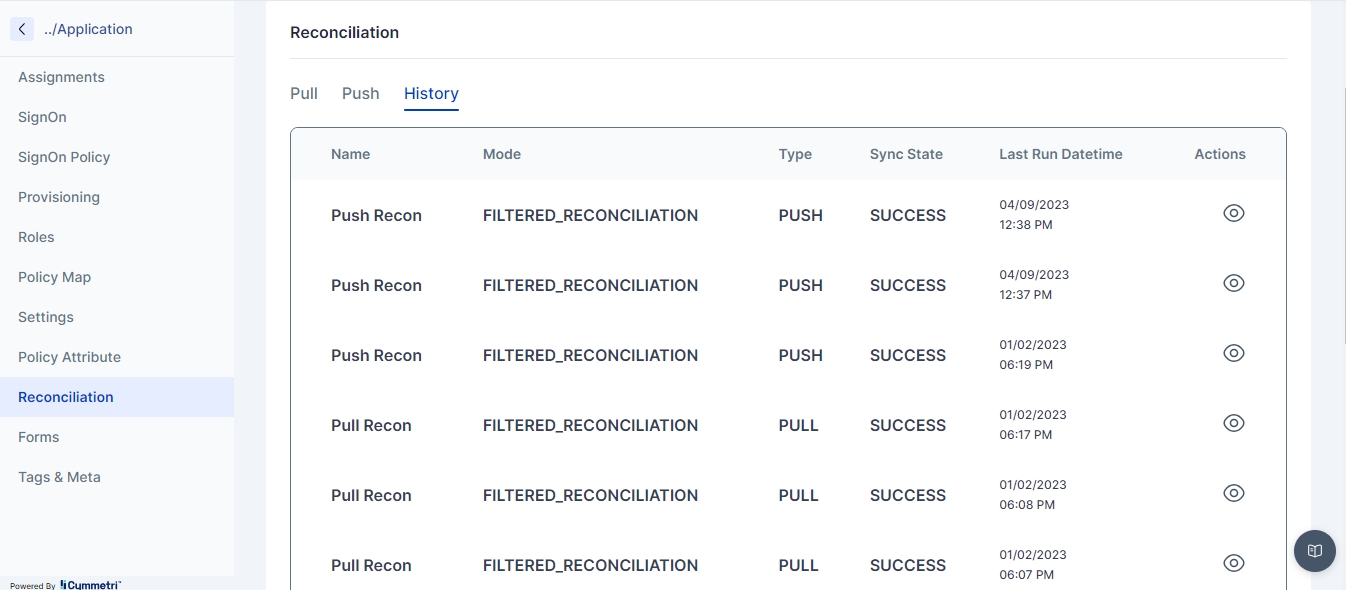
Navigate to the History tab to check and track the pull and push Reconciliation of the past.
Click on the eye icon to view the Push/Pull reconciliation operation.
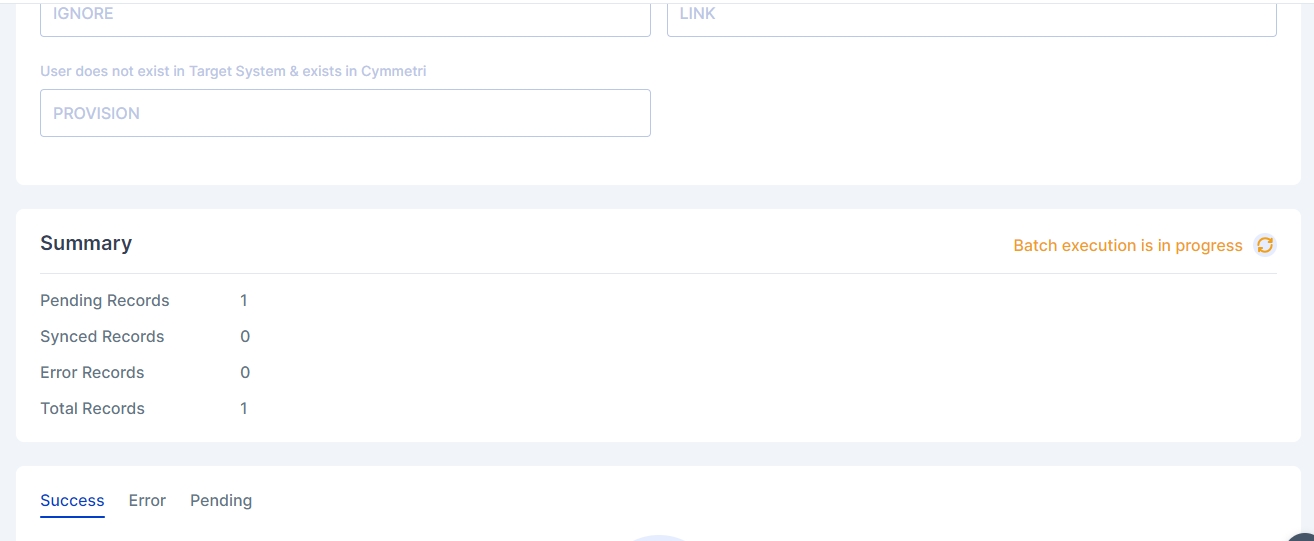
All the details configured in the Push/Pull Reconciliation can be seen here. It also displays the Summary of Pending, Synced and Error records.
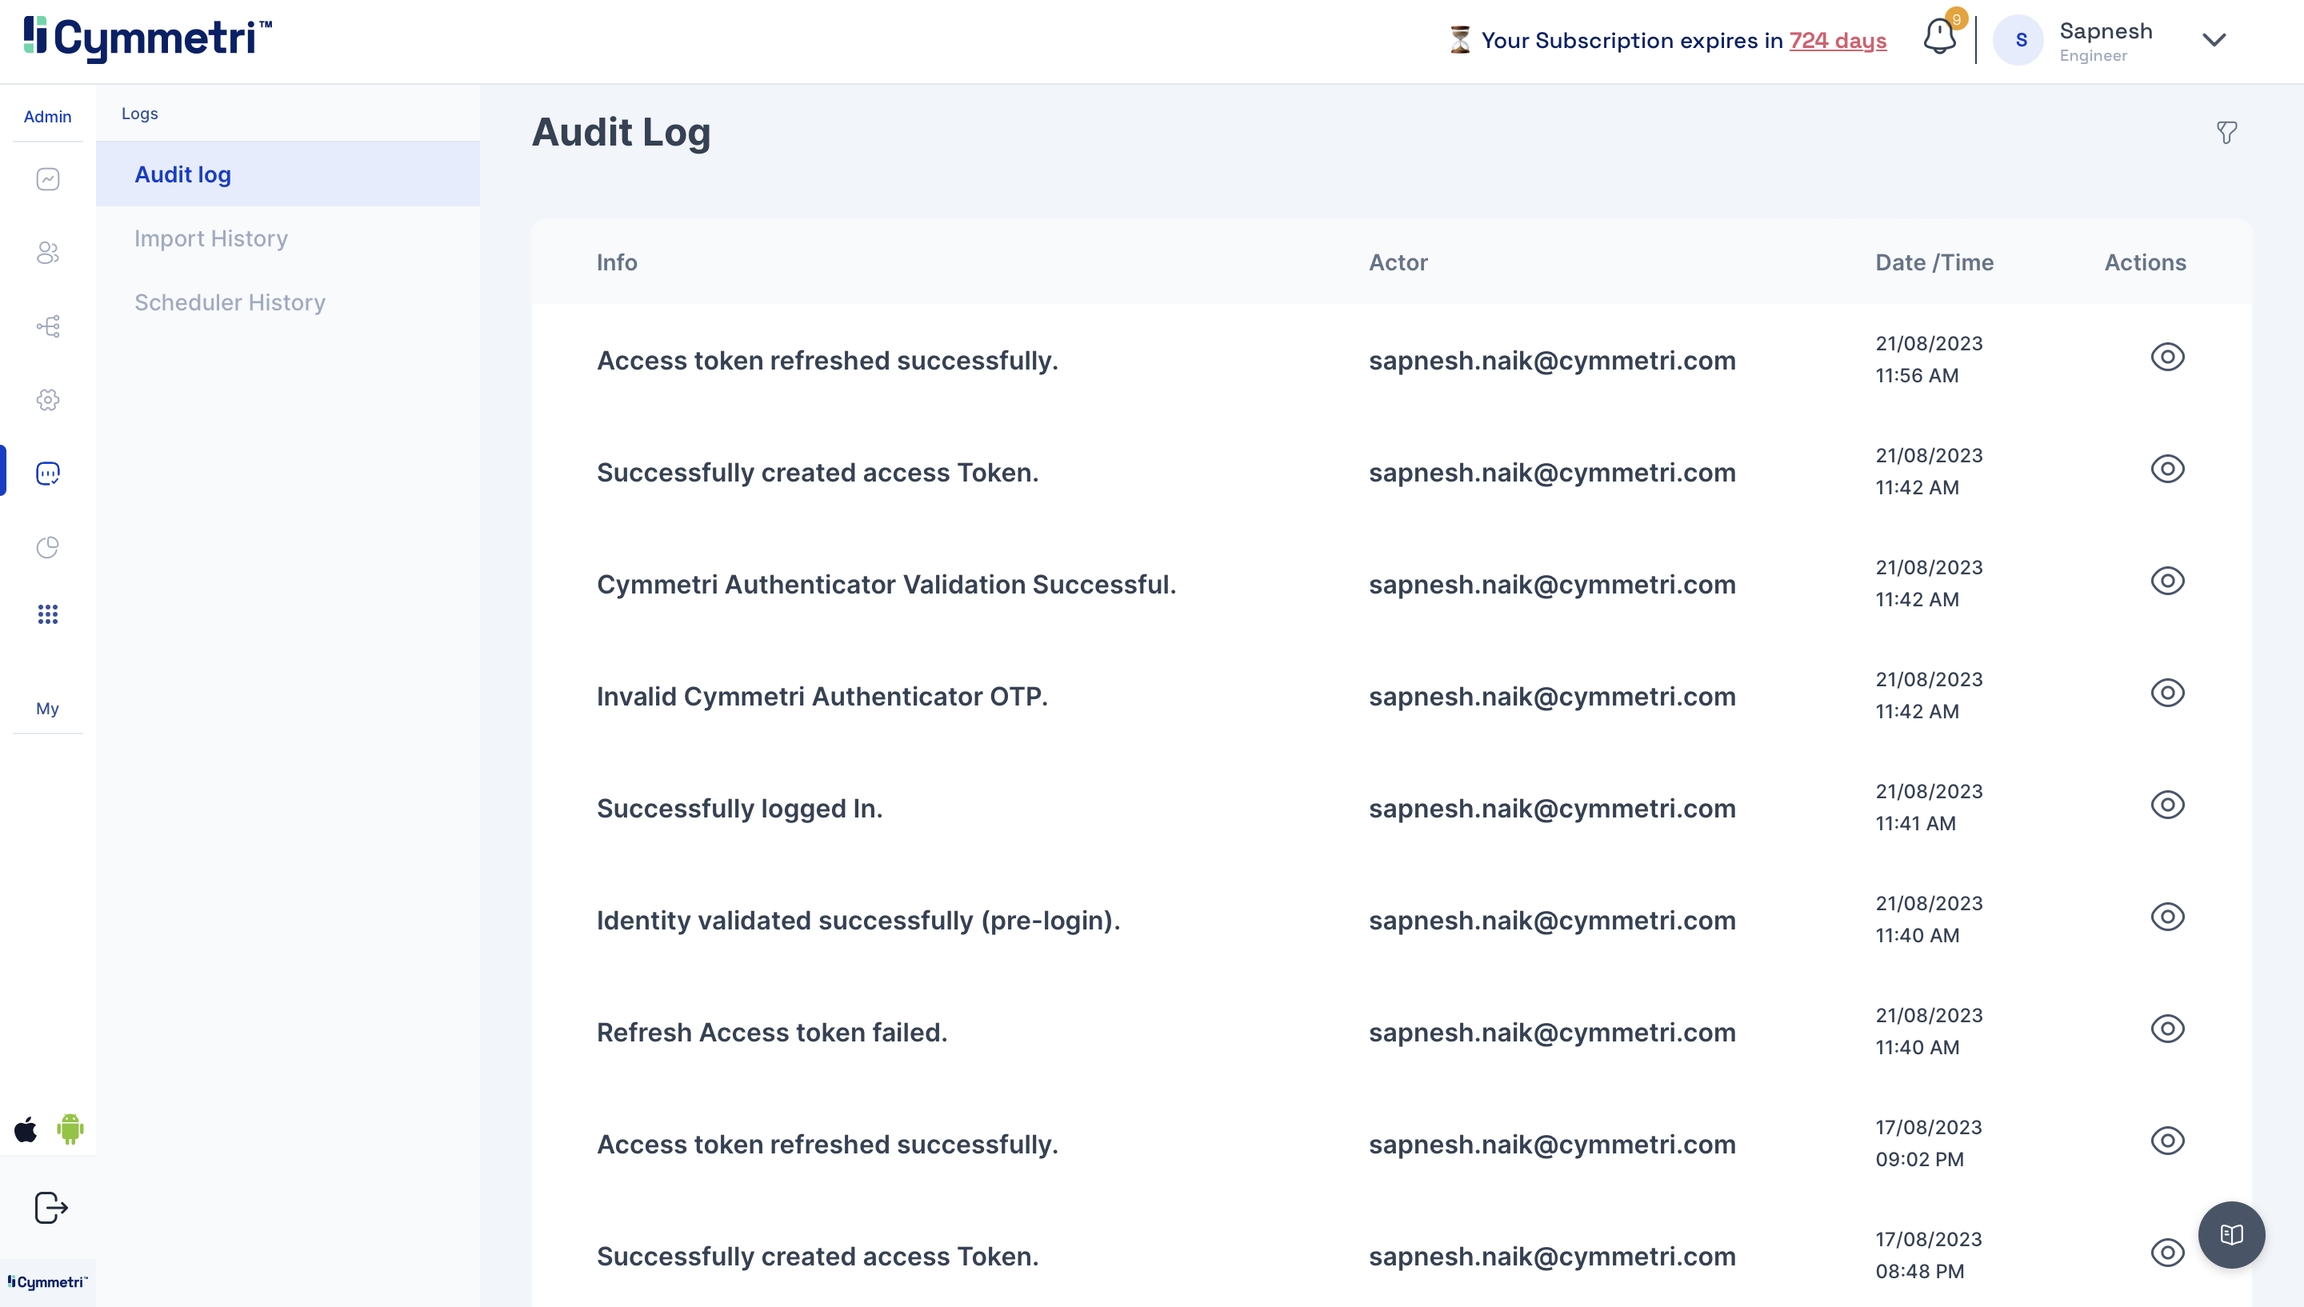
If, in any case, you're facing issues, head to the Logs->Audit Log to check for error logs.
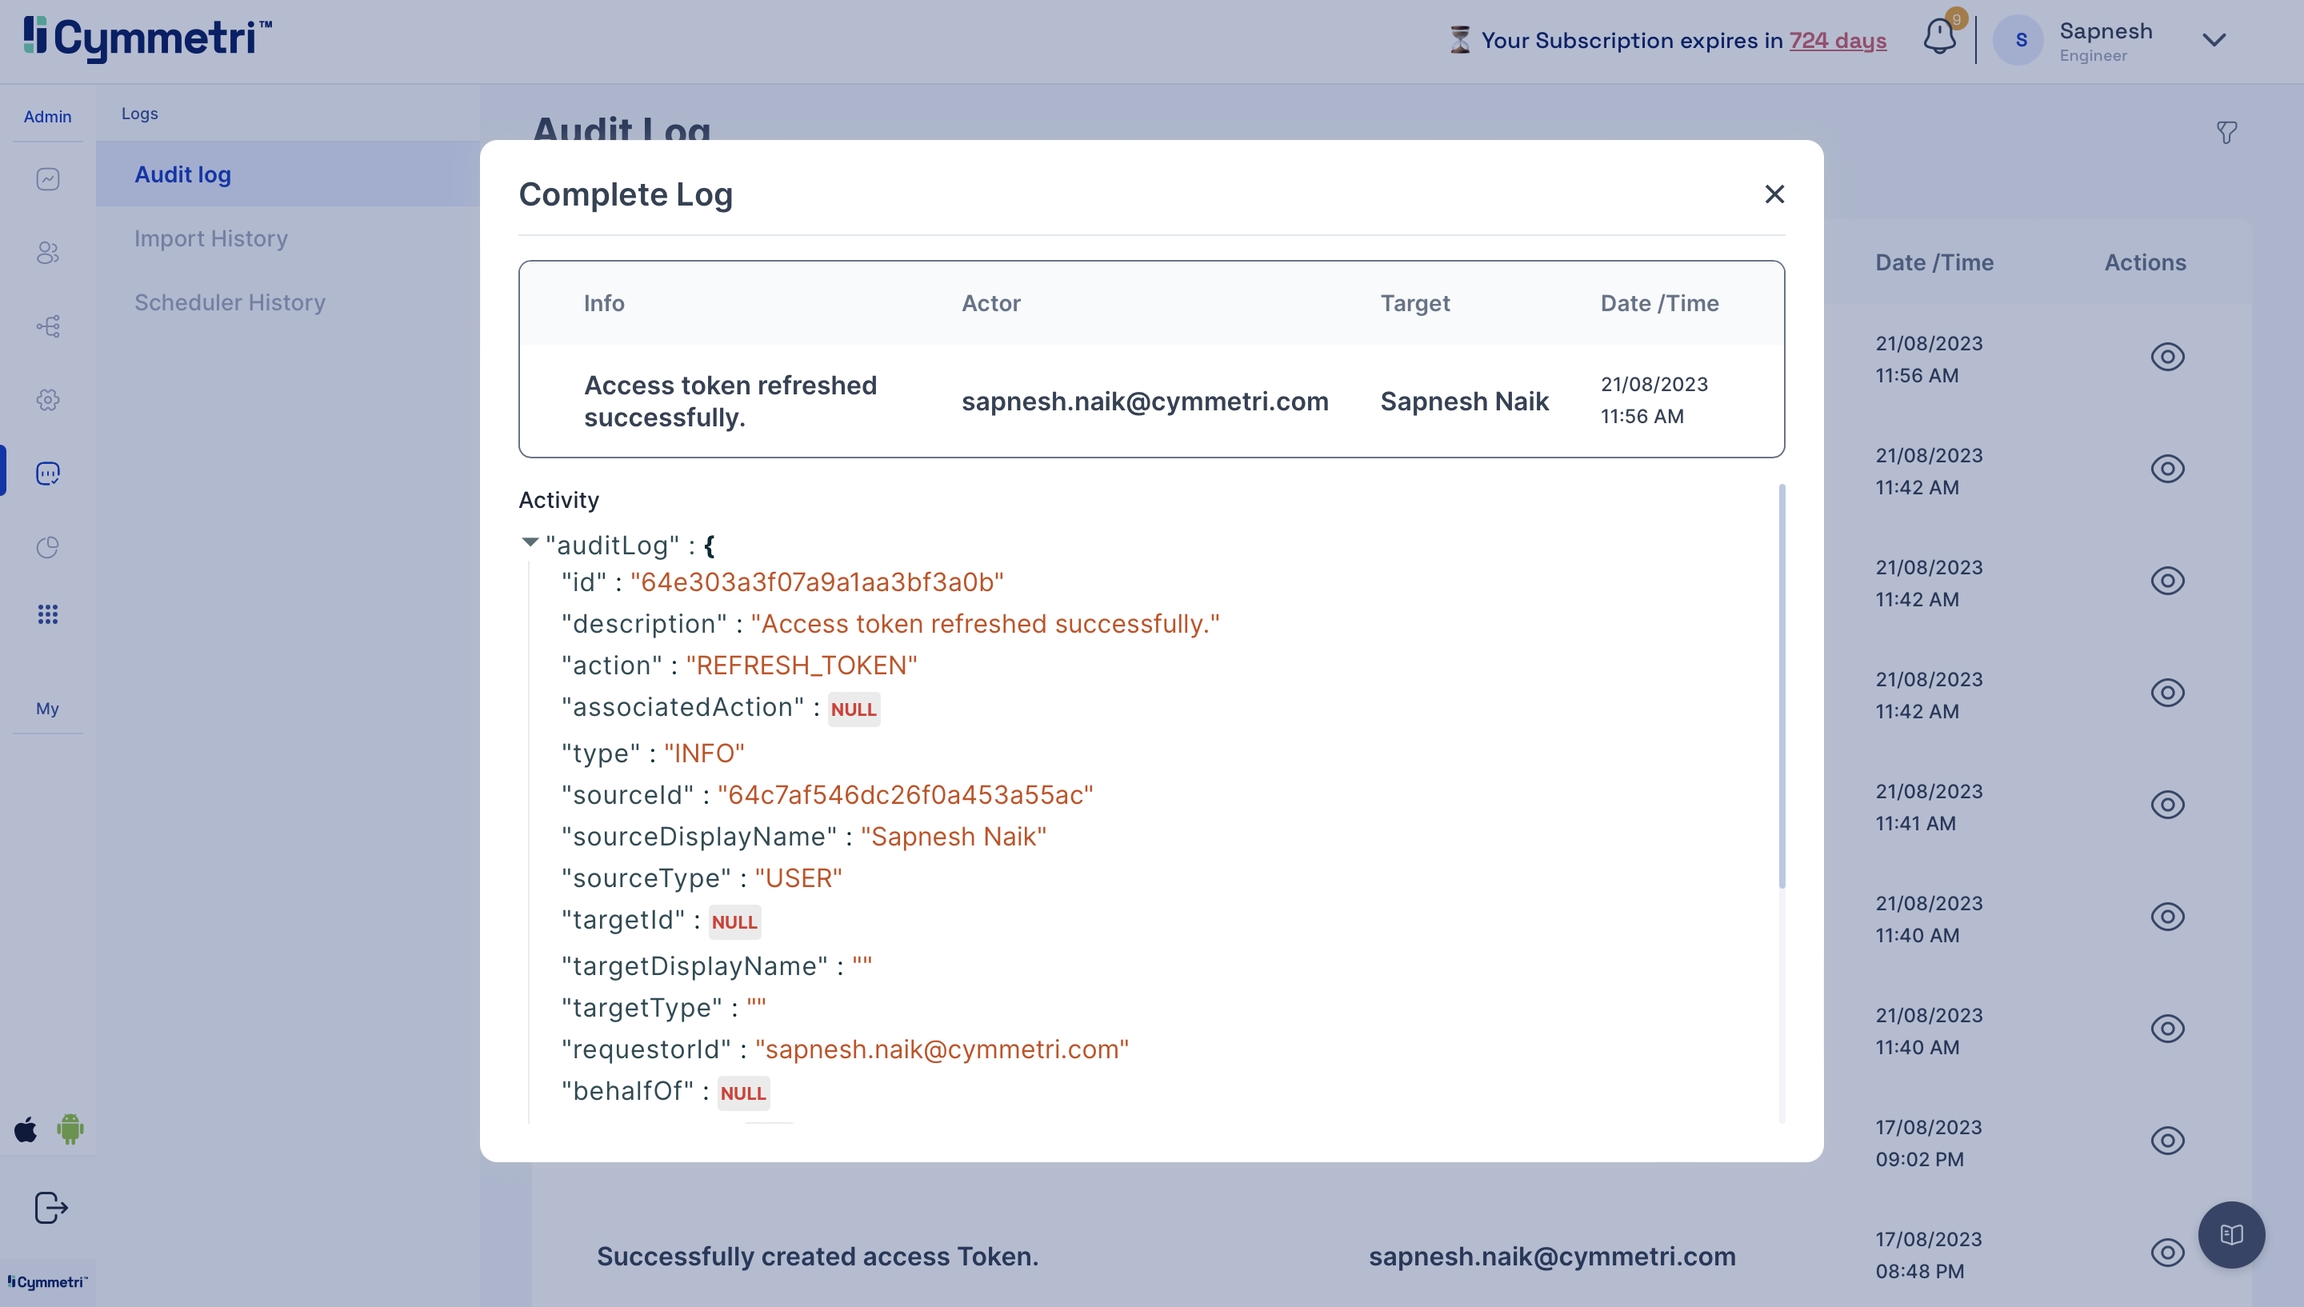
Click on the eye icon to check the event attributes in the audit log for errors.
Any application which supports SCIM v2.0 with bearer token is workable for application.
Following are configuration which is used for SCIM with bearer.
Base address - It is the endpoint of the target system which supports SCIM v2 API’s.
Username - Username to authenticate SCIM API endpoint.
Password - Password to authenticate SCIM API endpoint.
Security Token - It is a token which is used to authenticate.
Grant Type - It is grant type which is used to grant access for API’s.
Client Id - client id for authentication
Client Secret - client secret for authentication
Authentication type - It is Fixed Bearer compulsory.
Update method - Patch or Put method.
Accept - Http header which accepts (application/json etc).
Content Type - Http header which accepts (application/json etc).
Access Token Base Address - base address for access token
Access Token Node Id - node id for access token
Access Token Content Type - content type for access token.
For LDAP connector integration we need an LDAP server with the following detail sample.
Host/IP
LDAP Base Context
service user (Manager Username)
password (Manager User password)
After configure LDAP server we need to configure the Ldap application into the Cymmetri.
Check policy map to add proper attributes as needed by LDAP schema.
For the powershell connector we need a windows server machine with a connId server on it.
Configure powershell connector with following properties
Must configure powershell script with valid data using the reference below
Reference: https://drive.google.com/drive/folders/1XHt6aNmPzs7V7OKesk31FwqLxGf3u2ST?usp=sharing
Integration REST Application
The REST connector is designed to manage provisioning by relying on RESTful service.
For REST applications we need target applications which support REST API’s.
Following configuration is tested for felicity application.
We need REST API’s to integrate with cymmetri.
Following are the cymmetri configuration which need to configure in user configuration in cymmetri.
It is Basic REST configuration which need to configure in application.
We need to provide Groovy code to run create user, update user, delete user and also recon pull and push (for recon pull we need to add sync script and for recon push we need to add search script)
For sample script please validate following link
https://drive.google.com/drive/folders/1Vs8y1ZHXV3AjqsPkQSnwUoVppL-yc8Vl?usp=sharing
Note: Please Configure script step by step
Configure test script at initial step and then test configuration for provided script (If configure successfully then only go for step b).
Configure create script and test configuration (If successfully configured then only go for step c).
Configure update script and test configuration (If successfully configured then only go for step d).
Configure delete script and test configuration (If successfully configured then only go for step e).
Configure sync(pull) script and test configuration (If successfully configured then only go for step f).
Configure search(push) script and test configuration (If successfully configured then only go to the next step).
Azure provisioning in Cymmetri involves setting up configurations to automate the creation and management of user accounts in Microsoft Entra ID. This allows for seamless user onboarding and offboarding processes.
To implement Azure provisioning in Cymmetri, follow these general steps:
The administrator needs to login to Azure Portal: https://portal.azure.com
Once logged in click on More services-> button
In the next screen click on Identity -> App registrations inside the Identity management section
Next click on New registration to register a new App. Registering your application establishes a trust relationship between your app and the Microsoft identity platform. The trust is unidirectional: your app trusts the Microsoft identity platform, and not the other way around. Once created, the application object cannot be moved between different tenants.
Next enter the Application Name and select the Supported account types to organizational directory only : Accounts in this organizational directory only (Cymmetri Organization only - Single tenant) and then click on Register
Once registered next click on Authentication menu and +Add a platform.
On the next screen select Mobile and desktop applications
Enter a Custom redirect URIs: http://localhost and click on Configure
Further enable the Public Client flows and click on Save button
Next go to Certificates and secrets menu and create a new client secret:
Next enter a Description for the and select the duration after which the secret would Expire -Recommended is 180 days (6 months) but can be changed as per the need. Once both the details are entered click on Add button
Next copy and save the Client Secret ID and Client Secret Value in a safe and accessible place. Client secret values cannot be viewed, except for immediately after creation. Be sure to save the secret when created before leaving the page.
Once the client secret details are stored next click on API permissions menu and then + Add a permission
On this page select Microsoft Graph
On the next page we require permissions for both Delegated and Application permissions. Select each type of permission and in that Search and select the following permissions/scopes:
APIConnectors.Read.All
Directory.ReadWrite.All
OpenID (Not available for Application Permissions)
PrivilegedAccess.Read.AzureAD
User.ReadWrite.All
Directory.Read.All
Once all the permissions are added a warning is shown: "You are editing permission(s) to your application, users will have to consent even if they’ve already done so previously." The administrator needs to click on the "Grant admin consent for Cymmetri Organization" link
On the click of the link a popup appears to grant admin consent, click on Yes
Next click on Expose an API and then click on Add to add an Application ID URI: The Application ID URI, also called identifier URI, is a globally unique URI used to identify the web API. This URI is the prefix for scopes in the Oauth protocol. You can either use the default value in the form of api://, or specify a more readable URI.
On the next page keep the default values intact and click on Save button
Finally you can see the Overview page that contains all the information you need to configure Azure in Cymmetri.
Also the User config Application Authority can be obtained from the endpoint section in the Overview page:
This completes the Azure side of the configuration, next the administrator needs to need to move to Cymmetri and configure the Azure application. Mentioned below are the steps required to configure Azure in Cymmetri:
Add a new Azure application Identity Hub->Applications and then click on the +Add New button
Once added the administrator needs to go to Policy Attribute section and ensure all the below mentioned attributes are present (Add if not already present):
mailNickname
displayName
__PASSWORD__
__NAME__
userPrincipalName
givenName
surname
usageLocation
Next the administrator needs to go to the Policy Map section and ensure a mapping shown as below is created:
displayName
displayName
-
True
True
__NAME__
login
-
True
True
__PASSWORD__
password
-
True
True
mailNickname
mailNickName
-
True
True
userPrincipalName
login
True
True
True
givenName
firstName
-
True
True
surname
lastName
-
True
True
-
True
True
usageLocation
country
True
True
azureLicense
azureLicense
<actual license key>
True
True
Once the policy map is created next the administrator needs to go to Provisioning section and then to Server Configuration and need to configure the connector server as shown below:
Once the Server Configuration is done next the administrator needs to implement User Configuration with the below mentioned fields:
User config Application Authority: This is the authority under which the application operates. For example, if you're using Azure AD, the application authority might be https://login.microsoftonline.com/<tenant_id>/oauth2/authorize
User config application client id: This is the unique identifier for your application. It is provided by Azure when you register your application. For example, e9a5a8b6-8af7-4719-9821-0deef255f68e.
Client Secret: This is a secret key used by the application to prove its identity when requesting access tokens. It should be kept confidential. For example, 7f7df45a-251e-49d3-a396-748bf8e05a3c.
User config domain: This is the domain associated with your Azure AD. For example, contoso.onmicrosoft.com.
User config base password: This is the base password used for your application. For example, MyBasePassword123.
Redirect URI: This is the URI to which Azure AD will redirect the user after authentication. For example, api://05b765c3-d64f-7704-b0d8-5c4c6bc674df
User config resource URI: This is the URI of the resource (API, web app, etc.) that the application wants to access. For example, https://graph.microsoft.com.
Azure Tenant ID: This is the identifier for your Azure AD tenant. For example, 72f988bf-86f1-41af-91ab-2d7cd011db47.
User config base username: This is the base username used for your application. For example, MyUsername@contoso.onmicrosoft.com.
Once the configuration is done and saved, Next click on TEST CONFIGURATION to test if Cymmetri is able to connect to Azure Server.
For assigning any sort of licenses to a user of various products two main policy map entries need to done as shown below:
azureLicense: Need to provide license key for the product you wish to assign to the user
usageLocation: This field needs a two-letter country code (ISO standard 3166). Required for users that are assigned licenses due to legal requirements to check for availability of services in countries. Examples include: US, JP, and IN.
The value for azureLicense can be obtained as explained below:
Go to https://admin.microsoft.com/ and login using the admin credentials. Once logged in go to Billing->Licenses->Microsoft Teams Exploratory
Once you click that it opens the page from which we can copy the product id from URL as shown below:
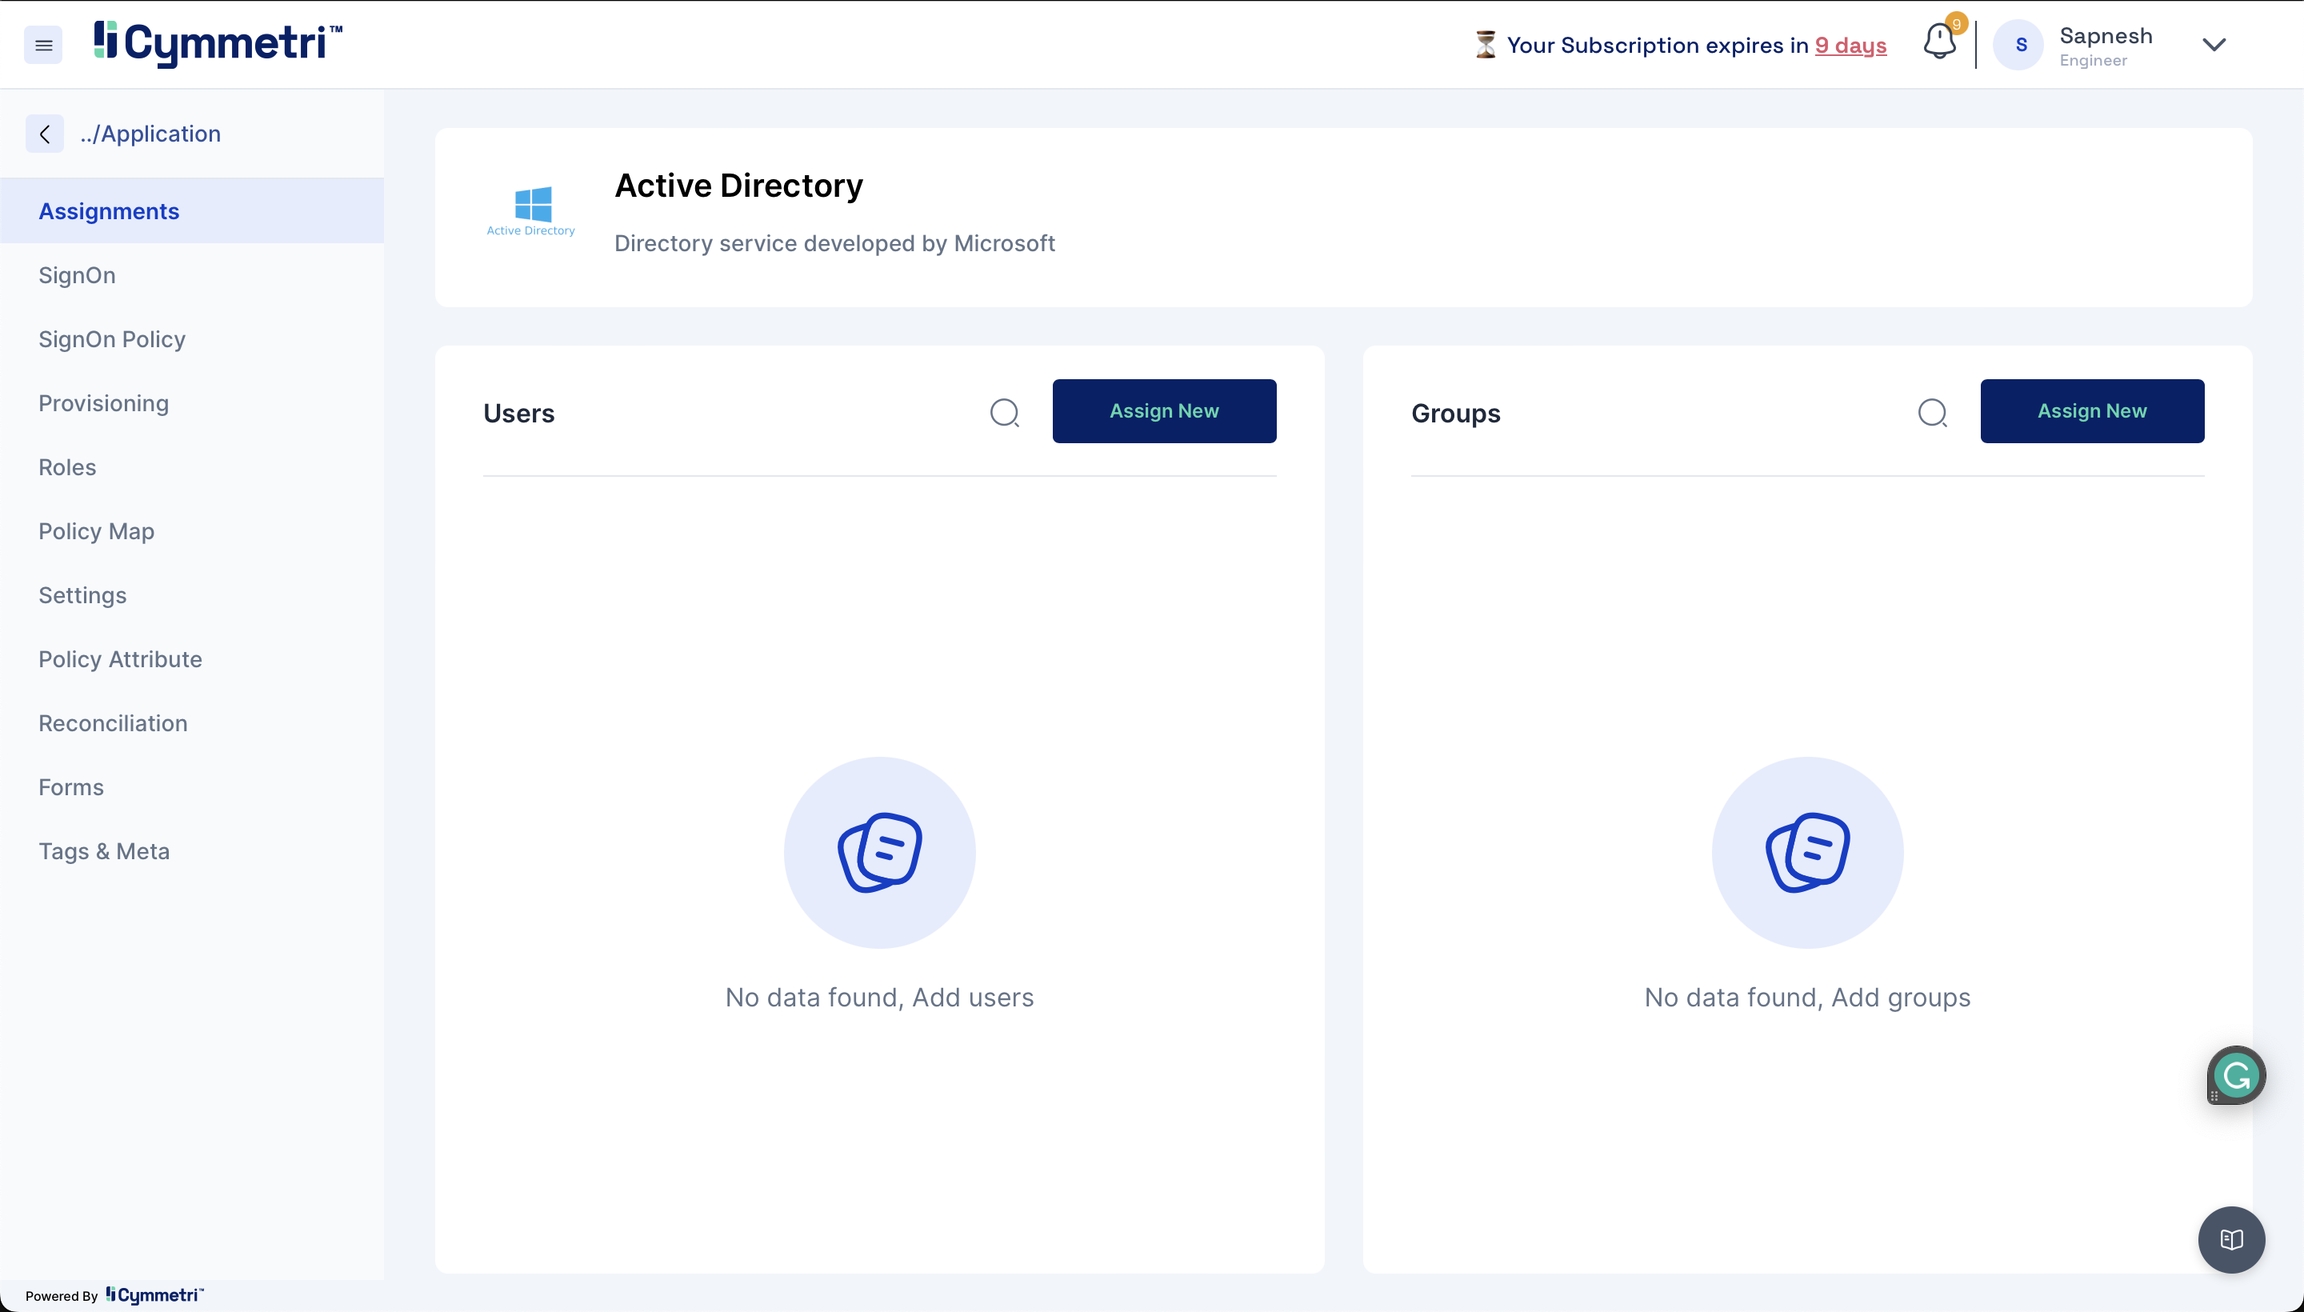
Once all the above configuration is done, on the same page in Cymmetri go to Assignments section and assign users to the application and ensure that these users are created in Azure's Microsoft Entra ID along with the Microsoft Teams license.
Any application which supports SCIM v2.0 with fixed bearer is workable for application.
Following are configuration which is used for SCIM with fixed bearer
Base address - It is the endpoint of the target system which supports SCIM v2 API’s.
Username - Username to authenticate SCIM API endpoint.
Password - Password to authenticate SCIM API endpoint.
Authentication type - It is Fixed Bearer compulsory.
Fixed Bearer Value - The value for fixed bearer.
Update method - Patch or Put method.
Accept - Http header which accepts (application/json etc).
Content Type - Http header which accepts (application/json etc).
Github Enterprise provides provisioning using SCIM 2.0
Pre-requisites
Create an account in Github (Enterprise).
Enable SAML for the Github tenant to be used with Cymmetri.
Step 1. Configure SSO in Cymmetri
Note the application URL received from the Git SAML configuration
Continue the configuration by logging into Cymmetri using at least Application Administrator role
Note: Public certificate gets from SSO metadata(cymmetri) and format it using following
https://www.samltool.com/format_x509cert.php
Note: Make sure when you test SAML then in cymmetri login with github admin users loginid which is added in cymmetri.
Configure Profile Mapping
Create User in Cymmetri and make sure login id of Cymmetri is same as gitHub Admin user login id.
Test SSO with the Cymmetri user.
Configure SCIM v2.0 (Github) application from master (cymmetri).
Basic provisioning policy attribute and policy map already aaded in default schema.
Github Application is run using Fixed Bearer token.
To get Fixed bearer token following steps used.
Step 1: Go to user settings in github
Step 2: Go to developer settings
Step 3: Go to personal access token and generate new token
Step4: Click on Configure SSO
Step 5: Click on Authorize
Use following cymmetri provision configuration and change according to github account.
Fixed Bearer Value copy from personal access token
Click on save
Click on Test Configuration with success message.
Check Policy map
Disable default for the respective attribute
Google Workspace is a software-as-a-service platform (SAAS) that provides email, calendar, documents and other services. This connector uses the Google Workspace provisioning APIs to create, add, delete and modify user accounts and email aliases.
Note: 1. Only the Premium (paid) or Educational versions of Google Workspace provide access to the provisioning APIs. 2. Connector will not work on the free Google Workspace Domain
For Configuring Google Workspace for provisioning we need to first obtain the client_secret.json file from the Google Workspace instance.
Go To and create a new Project if not already created. A new project needs to be created because it allows you to manage the credentials required to access Google APIs and services securely. A new project can be created by clicking on the New Project on top right or by clicking on the the Resource Dropdown
And the on the NEW PROJECT link on top right
Next enter the Project name and select Organisation and Location as shown below and click on CREATE button
The Admin SDK API is needed to programmatically manage and interact with various aspects of a Google Workspace domain, such as users, groups, organizational units, and settings. Here are some key reasons why the Admin SDK API is essential:
User Management: The Admin SDK API allows you to create, retrieve, update, and delete user accounts in your Google Workspace domain. You can manage user details such as name, email address, password, and organizational unit.
Group Management: You can create, retrieve, update, and delete groups within your Google Workspace domain using the Admin SDK API. This includes managing group members and settings.
Organizational Unit Management: The API enables you to manage organizational units (OUs) within your Google Workspace domain. You can create, retrieve, update, and delete OUs, as well as move users and groups between OUs.
User Reports: The Admin SDK API provides access to various reports about user activity, such as login activity, email sending/receiving activity, and more. These reports can help you monitor and analyze user behavior within your domain.
Settings Management: You can manage various domain-wide settings, such as email routing, calendar sharing settings, and device management settings, using the Admin SDK API.
Security and Compliance: The API provides features for managing security and compliance settings within your Google Workspace domain, such as 2-step verification, password policies, and audit logs.
To enable ADMIN SDK API click on Enabled API & Services and Search for Admin SDK API:
Click on Admin SDK API and then click on the Enable button
Once enabled, Click on CREDENTIALS tab
Now click on Credentials section and click on CREATE CREDENTIALS button and in that select OAuth client ID option
Select Desktop app as Application type, provide a name for the OAuth 2.0 client and then click on the CREATE button
A response screen is visible that shows that the "OAuth client created" It also displays Your Client ID and Your Client Secret. You may download the JSON here using the DOWNLOAD JSON option.
Click on OAuth consent screen and then Click on EDIT APP. Enter the required details and Click on SAVE AND CONTINUE button
Select Internal as User Type if you want to restrict access only to the users of your organization.
Search for Admin SDK API on the Scopes screen and select scope for user: .../auth/admin.directory.user
Select the scope for group: .../auth/admin.directory.group
Next Click on Credentials section and downlaod OAuth client json file on your local machine by clicking on the Download OAuth client button.
This command opens the default browser, and loads a screen on which you authorize consent to access the Google Apps account. When you have authorized consent, the browser returns a code. Copy and paste the code into the terminal from which you ran the original command
A response similar to the following is returned.
Once the above information is obtained we need to configure the Google Workspace in Cymmetri with Server Configuration and User Configuration as shown below:
Once the configuration is done click on TEST CONFIGURATION button to check if the configuration is working.
Once the test is successful next go to the Assigments section and assign the application to a user as shown below:
Once assigned ensure that the user is created in Google Workspace.
Next download thebundle for Google Workspace from the Connector Server website. Once downloaded open a new command prompt and change to the directory where you have downloaded the bundle and run the following command on the client_secrets.json file that you obtained earlier step:


