Loading...
Loading...
Loading...
Loading...
Loading...
Loading...
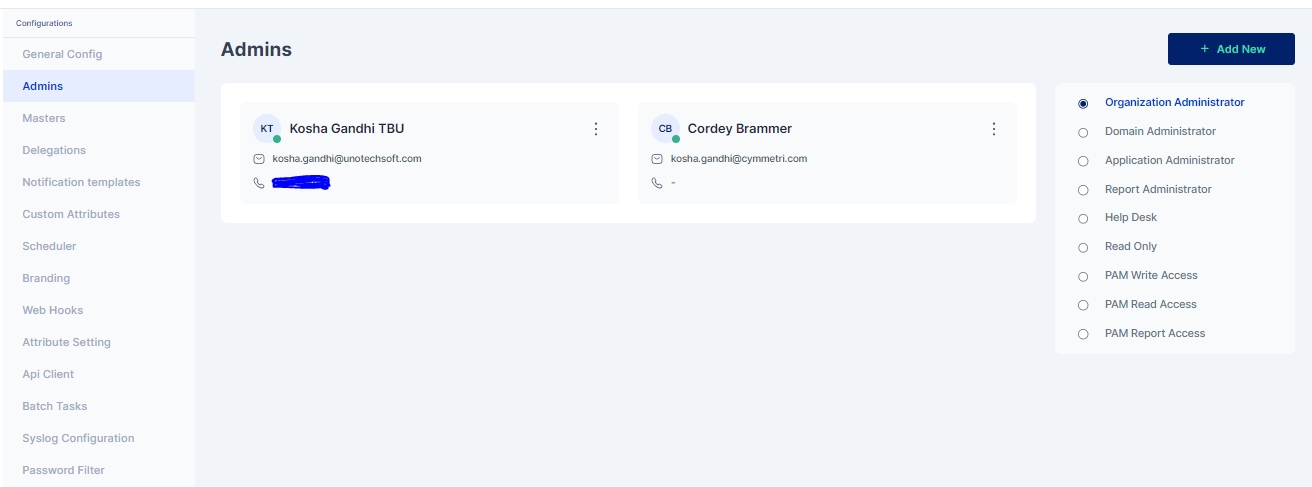
Cymmetri platform has six different admin roles with various levels of access to the various menus and resources on the administration portal of the Cymmetri.
In addition to these six admin roles, Cymmetri also supports three different privileged user roles that grant varying levels of access (read, write, report) to privileged users within Cymmetri.
The various admin roles on the Cymmetri Identity Platform may be described as follows:
This is the so-called 'super admin' administrator role in the Cymmetri platform. Administrators with this role have the authorization to modify any settings or make changes to the tenant.
This is a slightly less privileged administrator. Most tenant-wide system settings, such as the configuration of SMS and email providers (when configured by the tenant), are restricted for domain administrators. All other configurations can be viewed and edited by administrators with the Domain Administrator role.
An administrator with the role of Application Administrator has access to Identity Hub configurations, including Application, User, and Group configurations. The Application Administrator can map users and groups to applications and has the ability to edit all configurations related to Application Management.
An administrator with the role of Report Administrator has access to the Reports menu, which includes the ability to view, modify, and add new reports.
Helpdesk administrator has access to a very limited set of administrative functionalities, such as, reset password of end-user, remove configured Multifactor authentication options, and other such common use-case
All administrative users have editing access to the various administrative sections of the Cymmetri platform. However, administrators with the "Read Only Administrator" role do not have editing access to any of the settings or configurations; they only have "Read Only" access to the administrative section.
PAM Write Access in Cymmetri grants users the privilege to connect to servers via RDP or SSH and perform write or modification actions on those servers. Users with PAM Write Access have the ability to make changes, update configurations, and perform tasks that involve altering data or settings on the connected servers. This access level is typically assigned to administrators and IT personnel responsible for making configuration changes or updates on various servers within the Cymmetri environment.
PAM Read Access provides users with the ability to connect to servers using RDP or SSH and view the content and configurations on those servers. However, users with PAM Read Access do not have the authority to make modifications or changes to the server settings or data. This level of access is suitable for individuals who need to monitor server activities, check logs, or retrieve information from servers without the need to alter any server configurations.
PAM Report Access is designed for users who require access to PAM-related reports without the need to connect to servers via RDP or SSH directly. Users with PAM Report Access can generate and access reports that provide insights into server activities, access logs, or other relevant data within the Cymmetri. Such users can also configure schedulers to send timely reports to various other users. This level of access is beneficial for auditors, compliance teams, or individuals focused on analyzing server-related information for reporting and auditing purposes.
Follow the steps mentioned below to promote a user as an admin in Cymmetri platform.
Click on the Configuration menu on the right-hand side
Now click on the Admins sub menu within the Configuration menu
Click on the "+Add New" new button to add a new administrator
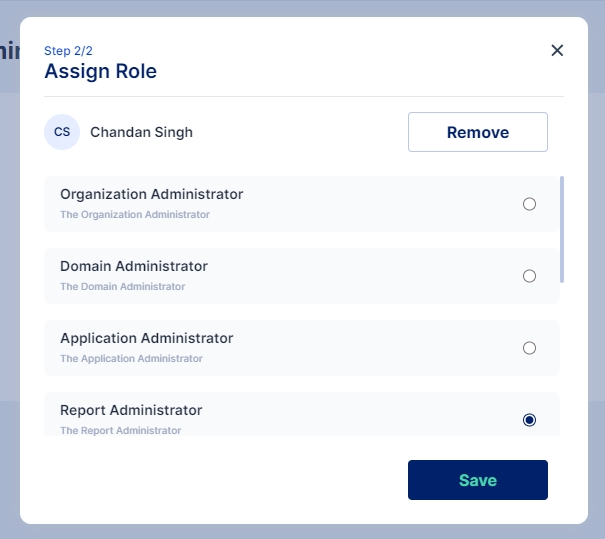
To assign an administrator role to a user, search for the user and then click the 'Assign' button.
Select the chosen administration role and click on Save
Administrator has been assigned the role as “Report Administrator”.
Notifications are triggered from the Cymmetri platform for various actions occuring on the platform either through direct action by the end-user or by the virtue of some backend action (such as running of a scheduler for a campaign). Cymmetri platform ships with default notification templates that may be modified by the administrator using the following process:
Access the notification templates menu by clicking on the configuration menu on the left-hand side menu bar and then clicking on the Notification templates pop-up menu.
Click on the eye icon to preview the corresponding template
Values in <> anchor tags and ${} reflect macros.
Click on the pencil icon to edit the template.
We may treat this template as an email, and edit the subject of the mail.
By default, the email notification will be sent to the corresponding affected end-user, but selecting the toggle option for “Send notification to Reporting Manager” will also copy the mail to the Reporting manager of the affected end-user, allowing for offline followup for the notification.
The administrator may edit the HTML using the provided HTML editor to add/change any template button/text/background. The macros required for the particular template are already provided in the sample default notification template.
Click on the Save button to save the notification template.
Tenant branding in Cymmetri allows you to personalize and enhance the visual identity of your environment. With tenant branding, you can customize the appearance of your platform, including logos, color schemes, and even tailored messages, aligning it with your organization's branding guidelines.
This not only creates a cohesive and professional user experience but also reinforces your brand's presence throughout the Cymmetri environment. It's a powerful tool for organizations looking to maintain a consistent and recognizable image while utilizing Cymmetri's identity and management capabilities.
The Cymmetri platform allows a certain level of customization to your tenant from the administration panel. This includes the ability to modify the default Cymmetri branding scheme to your own Organization’s branding scheme.
Your Organization Name and Tagline
Your Organization Logo
Your Organization Branding Colors (Primary, Secondary, Accent Colors)
To access the branding menu, first click on the Configuration menu on the left-hand side and then proceed by clicking on the Branding menu item.
Start the configuration by entering your Organization Name and Tag Line
Proceed by adding your URL to the Website text box and click on “Fetch Brand”.
If your organization’s branding is available, the logo and the corresponding color scheme will be displayed in the menu below.
If your branding is not available, you may configure it yourself by uploading your logo and editing your primary color, secondary color, and accent color.
Click on Save and Sync Server button to make the branding configuration apply to the entire website.
The configuration will be applied in a few seconds to reflect your branding.
Custom Attributes may be added for all user entities in your Cymmetri Platform. This allows organizations to add custom user attributes, that are used across the applications in the organization.
For example, your organization has a custom attribute that captures and uses the local language of your employees and vendors for the purpose of providing local services. This attribute may be stored in your Active Directory, and may need to be synchronized to your organization’s other applications during the course of an employee or vendor’s employment.
Cymmetri platform allows the administrator to define custom attributes on a tenant-wide level.
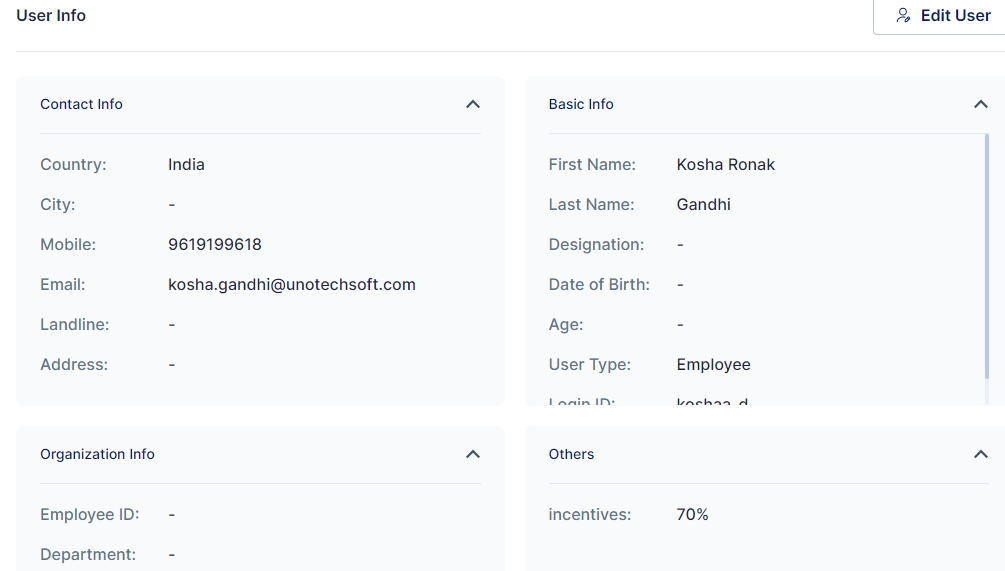
Custom attributes can be used at various places like when creating a user, as a filter when searching for users, and is visible in the others section of user info
To start configuring custom attributes, click on the Configurations menu on the left-hand side and then click on the Custom Attributes menu.
Click on the Add New button to start adding a custom attribute
Fields to be updated:
Name/ Key: refers to the label assigned to the custom attribute.
Description: allows you to provide additional details or notes about the custom attribute for reference and clarity.
Status: Allows to activate the custom attribute. Only if it is set to active, is the attribute available to use in the User Object.
Note: A custom attribute once created can only be set to inactive, it cannot be deleted.
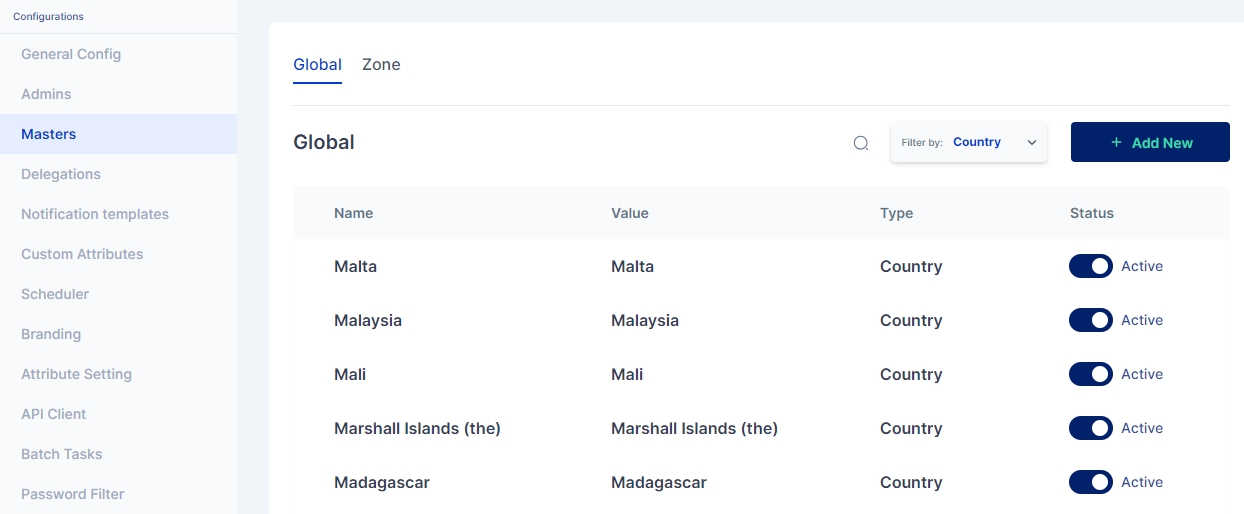
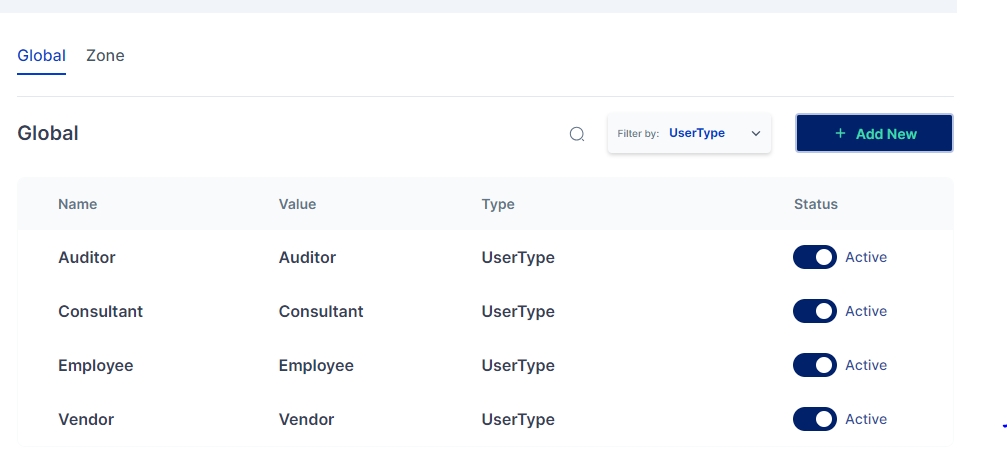
Masters are key-value pairs that can be defined for the entire tenant. The key(name) in this context refers to the label to be shown on the Cymmetri User Interface, and the value is the backend identifier used to reference this field in various processes, rules, and policies defined in the Cymmetri platform.
Cymmetri platform allows for configuring a number of masters in the system, the major classification among which is Global masters (which allow for creating master key-value pairs that may be used for various situations, such as creating a new department, designation, and other custom attributes for users in the system) and Zone masters (which are network configurations that may be used to whitelist or blacklist user access onto the platform as well as act as a source for adaptive Multi-factor authentication).
These are system-wide key value pairs primarily used to setup key value pairs referring to various masters as given below:
Country
Country key-value pairs are stored in the system, and are available as drop-downs wherever needed in the system - User attributes, Policies and other mappings.
UserType
UserType is used as one of the conditions while defining authentication policies and as an input in the rule engine.
Department
Department is used as one of the conditions while defining authentication policies and as an input in the rule engine, and also as a user attribute.
Designation
Designation is used as one of the conditions while defining authentication policies and as an input in the rule engine, and also as a user attribute.
RBAC
RBAC (System Roles) is used as one of the conditions while defining authentication policies and as an input in the rule engine, and also as a user attribute.
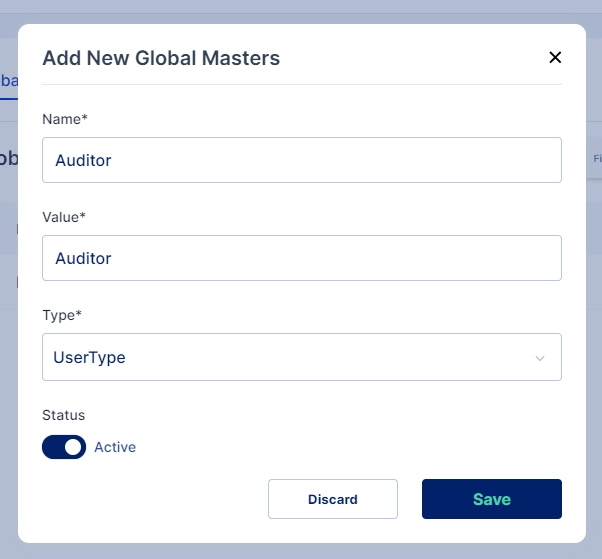
Follow the steps below to Add a New Master:
Click on the "+Add New" button to add a new master of any category mentioned above.
Enter the Name and Value for the new Master, then select the type of master you wish to create and enable the active toggle button to make the master active. Once all values are entered click on Save button
A new Global Master is successfully created in the selected category
Zone masters indicate the network zones that may be used for blacklisting or whitelisting access to the Cymmetri Identity platform deployment. It may also be used for detecting users from certain zone and assign relevant multi-factor authentication policies.
Zone Name: Used to refer to a zone in other configurations on the Cymmetri platform.
Inactive/Active: Toggle button to check whether the zone is active (configurable as a condition for other rules on the Cymmetri platform.)
Gateway IP: Refers to the Gateway IP address for the network zone.
Proxy IPs: Proxy Server IP addresses that may be used to be directed to this network or the IP addresses outside of the zone that would indicate a connection from this zone.
CIDR: Refers to the CIDR notation of the subnet of the network that this zone refers to. CIDR Notation.
For adding a new Zone Master or for editing an existing one, Fill all the mandatory details in the screen as shown above, click on the enable toggle button and finally click a “Save” button.
In this section within Cymmetri a range of general or broad configuration settings and options are managed. These settings encompass various foundational configurations that affect the overall behavior of Cymmetri.
There are different system configurations in Cymmetri mentioned below:
On Behalf
It refers to a setting within Cymmetri that enables a user to raise an application access request on behalf of another user. An administrator can enable this feature and then the user can raise a request for any other user. The page here shows how the users get an access to the On Behalf feature and use it to raise application requests
Time Based
In the Time-Based configuration, system administrators have the capability to determine whether the system will send repeated notifications to users based on the number of days remaining, as specified in the 'Send Notifications before' field. This occurs when an application is assigned to the user as a time-based application and is about to expire.
Email Config
These settings and configurations within Cymmetri are specifically related to the management and customization of email-related functionalities. This configuration area allows administrators to set up, manage, and customize the email communications as per the organization's needs.


