LogoLogo
3.0.0
3.0.0
  • Getting Started
    • What is Cymmetri?
    • Release Notes
    • Starting your Cymmetri Trial
    • Admin Dashboard
    • Accessing Cymmetri
    • Supported Web Browsers
    • Cymmetri Error Codes
    • Help
    • Personalization
      • General Configuration
      • Admins
      • Masters in Cymmetri
      • Personalize Notification Templates
      • Tenant Branding
      • Custom Attributes
  • Identity Hub
    • Managing Users and Groups
      • User Management
      • User Detail
      • Create Users
      • Create Groups
      • Importing Users
      • Assigning Users to Groups
      • Delegation
        • Setting up Delegation
        • Delegating Work to Delegatee
        • Accepting Delegation
      • Suspended Users
      • Archived Users
      • All Users Session
    • Authentication
      • Identity Provider
        • Internal IDP
          • Introduction
          • Internal Identity Provider Configuration: Cymmetri
          • Internal Identity Provider Configuration: Active Directory
          • Internal Identity Provider Configuration: LDAP
        • External IDP
          • Introduction
          • External Identity Provider Configuration - Google IDP
          • External Identity Provider Configuration - Azure IDP
          • External Identity Provider Configuration - Salesforce IDP
      • Service Provider
      • Authentication Rules
      • Password Policy
      • Global Auth Policy
      • Adaptive
    • Attribute Setting
    • Password Filter
    • Logs
      • Audit Log
      • Import History
      • Scheduler History
  • Lifecycle Management
    • Application Management
      • Support for Application Management
      • Getting Started
        • Introduction to Application Management
        • Adding Applications to be managed by Cymmetri
        • Assigning Applications to End Users
        • Dynamic Forms
        • Configuring Connector Server
      • Provisioning How to
        • Azure Provisioning
        • Active Directory (AD) Provisioning
        • Google Workspace Provisioning
        • LDAP Provisioning
        • Powershell Provisioning
        • REST Connector Provisioning
        • SCIM v2.0 Provisioning with Basic Authentication
        • SCIM 2.0 with Bearer Authentication
        • SCIM 2.0 with Fixed Bearer
        • Github Provisioning
      • Reconciliation How to
        • Configuring Reconciliation Process
      • Rules
        • Provisioning
        • Deprovisioning
    • Workflow Management
      • Workflow Configuration
      • Workflow Rules
      • Pending Workflows
      • Workflows List
    • Teams Config
    • Configuring Webhooks
  • Single Sign On
    • Introduction
    • SSO Configuration
      • SAML 2.0 Based SSO
      • API Based SSO
      • OpenID Connect Based SSO
    • Multifactor Authentication(MFA)
      • Introduction
      • Cymmetri Authenticator
      • Push Authenticator
      • Google Authenticator
      • SMS Authenticator
      • Secret Questions
      • FIDO Authenticator
      • Admin MFA Setting
    • Passwordless
      • Introduction
      • TOTP Based
      • OTP Based
      • Consent Based
      • FIDO Based
  • My Workspace
    • Getting Started
      • Introduction
      • First Time User Registration
      • End User Login Process
      • Forgot Password & Unlock Account
      • User Settings
    • How to use the My Workspace
      • Dashboard
      • My Access
      • Inbox
      • Team
      • On Behalf
  • Privileged Access Management
    • PAM Administration
      • Introduction to Privilege Access Management (PAM)
      • How to Access PAM in Cymmetri
      • Sub-Sections of PAM
      • Steps to configure PAM Server
      • Adding a device/ server in PAM
      • Vault User
      • Vaulting Configuration
      • Break Glass Configuration
      • PAM Reports and PAM History
      • Dormancy Disable Config
    • PAM Usage
      • Assign a server to a user
      • Access the server
  • Governance
    • Insights
      • Reports
      • Risk
    • Access Certification
      • Setting up and managing Access Reviews
  • Self-Service App
Powered by GitBook

Cymmetri.com

On this page
  • Creating a dynamic form:
  • Administrator's View:
  • User's View

Was this helpful?

Export as PDF
  1. Lifecycle Management
  2. Application Management
  3. Getting Started

Dynamic Forms

Last updated 1 year ago

Was this helpful?

Dynamic Forms enable administrators to request additional fields from either administrators or end-users when assigning applications. These additional user fields are then collected and used for provisioning the user into the managed application. It is a feature in Cymmetri's application details sections which enables administrators to ask necessary questions at time of application assignment. The form filled will be saved and reviewed by the approver.

Creating a dynamic form:

For creating a dynamic form the administrator needs to configure the managed application. For eg. Identity Hub->Applications->Service Now(Application may change )->Forms
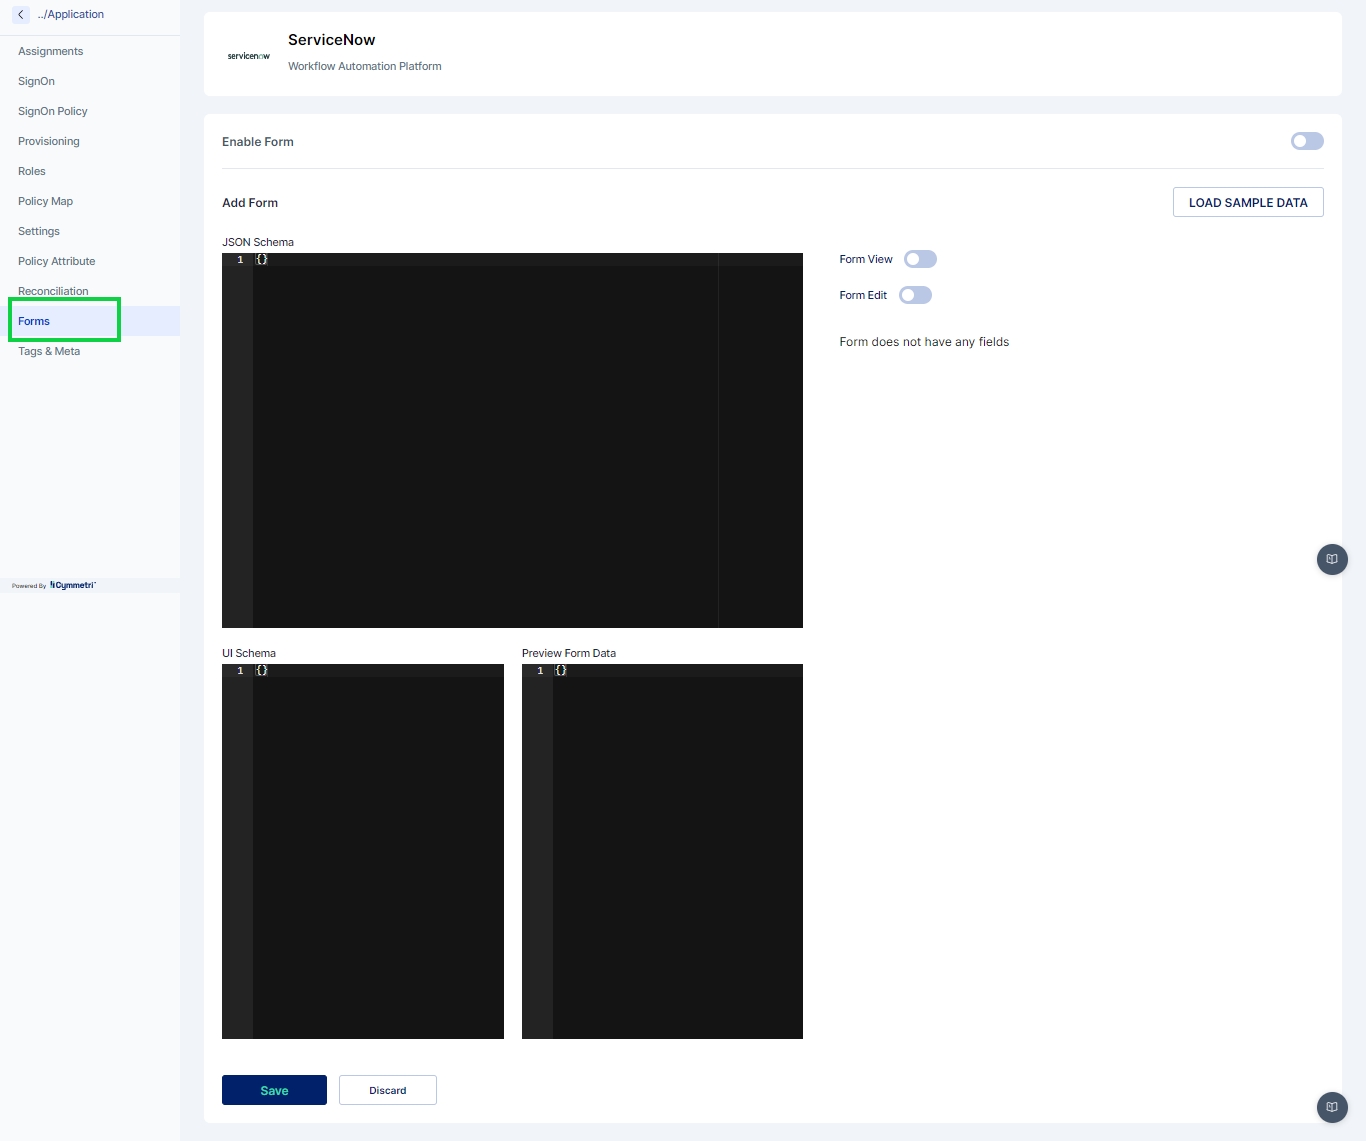
Load the default form by clicking on the “Load Sample Data” button
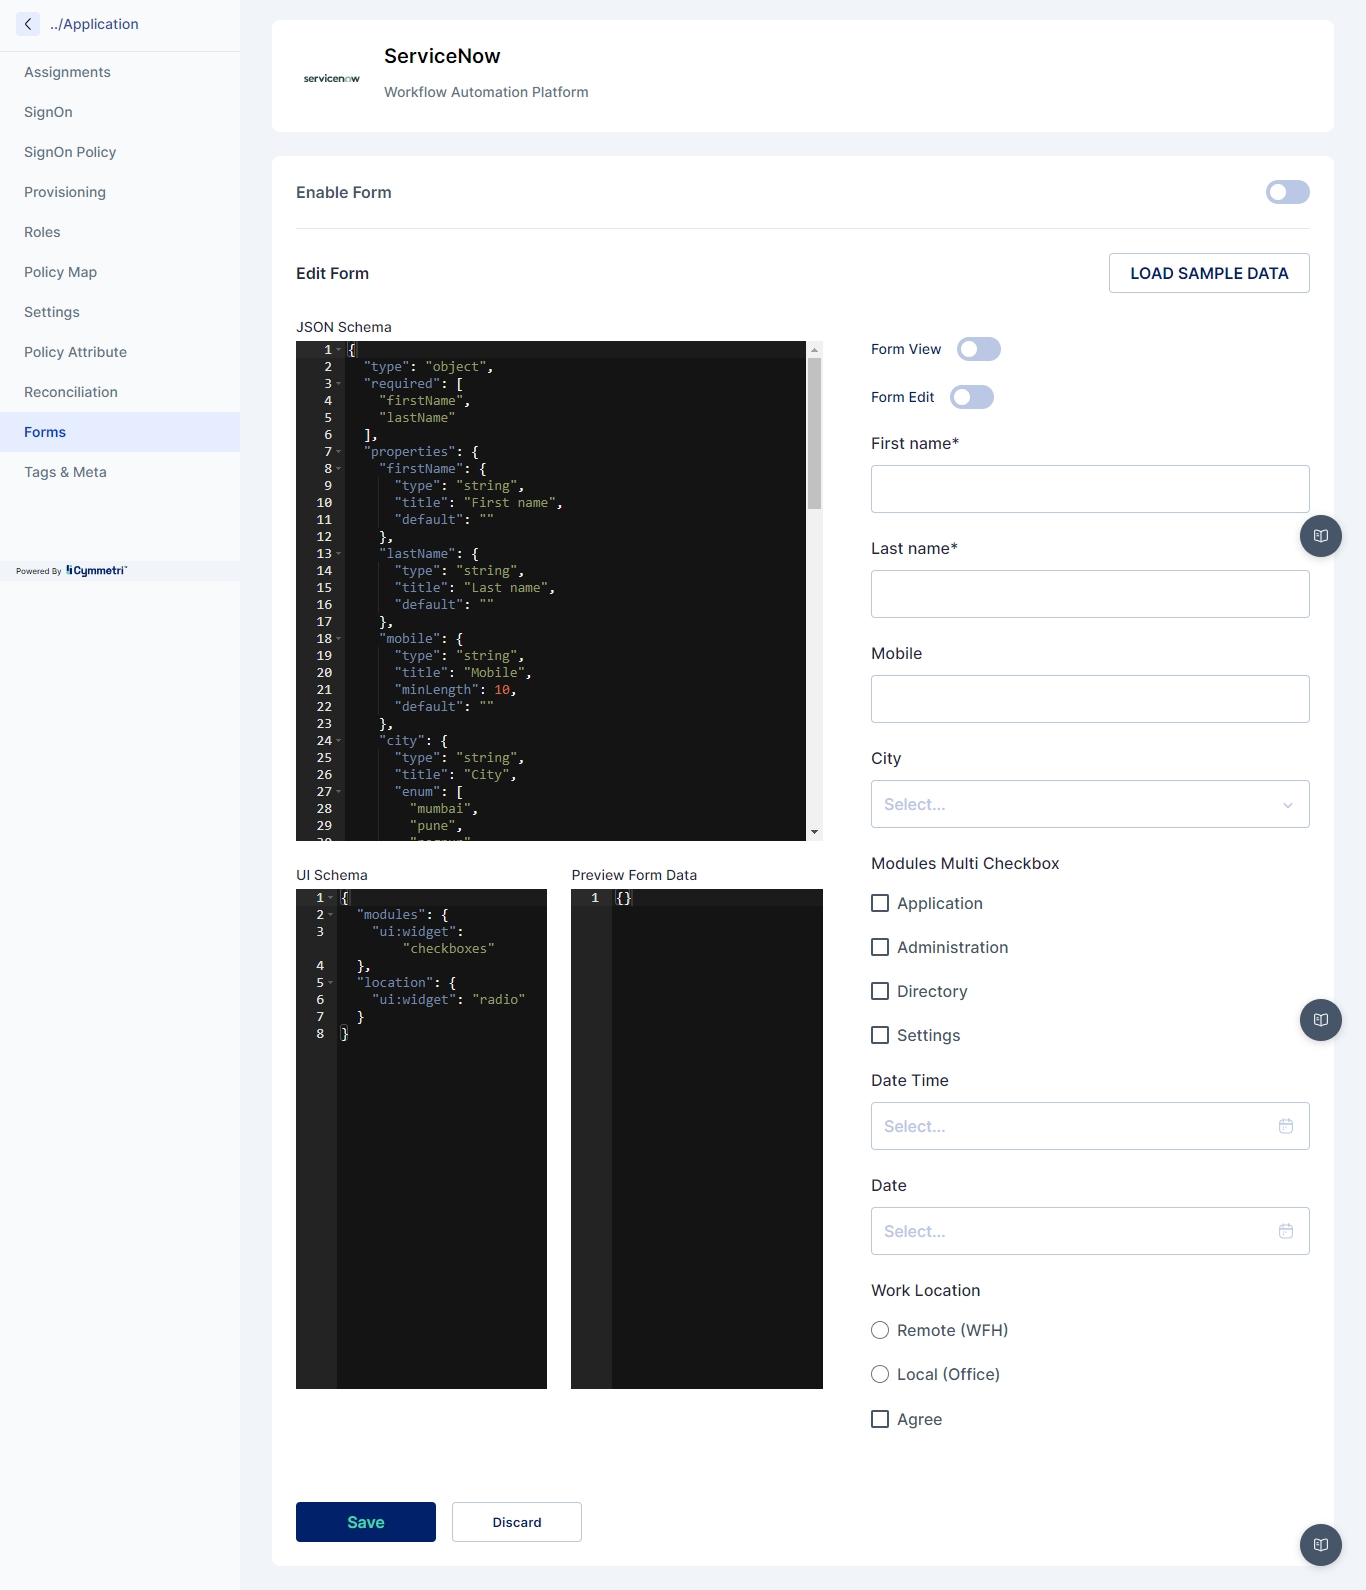
Edit the default form in the JSON Schema section, In the JSON Schema section the administrator can define the form structure with the type of element, and its various properties like type, title, default value etc, a preview of the form is shown on the right hand side.

Let us create a simple form that can capture

  1. “Preferred Username” [text field] and

  2. “Request Additional Modules” [Radio] with two options “Administrator” and “Read Only”.

The code below shows how to create a simple form described above:

{ 
  "type": "object", 
  "required": [ 
    "preferredName" 
  ], 
  "properties": { 
    "preferredName": { 
    "type": "string", 
    "title": "Preferred Username", 
    "default": "" 
  }, 
  "additionalModules": { 
    "type": "string", 
    "title": "Additional Modules", 
    "enum": [ 
      "admin", 
      "readonly" 
    ], 
    "enumNames": [
       "Administrator",
       "Read-Only" 
    ], 
    "default": "" 
    } 
  }
}
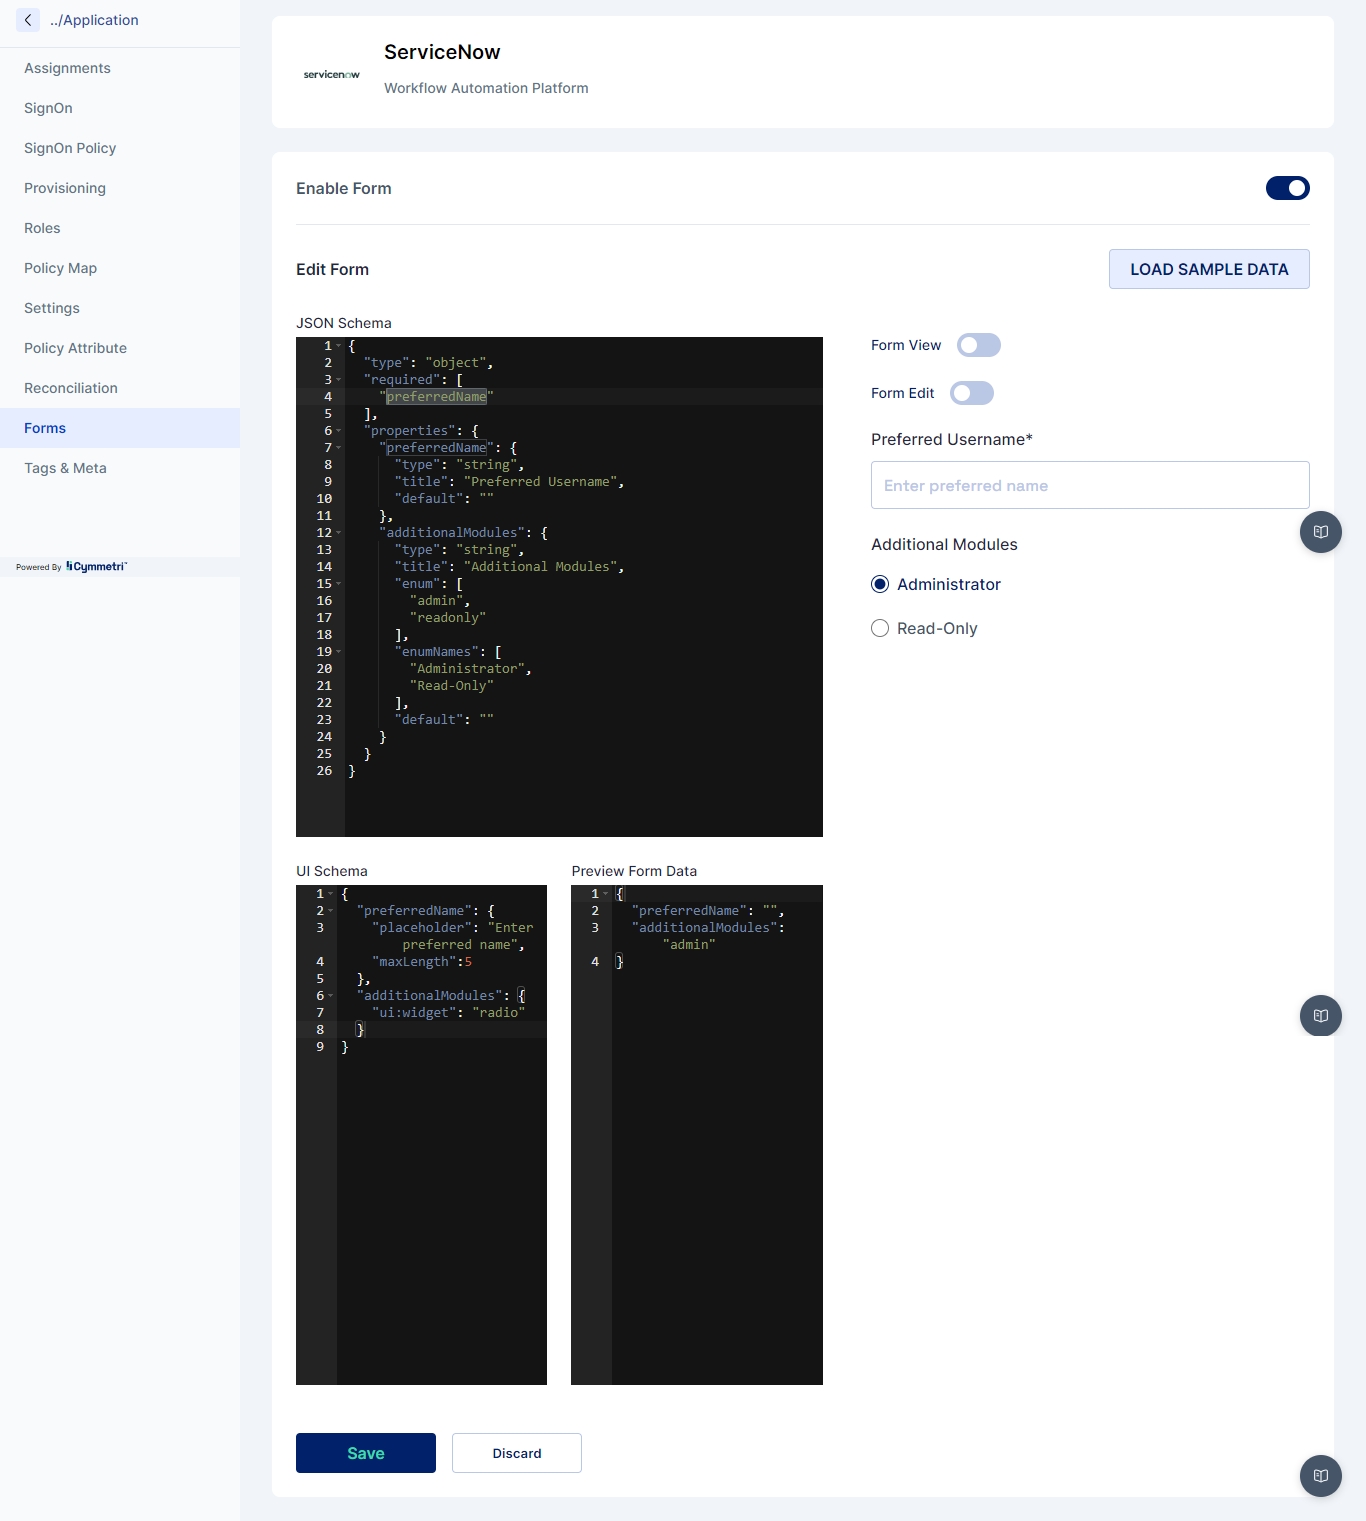
The UI Schema is like a set of json properties that are used to configure how the form should look and behave. It lets you tweak things like the length of a text box or whether a choice should be shown as radio buttons or checkboxes. In the example code, we're using the UI Schema to make the "preferredName" field have a placeholder and also set a maximum length. For "additionalModules," we're using widget property to make it show up as a radio button.

{
  "preferredName": {
    "placeholder": "Enter preferred name",
    "maxLength":5
  },
  "additionalModules": {
    "ui:widget": "radio"
  }
}

The Preview Form Data displays how the data entered in the UI will be gathered and shows the structure in which the data will be sent to the API.
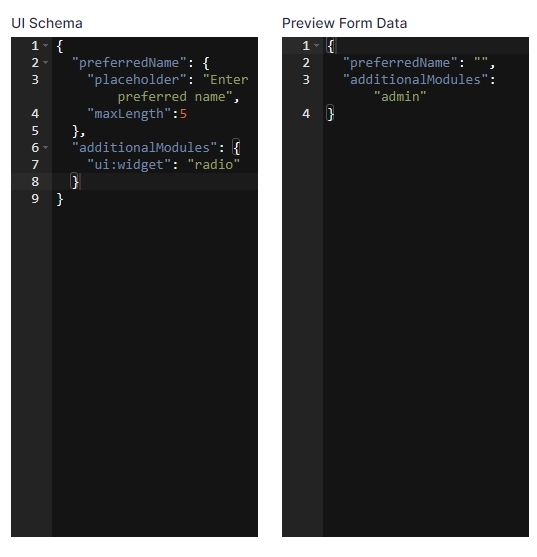
The preview of the form looks as below after making the changes:
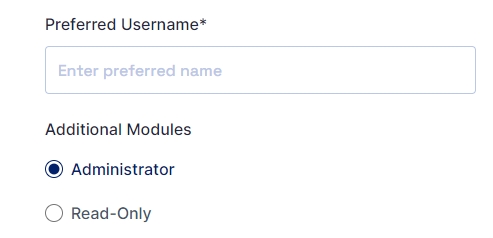
Once configured the administrator can Click on the Save button.

Once saved a confirm box appears to enable the form; the administrator needs to click on the Confirm button in the popup to enable the form for the application.

The Form View and Form Edit options allow the administrator and user to view and edit the form

Administrator's View:

When the Form View button is enabled it allows the administrator to view the form in the user's Application Page

On clicking the View Form button the form appears as below:

Similarly when the Form Edit button is enabled it allows the administrator to edit the form in the user's Application Page

On clicking the Edit Form button the form appears as below, The administrator may change the details mentioned in the form.

User's View

The user to whom the application is assigned can also view or edit the form based on whether the form edit is enabled or not. The figure below shows the Edit Form option for a user in the MyAccess -> Applications section:

If the user clicks on Edit Form it shows the form to edit: