LogoLogo
3.0.0
3.0.0
  • Getting Started
    • What is Cymmetri?
    • Release Notes
    • Starting your Cymmetri Trial
    • Admin Dashboard
    • Accessing Cymmetri
    • Supported Web Browsers
    • Cymmetri Error Codes
    • Help
    • Personalization
      • General Configuration
      • Admins
      • Masters in Cymmetri
      • Personalize Notification Templates
      • Tenant Branding
      • Custom Attributes
  • Identity Hub
    • Managing Users and Groups
      • User Management
      • User Detail
      • Create Users
      • Create Groups
      • Importing Users
      • Assigning Users to Groups
      • Delegation
        • Setting up Delegation
        • Delegating Work to Delegatee
        • Accepting Delegation
      • Suspended Users
      • Archived Users
      • All Users Session
    • Authentication
      • Identity Provider
        • Internal IDP
          • Introduction
          • Internal Identity Provider Configuration: Cymmetri
          • Internal Identity Provider Configuration: Active Directory
          • Internal Identity Provider Configuration: LDAP
        • External IDP
          • Introduction
          • External Identity Provider Configuration - Google IDP
          • External Identity Provider Configuration - Azure IDP
          • External Identity Provider Configuration - Salesforce IDP
      • Service Provider
      • Authentication Rules
      • Password Policy
      • Global Auth Policy
      • Adaptive
    • Attribute Setting
    • Password Filter
    • Logs
      • Audit Log
      • Import History
      • Scheduler History
  • Lifecycle Management
    • Application Management
      • Support for Application Management
      • Getting Started
        • Introduction to Application Management
        • Adding Applications to be managed by Cymmetri
        • Assigning Applications to End Users
        • Dynamic Forms
        • Configuring Connector Server
      • Provisioning How to
        • Azure Provisioning
        • Active Directory (AD) Provisioning
        • Google Workspace Provisioning
        • LDAP Provisioning
        • Powershell Provisioning
        • REST Connector Provisioning
        • SCIM v2.0 Provisioning with Basic Authentication
        • SCIM 2.0 with Bearer Authentication
        • SCIM 2.0 with Fixed Bearer
        • Github Provisioning
      • Reconciliation How to
        • Configuring Reconciliation Process
      • Rules
        • Provisioning
        • Deprovisioning
    • Workflow Management
      • Workflow Configuration
      • Workflow Rules
      • Pending Workflows
      • Workflows List
    • Teams Config
    • Configuring Webhooks
  • Single Sign On
    • Introduction
    • SSO Configuration
      • SAML 2.0 Based SSO
      • API Based SSO
      • OpenID Connect Based SSO
    • Multifactor Authentication(MFA)
      • Introduction
      • Cymmetri Authenticator
      • Push Authenticator
      • Google Authenticator
      • SMS Authenticator
      • Secret Questions
      • FIDO Authenticator
      • Admin MFA Setting
    • Passwordless
      • Introduction
      • TOTP Based
      • OTP Based
      • Consent Based
      • FIDO Based
  • My Workspace
    • Getting Started
      • Introduction
      • First Time User Registration
      • End User Login Process
      • Forgot Password & Unlock Account
      • User Settings
    • How to use the My Workspace
      • Dashboard
      • My Access
      • Inbox
      • Team
      • On Behalf
  • Privileged Access Management
    • PAM Administration
      • Introduction to Privilege Access Management (PAM)
      • How to Access PAM in Cymmetri
      • Sub-Sections of PAM
      • Steps to configure PAM Server
      • Adding a device/ server in PAM
      • Vault User
      • Vaulting Configuration
      • Break Glass Configuration
      • PAM Reports and PAM History
      • Dormancy Disable Config
    • PAM Usage
      • Assign a server to a user
      • Access the server
  • Governance
    • Insights
      • Reports
      • Risk
    • Access Certification
      • Setting up and managing Access Reviews
  • Self-Service App
Powered by GitBook

Cymmetri.com

On this page
  • Assigning Users to a Group
  • Adding User to Group
  • Assigning a Group to a User
  • Bulk Assigning Users to a Group

Was this helpful?

Export as PDF
  1. Identity Hub
  2. Managing Users and Groups

Assigning Users to Groups

Last updated 12 months ago

Was this helpful?

Assigning Users to a Group

Users once created in the Cymmetri platform can be assigned to a group. Assigning users to a group helps ease the administrative efforts to apply the same policies and assigning applications to multiple users.

When assigning users to groups there can be various approaches which can be used:

  • Adding User to Group (from the Group Page)

  • Assigning a Group to a User (from the User's Page)

  • Bulk Assigning Users to a Group (Using Group Assignment on Group Page)

Adding User to Group

First the administrator needs to click on the group name and enter the configuration for the group.

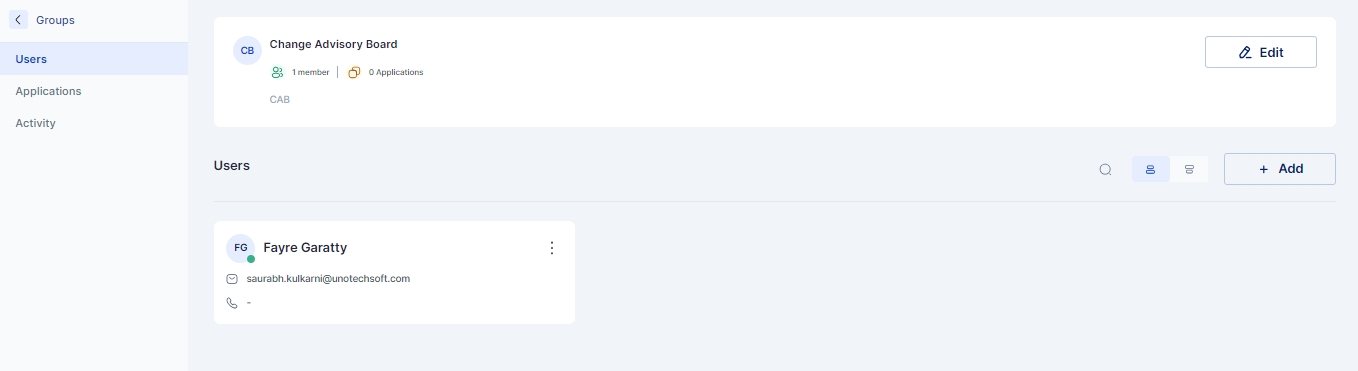
Now Go to the Users Page and click on +Add button to get a list of users to add to the group

3. Now click on the assign button next to the user you wish to add to the group.

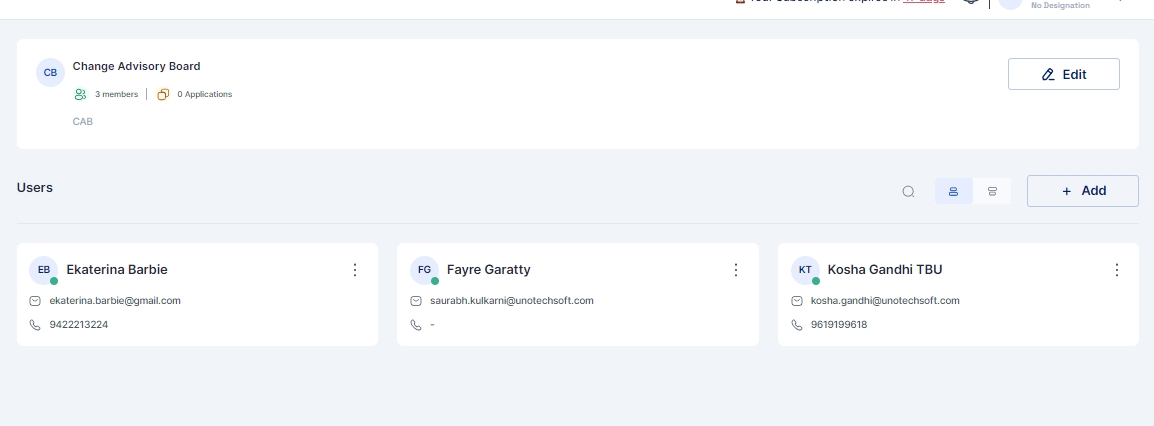
Once assigned the user can be seen on the Users page of the Group as shown below:

Assigning a Group to a User

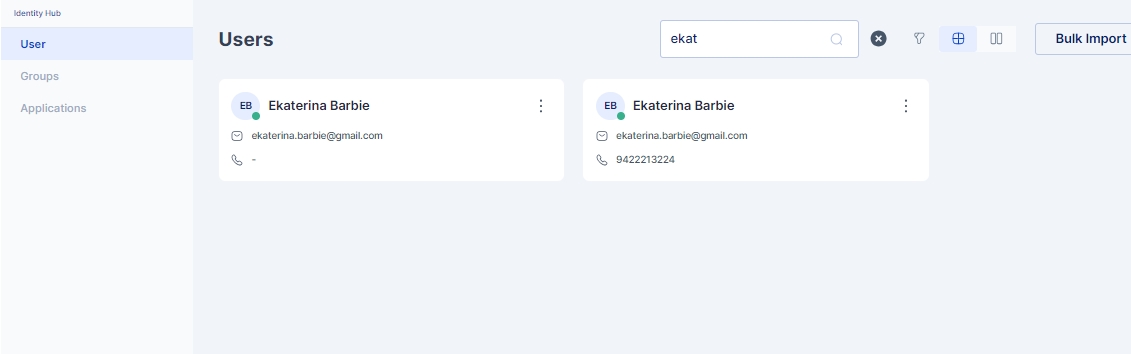
For this approach the Administrator needs to go to Identity Hub > User page and then select the user from the list to whom the group needs to be assigned

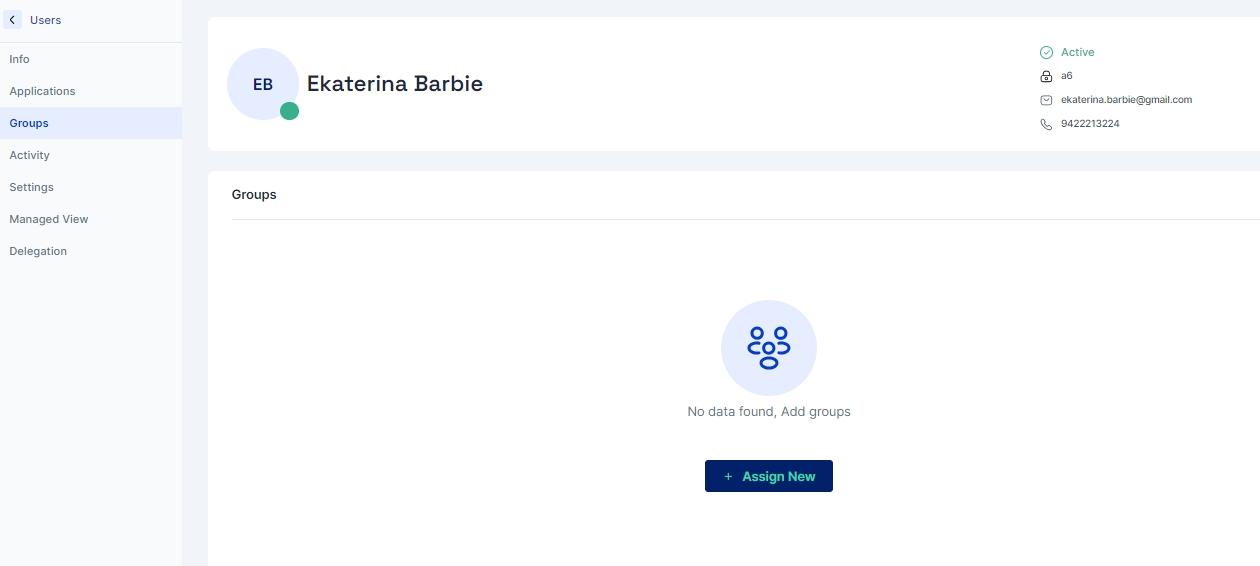
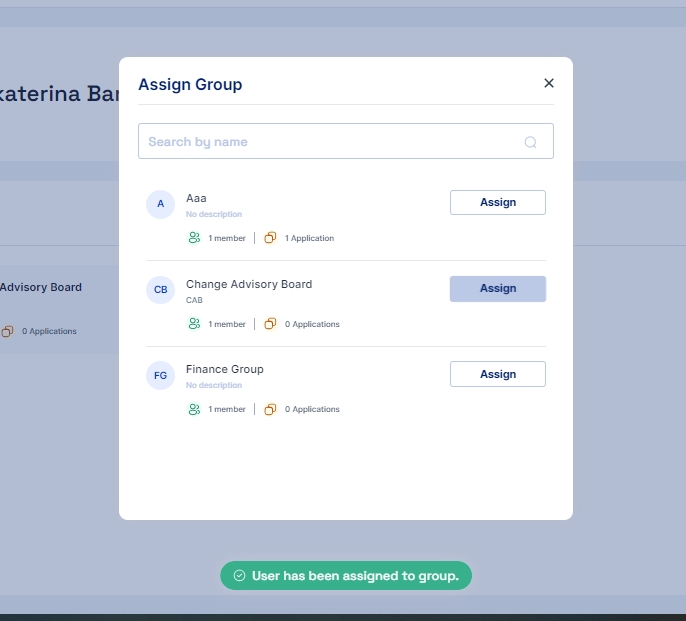
Go to the user's page and select the Groups menu and click on "+Assign New" button

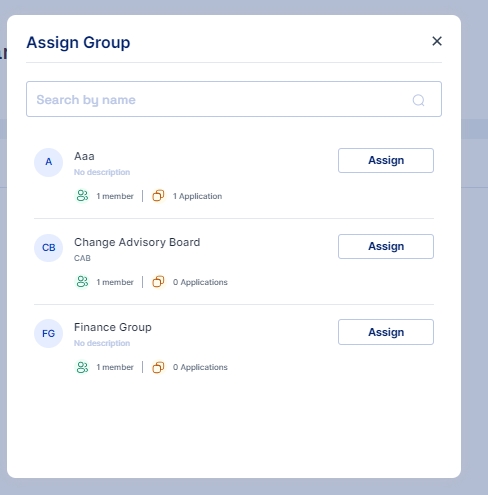
This opens a pop up window where a list of all groups is visible

Click on the assign button and the group is assigned to the user or you may say the user becomes a part of the group

Bulk Assigning Users to a Group

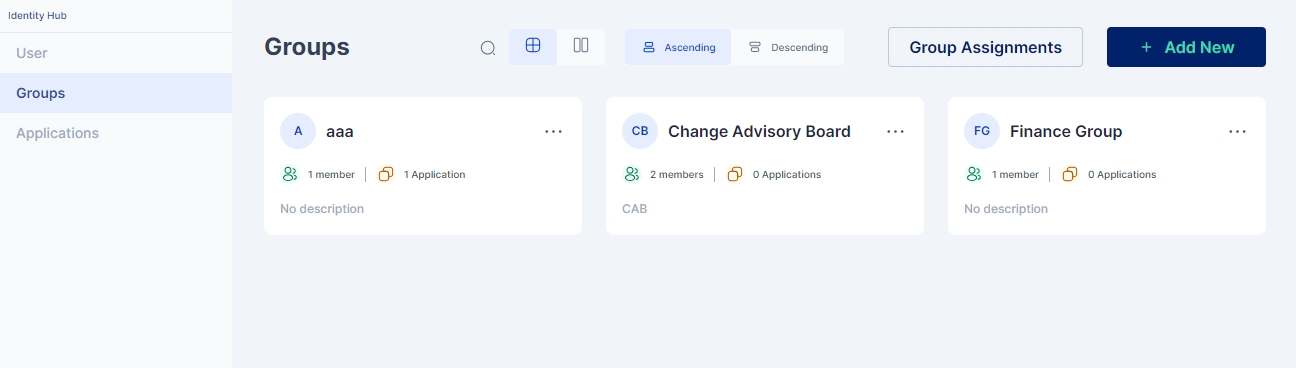
For this approach the Administrator needs to go to Identity Hub > Group page and then click on the Group Assignment button

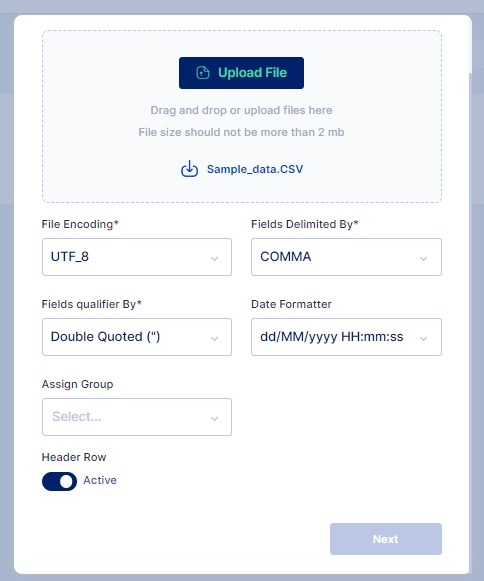
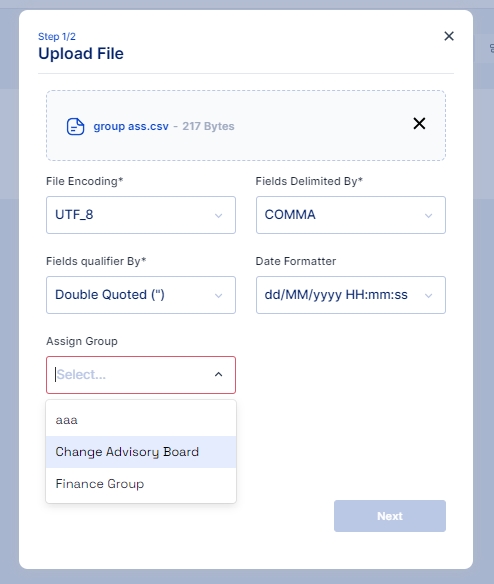
A screen pops up that lets you select the csv file you want to upload to import the users that needs to be assigned to the group. This csv file needs to have one column that contains login id of users; Upload the csv file, you may also use the sample data file available and modify it to match your user's login id.

Once the file is selected and uploaded next you need to select the group to which you want to assign the users.

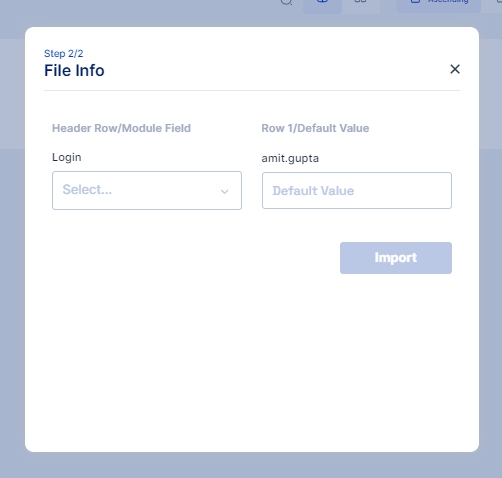
After selecting the group the column in the csv file needs to be mapped with the Cymmetri login column.

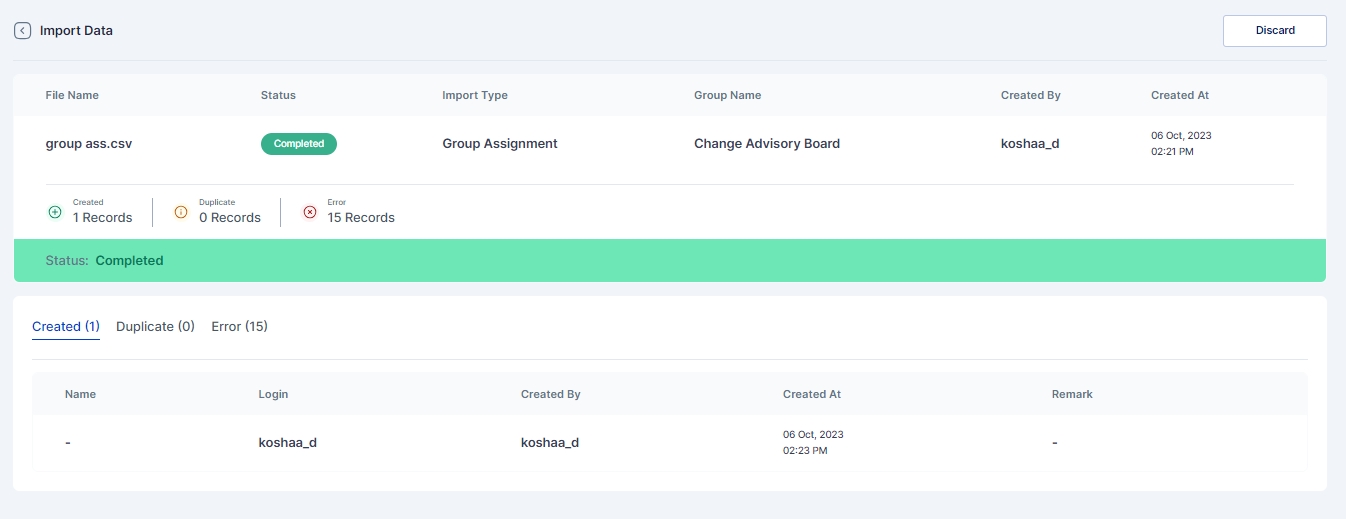
Once mapped click on the import button and the users would be mapped to the assigned group provided the login id is correct

Results of successfully Imported Users, Duplicate Users or any error that occurred during import can be see in Logs > Import History page