External Identity Provider Configuration - Salesforce IDP
Last updated
Was this helpful?
Last updated
Was this helpful?
Note: The link below shows steps as suggested by Salesforce to configure Salesforce as an Identity Provider: https://help.salesforce.com/s/articleView?id=sf.sso_sfdc_idp_saml_parent.htm&type=5
Here below the same steps are demostrated to use Salesforce as and Identity Provider and Cymmetri as a Service Provider.
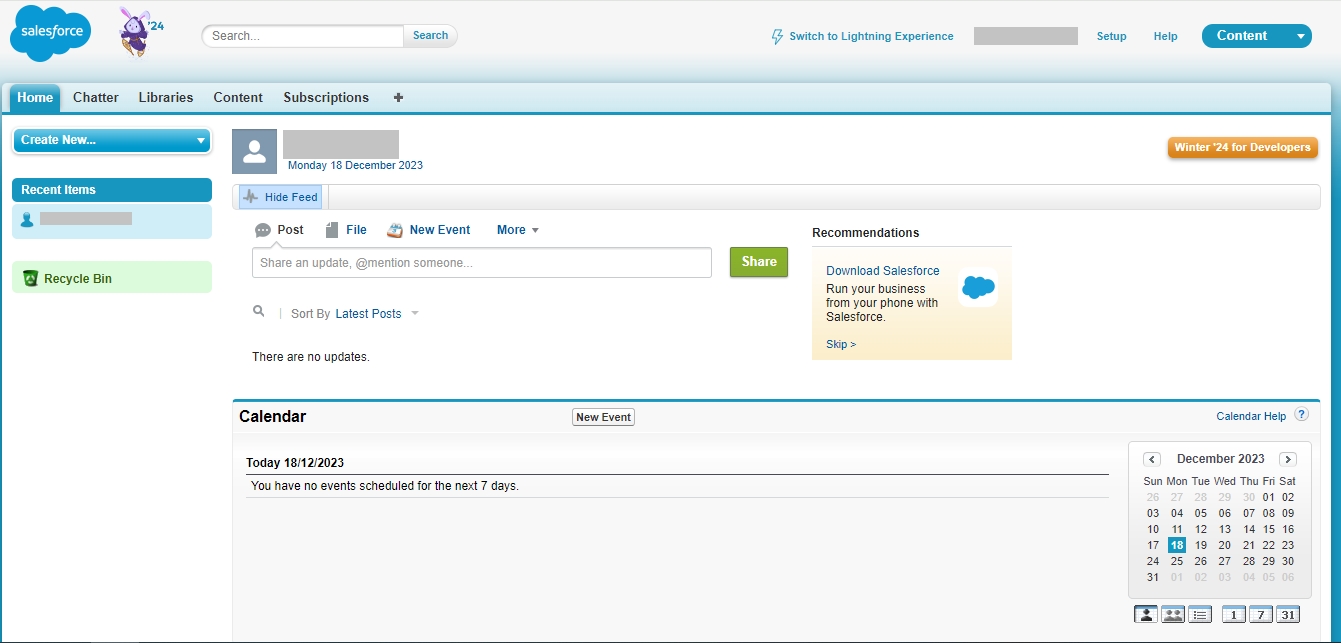
For configuring Salesforce to be used as an IDP the Salesforce Administrator needs to login in Salesforce as shown below:
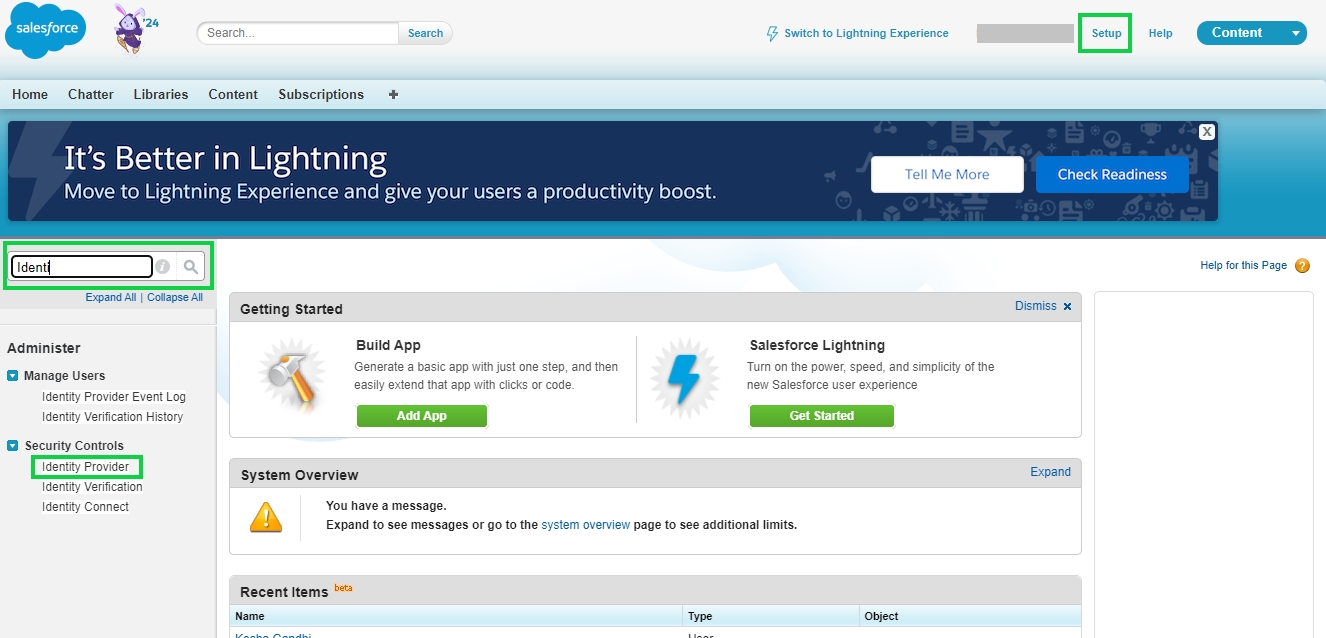
Once logged in the administrator needs to click on Setup on top right and then in the search bar on the right side search for Identity Providers. Once found click on Security Controls -> Identity Provider menu
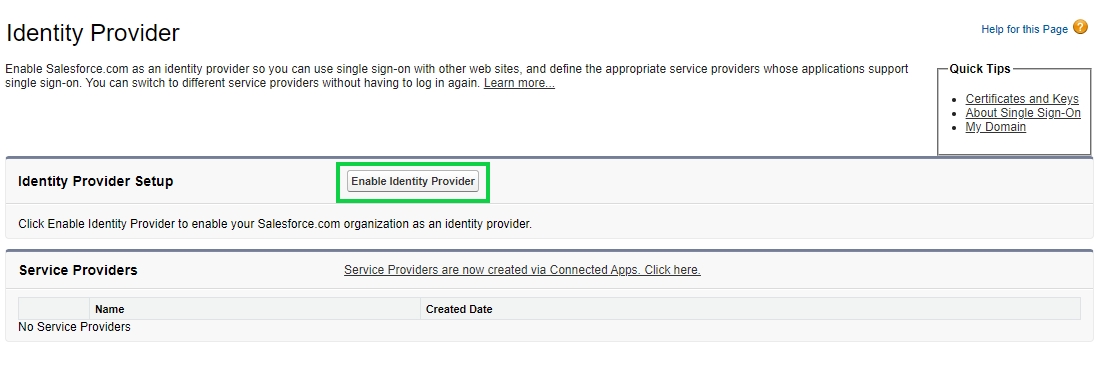
When the Identity Provider page opens click on Enable Identity Provider button to enable Salesforce as and Identity Provider so that it can be used for authentication in Cymmetri.
When the Enable Identity Provider button is clicked it opens a page that asks you to choose a certificate. Select the default certificate here and click Save.
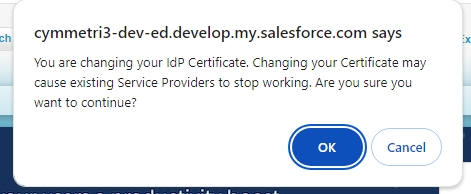
When saved it shows a warning message as below just click OK button and continue.
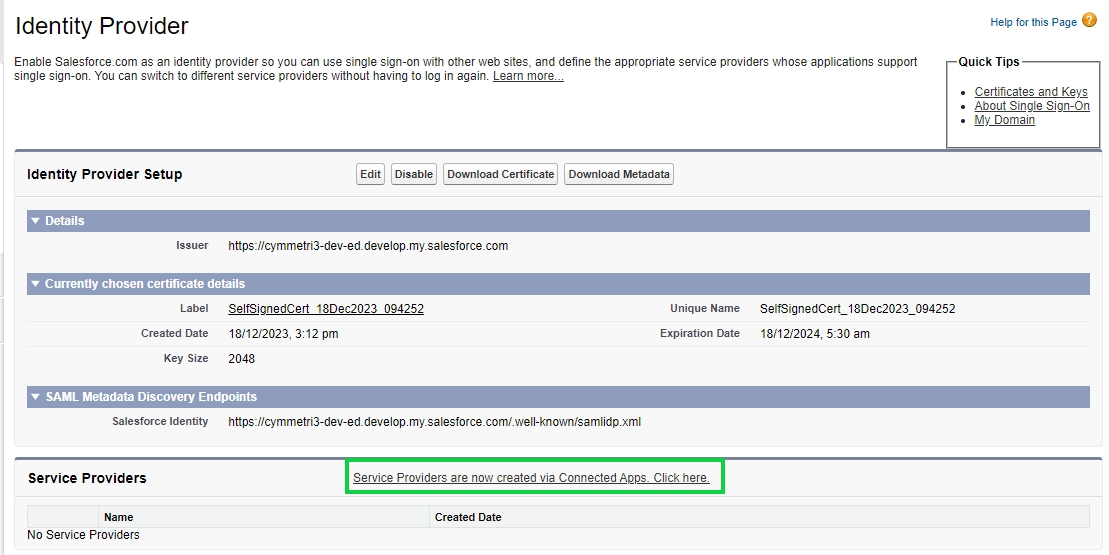
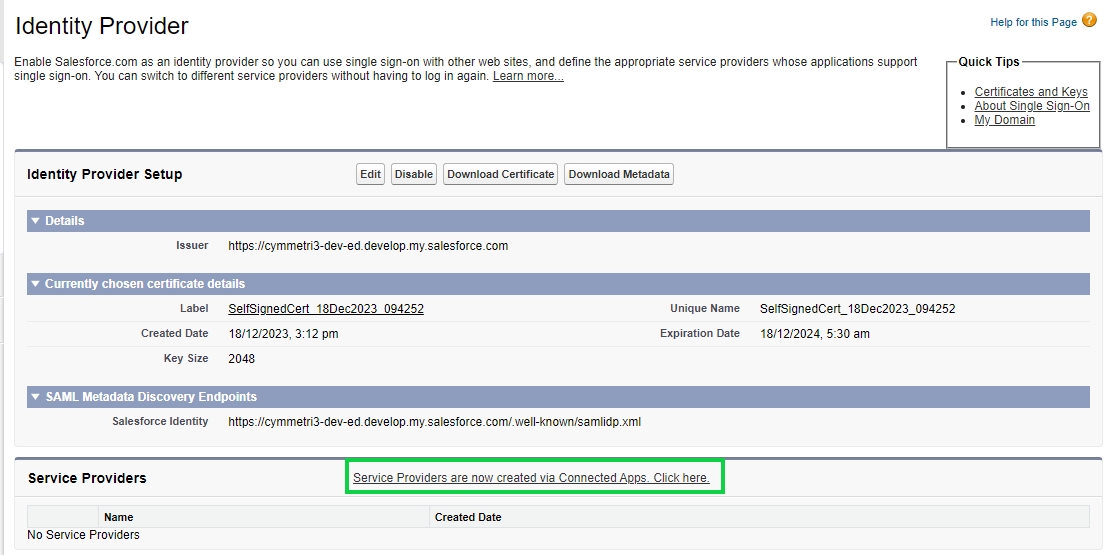
Once confirmed the screen as show below appears you may download the certificate and the metadata file here using the Download Certificate and Download Metadata buttons. These files can be downloaded later during the end the process which can be seen later in the documentation below.
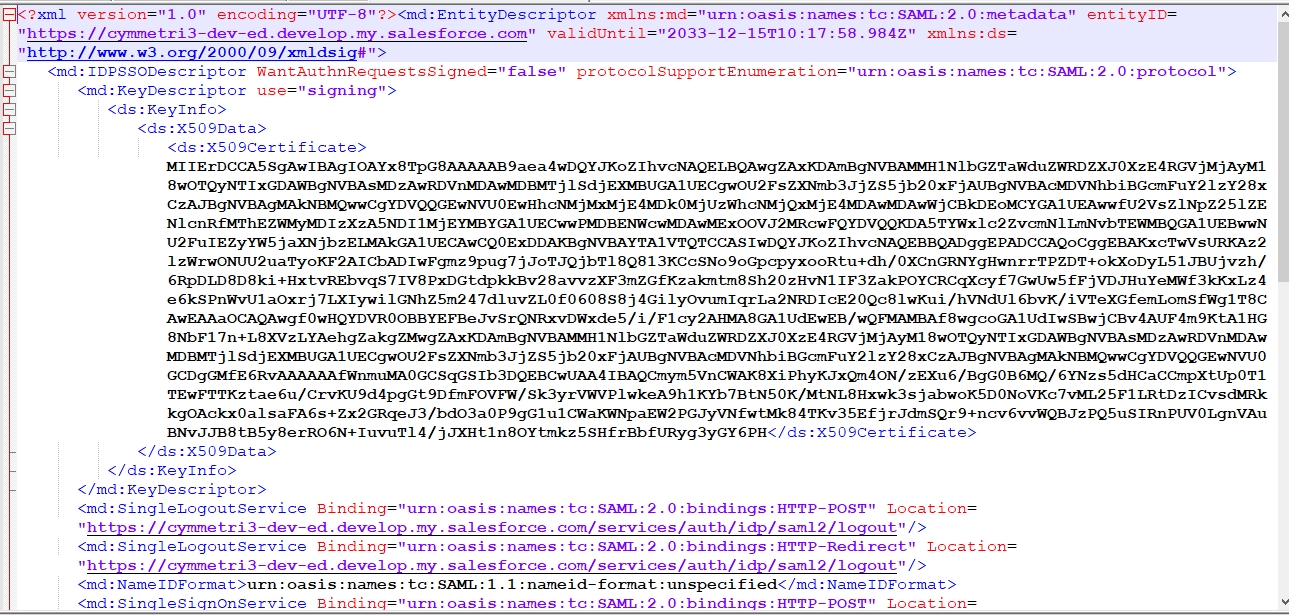
The metadata file appears as below, this data is used later to configure the External IDP in Cymmetri.
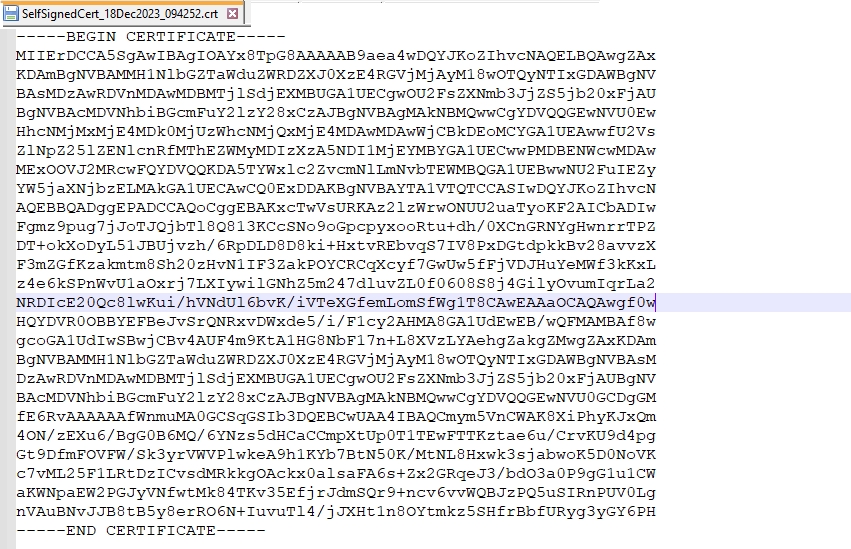
The certificate file appears as below this is also needed when configuring the External IDP in Cymmetri.
Once the files are downloaded next to add the Service Provider the salesforce administrator needs to click on Service Providers are now created via Connected Apps. Click here link. The mentioned link allows to create a Connected App for Cymmetri which acts as a service provider in Salesforce.
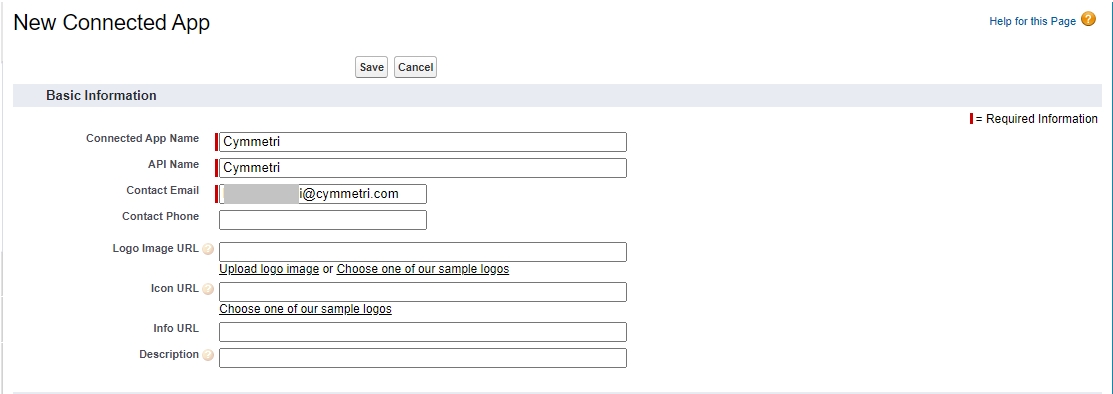
The link above leads to the page below where a new connected app can be added. Following details need to mentioned to add a connected app:
Connected App Name: App Name (Cymmetri in this case)
API Name: Auto-populated based on Connected App Name field, can be changed
Contact Email: a valid contact email
Note: Other fields shown in the image below are optional and hence can be skipped.
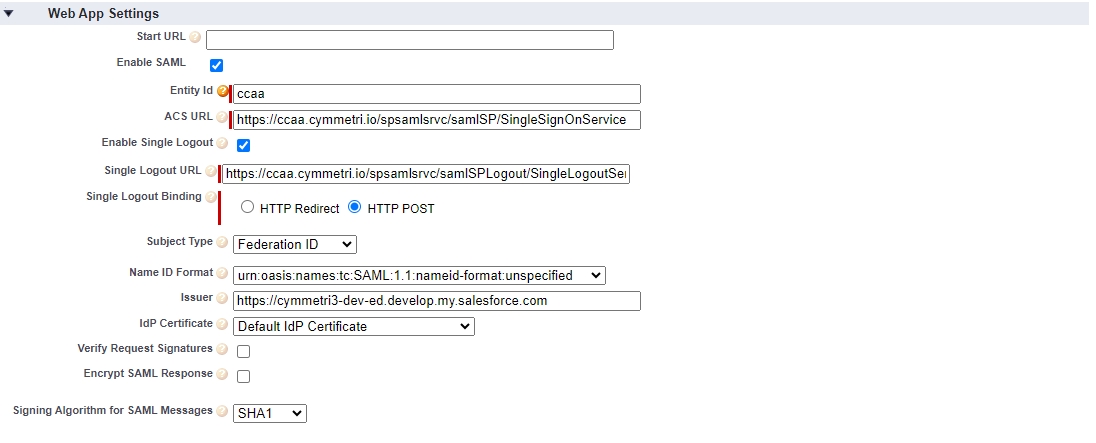
Next on the same page there is a section called Web App Settings here click on Enable SAML to enable the SAML settings. Once enabled all the below mentioned details need to be provided.
Entity Id: A unique identifier for a SAML entity, such as a Service Provider (SP) or Identity Provider (IDP), within a federated authentication environment.
ACS URL (Assertion Consumer Service URL): The endpoint where a service provider expects to receive SAML assertions from an identity provider, facilitating single sign-on (SSO) in a federated system.
Enable Single Logout: A configuration option indicating whether the system supports single logout functionality, allowing users to log out of all connected services in a federated environment with one action.
Single Logout URL: The endpoint to which a SAML entity sends logout requests as part of the single logout process when a user logs out of the federated system.
Single Logout Binding: The protocol or method used to transmit single logout requests and responses between SAML entities, often specified as either HTTP Redirect or HTTP POST.
Subject Type: Specifies the type of subject identifier used in SAML assertions, such as transient, persistent, or bearer, indicating how the identity of the user is communicated between the identity provider and the service provider.
Name ID Format: Defines the format of the NameID element in SAML assertions, determining how the user's identity is represented, such as email address, X.509 certificate, or unspecified.
Issuer: Identifies the entity that issues a SAML assertion, typically the identity provider, and is included in the SAML assertion to establish trust between the entities in a federated system.
IDP Certificate: The public key certificate associated with the identity provider, used by the service provider to verify the authenticity and integrity of SAML assertions and messages.
Signing Algorithm for SAML Messages: Specifies the cryptographic algorithm used to sign SAML messages, ensuring the integrity and authenticity of the information exchanged between identity providers and service providers in a federated
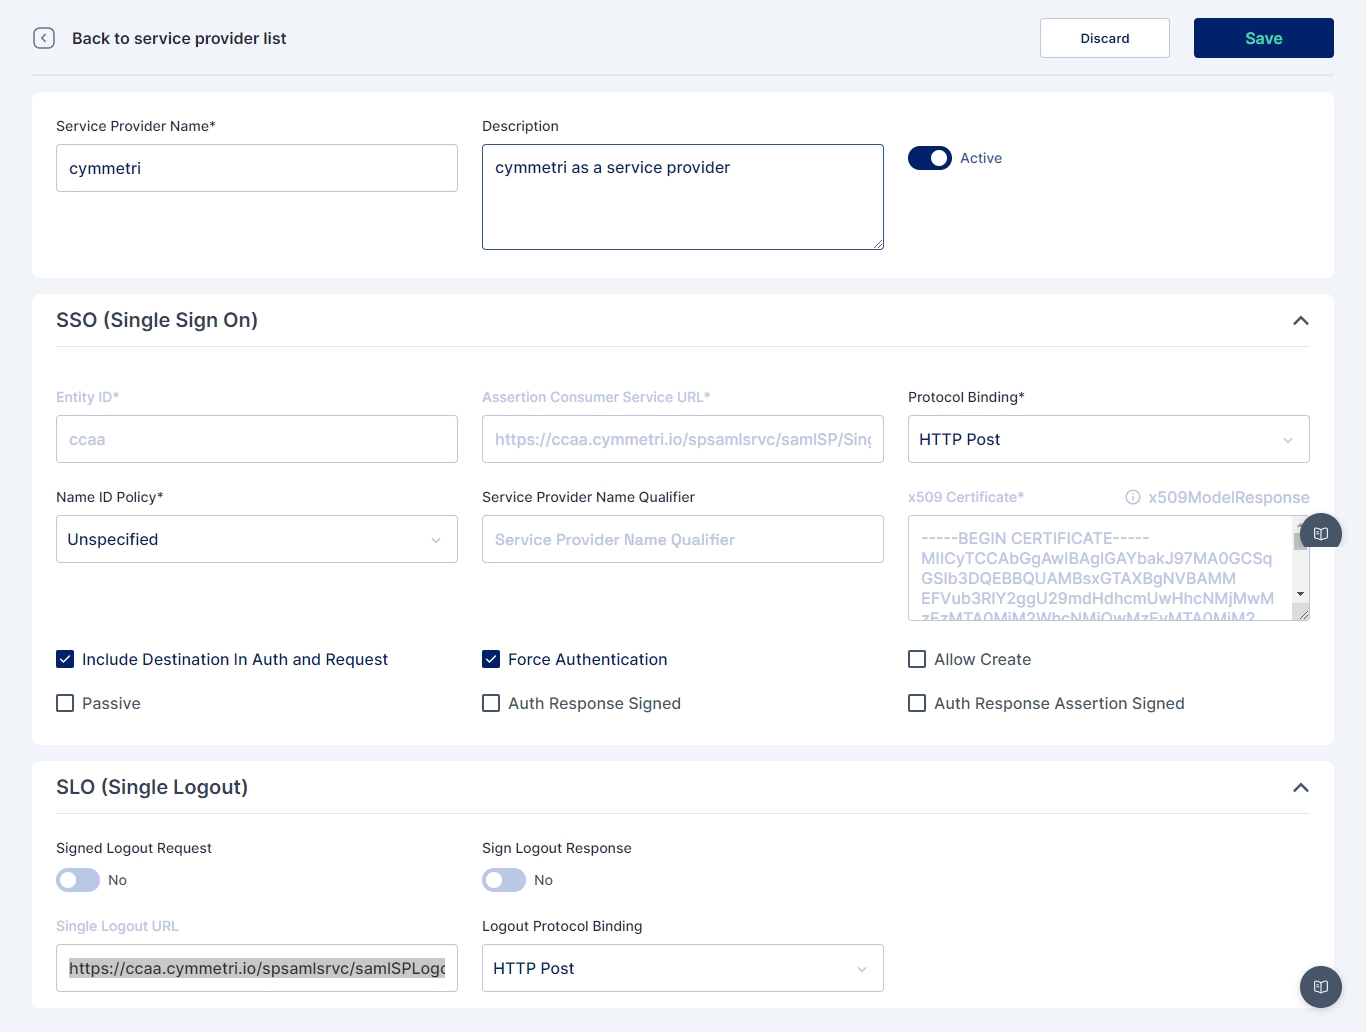
The above mentioned details can be obtained by adding a service provider in Cymmetri as shown below. To know more about how to add a service provider in Cymmetri click here. Once created these details can be used in Salesforce as shown above.
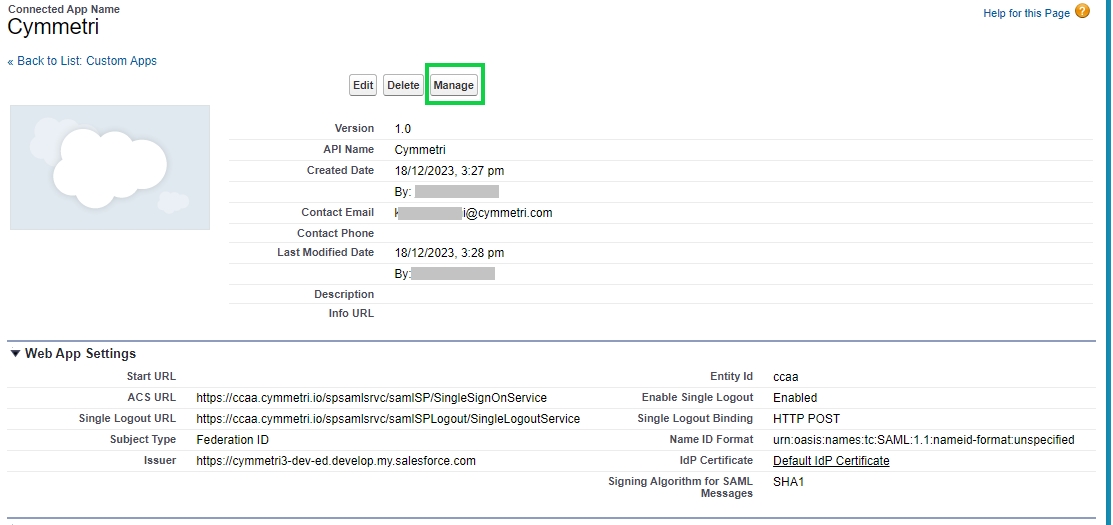
Once all details are successfully added and saved the screen as below appears which shows the configuration details.
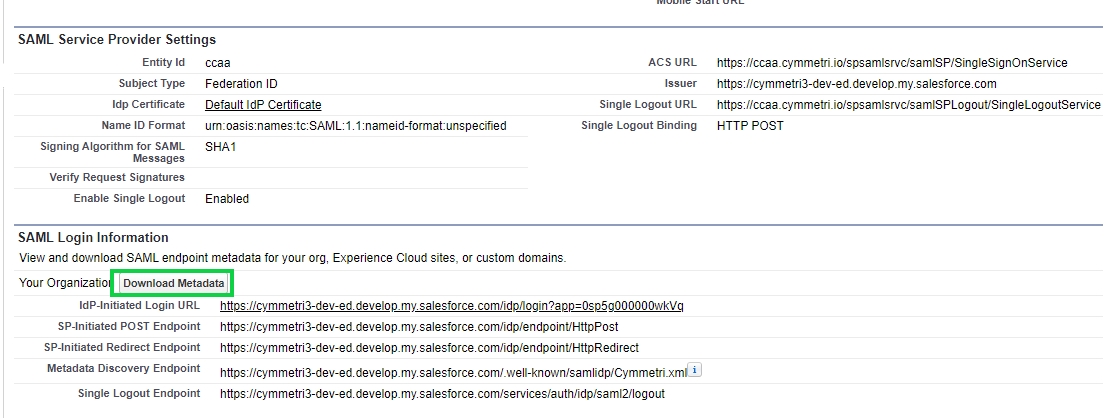
Administrator can click on Manage button (as shown above) to view SAML Service Provider Settings and SAML Login Information. Administator can also download metadata file here.
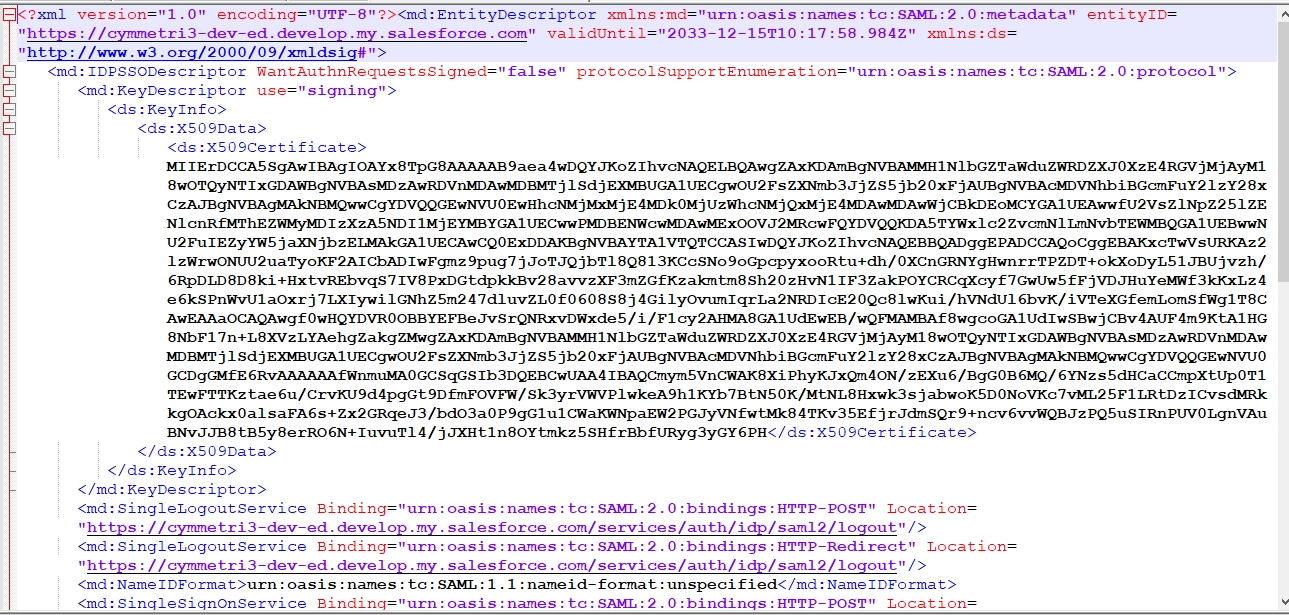
The downladed metadata file appears as below. The details mentioned in the metadata file are used to configure an External IDP in Cymmetri.
Based on the diverse profiles of users in Salesforce, the administrator needs to enable Connected App Access for these profiles. Here in this example access has been enabled for the System Administrator; similarly, it should be enabled for all profiles of various users who are intended to access Cymmetri.
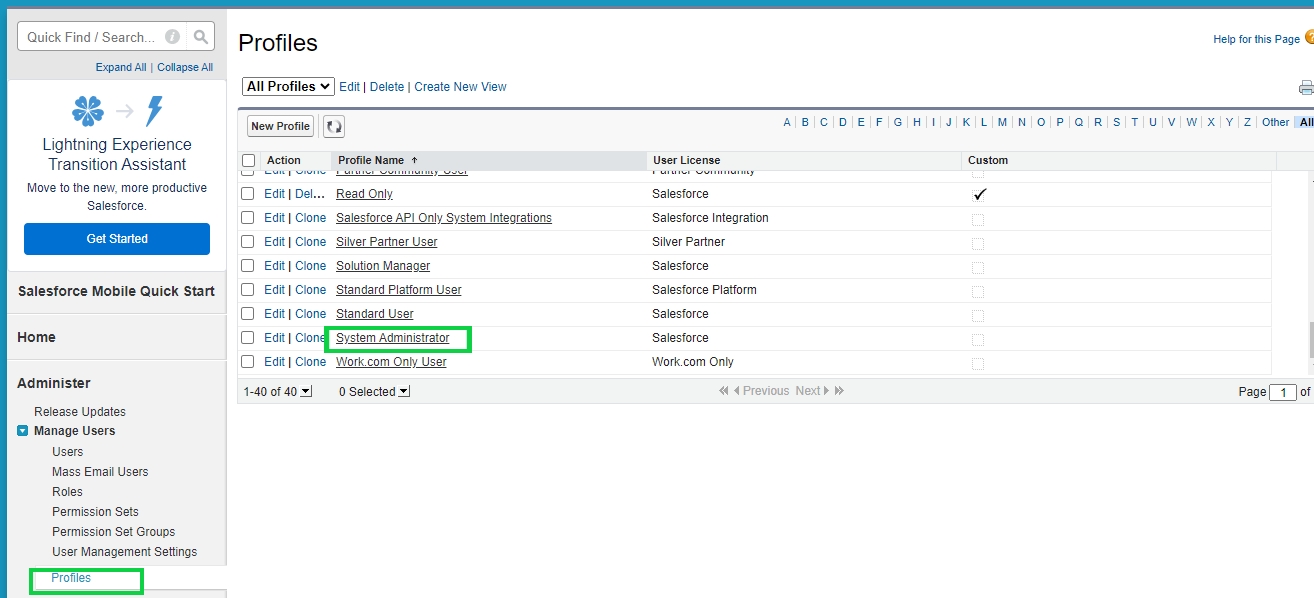
For enabling the connected app administrator needs to go to Setup->Manage Users-> Profiles, then select the profile for which the connected app needs to be enabled
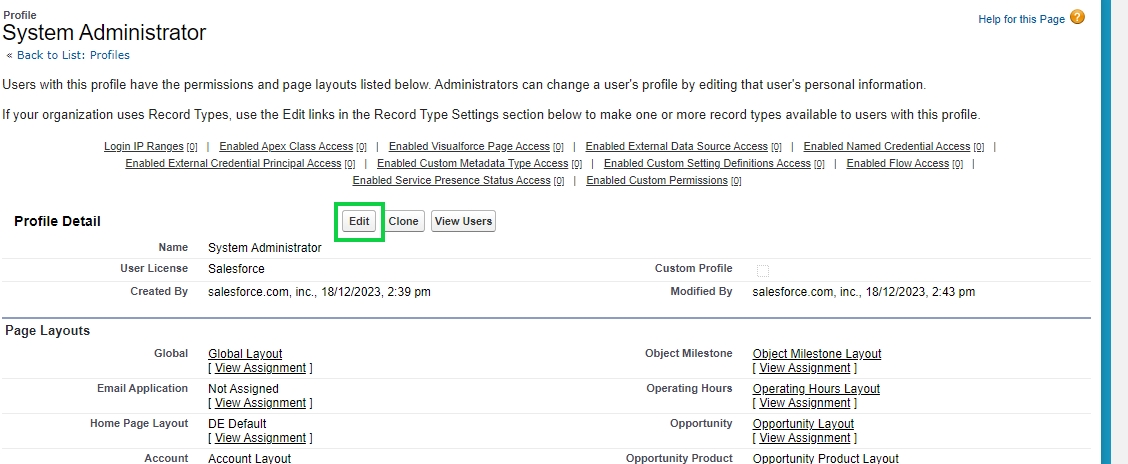
Once the profile is selected click on Edit button and look for Connected App Access section.
In the Connected App Access section look for the custom app you created(Cymmetri in this case) and click the checkbox to enable the access.
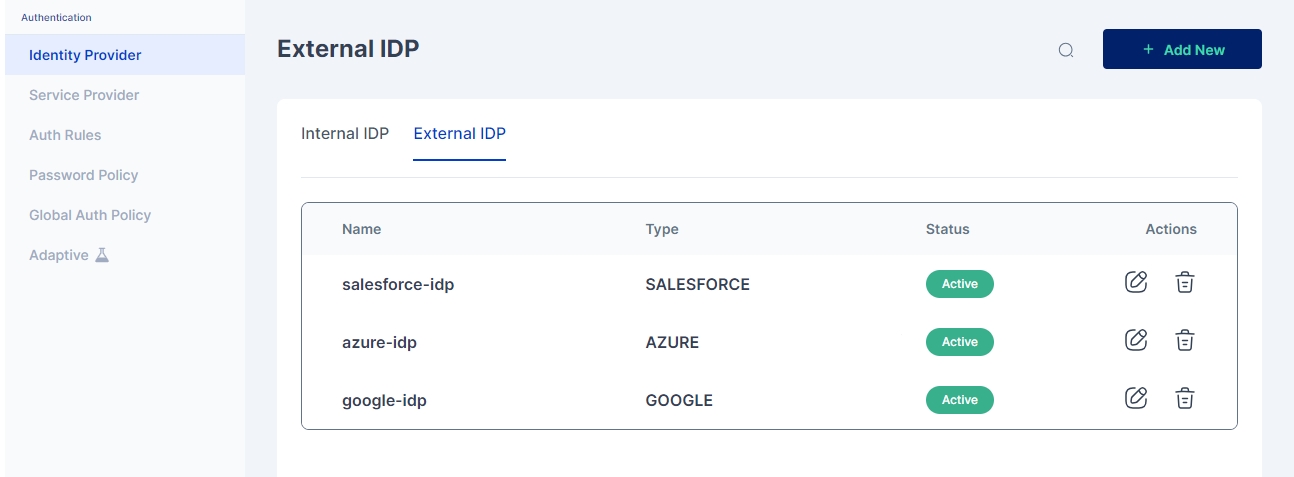
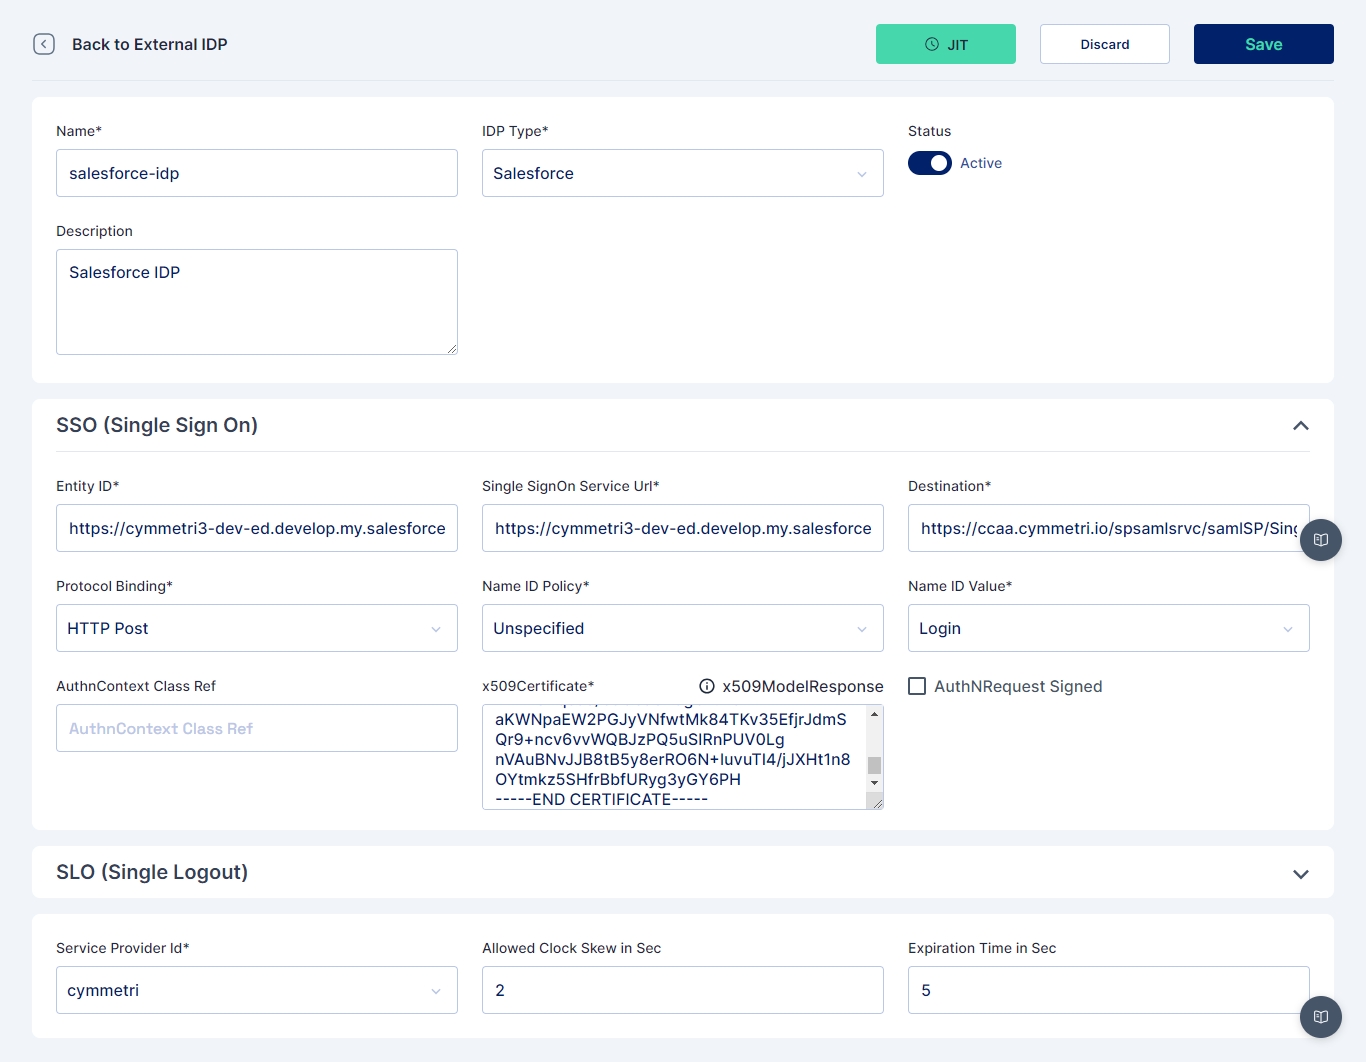
Once all the configurations on Salesforce end are done, the administrator must proceed with the configuration on the Cymmetri side. To achieve this, the administrator needs to go to Authentication->Identity Provider->External IDP. Here you may either configure the already created salesforce-idp instance or +Add New
In either cases a screen opens where you need to provide the below mentioned details
Name: salesforce-idp
IDP Type: Salesforce
Entity ID: Need to mention the EntityID from the metadata file downloaded from Salesforce
SSO Service URL: Need to mention the SingleSignonService url from the metadata file downloaded from Salesforce
Destination: https://<hostname>/spsamlsrvc/samlSP/SingleSignOn
Protocol Binding: HTTP Post (can also be set to HTTP Redirect if it is set so in Salesforce)
Name ID Policy:
Policy: Unspecified(This may change based on what is configured in Salesforce)
Value: Login(This may change based on what is configured in Salesforce)
Certificate: Certificate downloaded from Salesforce
Logout Request URL: Need to mention the SingleLogoutService url from the metadata file downloaded from Salesforce
Logout Protocol Binding:HTTP Post (can also be set to HTTP Redirect if it is set so in Salesforce)
Service Provider Id: cymmetri (Need to the select the configured Service Provider as shown above)
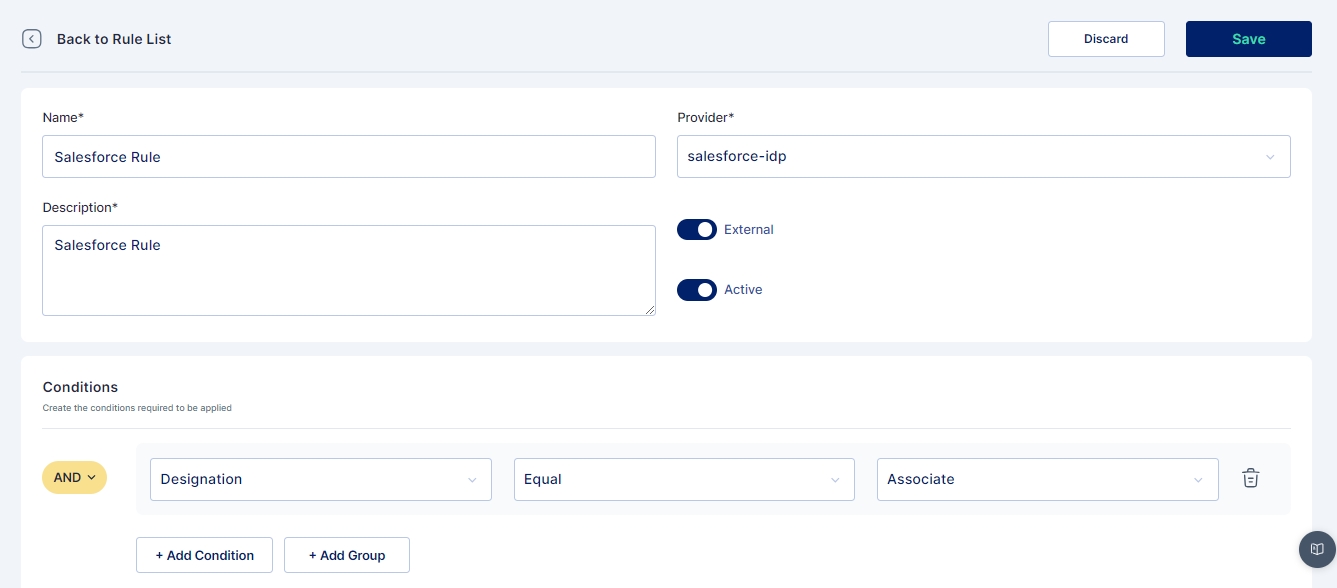
Once the external IDP is configured next we need to configure Authentication Rules as explained here and as shown below. Conditions mentioned here may vary based on actual scenario in which the IDP needs to be applicable.
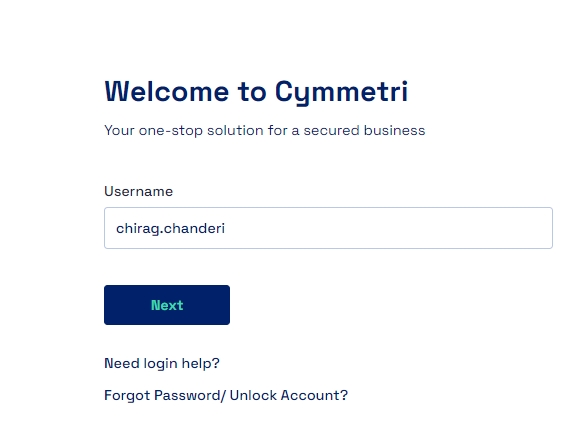
Now the user can login into Cymmetri using Salesforce. The user needs to provide his/her username and click on Next.
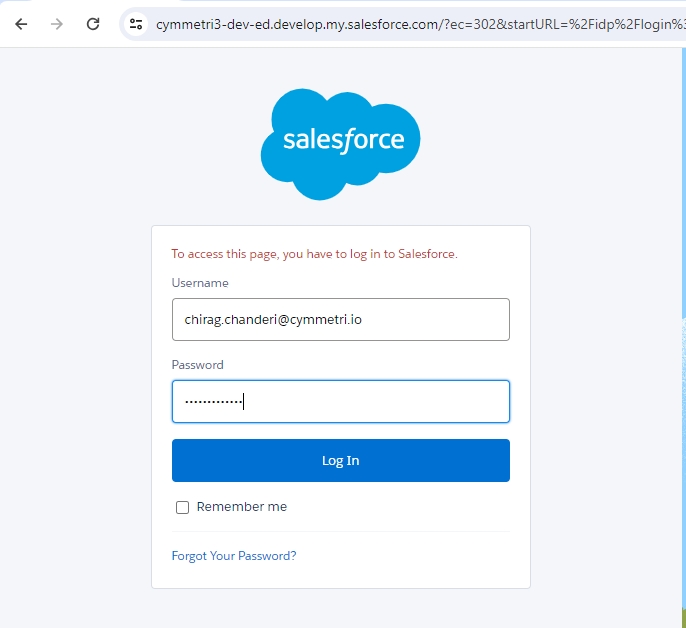
The user is then redirected to Salesforce login page where the user needs to enter their Salesforce credentials and click on Log in
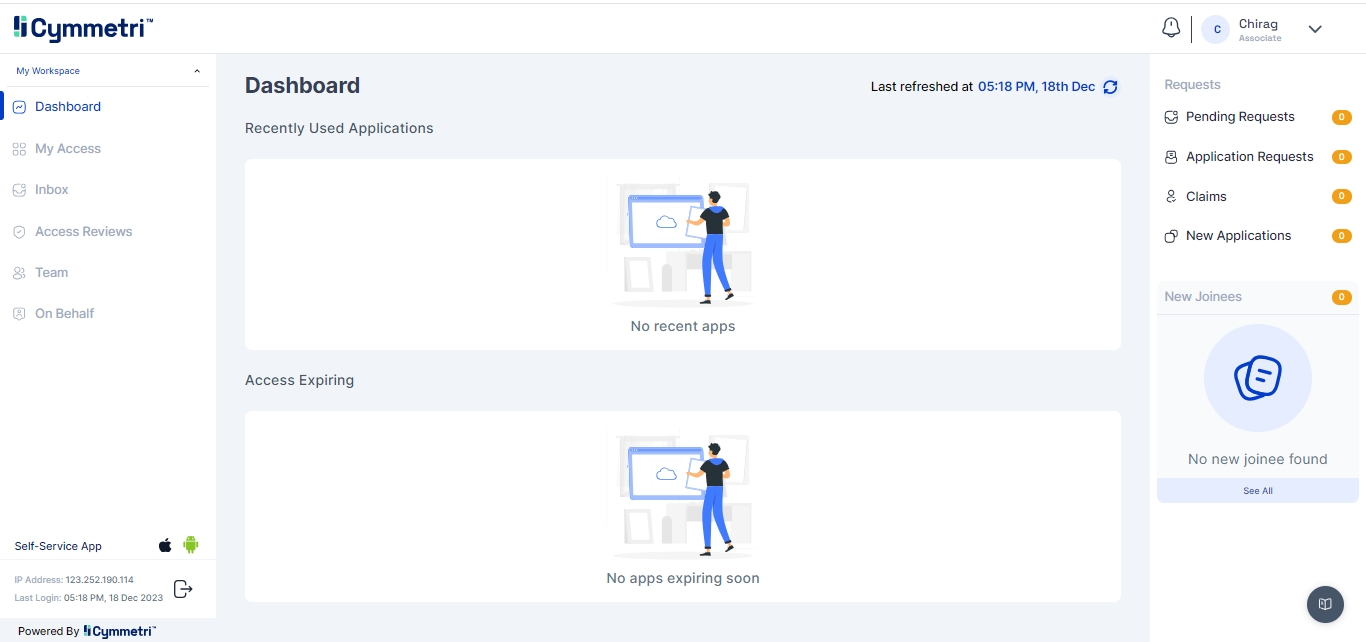
Once the salesforce credentials are successfully validated the user is redirected to Cymmetri home page.
