Assigning Applications to End Users
Once the managed application has been added to your Cymmetri Identity platform tenant, you will be able to assign applications to your end-users.
Application Assignment
There are three ways in which applications can be assigned to users:
Admin may assign an application directly to a user.
Admin may map an application to a group; and the user is added to the group or is already part of the group.
End User may request an application and is granted access to the application.
Bulk Assignment of application to a set of users
Let us understand the flow for each of the above mentioned scenarios:
1. Admin assigns an application directly to the end user
Users with admin roles such as Organization Admin, Domain Admin, or Application Admin on the Cymmetri platform can assign managed applications to end-users .
First, we need to add the application to the Cymmetri platform
Next, we move to configure the application to assign it to an end user.
Click on the application tile to configure it.

The flow for assignment goes as follows -

Description:
Admin clicks on the application tile, and starts the configuration.
Click on the Assignments tab on the left hand side menu.

Click on the “Assign New” button on the Users menu.

Search for a user in the search text box, and once the user is found, click on the “Assign” button.

Here we need to decide whether we want to provide a Lifetime Access or a Time Based Access
Lifetime Access: Users have access to the application without any time restrictions.
Time Based Access: Users have access to the application only for the specified range of time. We need to provide a Start Date & Time and an End Date & Time for Time Based Access.
Now click on Save to register a request for the application assignment. If no Workflow is configured for the said application the application is immediately assigned to the user.
If a workflow for application provisioning is configured then the workflow is been initiated.
The workflow approver will then receive a request to approve the user assignment in their inbox.

Now the approver may approve or reject the user assignment

The approver may change the start and end date, if required; refer to the dynamic form attributes passed during the application assignment.
To continue the flow click on Accept button.
Now the next level of approver will be able to see the previous levels of approval, and similar to the previous level of approval, the approver may change the start and end date, if required; refer to the dynamic form attributes passed during the application assignment.

Click “Accept” to proceed.
After the last level approver has also approved the assignment, the backend processes will run the application provisioning flow.
Once the user has been provisioned in the application, they will be able to see it in their list of applications.

2. Admin assigns an application directly to a group
Users with admin roles, such as Organization Admin, Domain Admin, or Application Admin, in a Cymmetri Identity platform deployment, will have the ability to assign entire groups of users to managed applications.
First, we need to add the application to the Cymmetri platform
Next, we move to configure the application to assign it to a group.
Click on the application tile to configure it.

The flow for assigning a group to an application goes as follows:

Description:
Click on the application tile, and start the configuration.
Click on the Assignments tab on the left hand side menu.

3. Click on the “Assign New” button in the Groups section.

4. Search for the group you wish to assign the application to and click on the assign button.

5. Checking for the users who belong to the group, we can see that the application has been assigned.

6. Viewing the application tiles, we can see if the user was directly assigned the application or received access by the virtue of being part of a group.
3. User requests for an application
Users on the Cymmetri platform can request access to a managed applications as a Self-Service feature.
The flow for an end-user to request for an application is as follows:

Description:
Visit the “My Workspace” menu.
Click on the “My Access” left-hand side menu.

3. Now Click on the “+ Request” button on the top-right button.

4. Click on the Application Icon to start the request process

Here we need to decide whether we want to provide a Lifetime Access or a Time Based Access
Lifetime Access: Users have access to the application without any time restrictions.
Time Based Access: Users have access to the application only for the specified range of time. We need to provide a Start Date & Time and an End Date & Time for Time Based Access.
Now click on Save to register a request for the application assignment. If no Workflow is configured for the said application the application is immediately assigned to the user.
If a workflow for application provisioning is configured then the workflow is been initiated.
The workflow approver will then receive a request to approve the user assignment in their inbox.

Now the approver may approve or reject the user assignment

The approver may change the start and end date, if required; refer to the dynamic form attributes passed during the application assignment.
To continue the flow click on Accept button.
Now the next level of approver will be able to see the previous levels of approval, and similar to the previous level of approval, the approver may change the start and end date, if required; refer to the dynamic form attributes passed during the application assignment.

Click “Accept” to proceed.
After the last level approver has also approved the assignment, the backend processes will run the application provisioning flow.
Once the user has been provisioned in the application, they will be able to see it in their list of applications.

4. Bulk Assignment of application to a set of users
An administrator can bulk assign an application to a set of users. This an be achieved by uploading a .csv file which contains user information like., loginId, appUserId and roleId. For bulk assigning applications to users in Cymmetri platform administrator needs to
Click on Identity Hub > Applications menu and then click on the Applications Assignments button.

A screen pops up that lets you select the csv file you want to upload that contains the list of users to whom the application needs to be assigned, Upload the csv file, you may also use the sample data file available and modify it to match your user details.
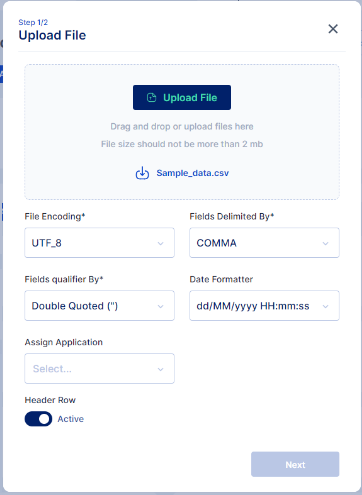
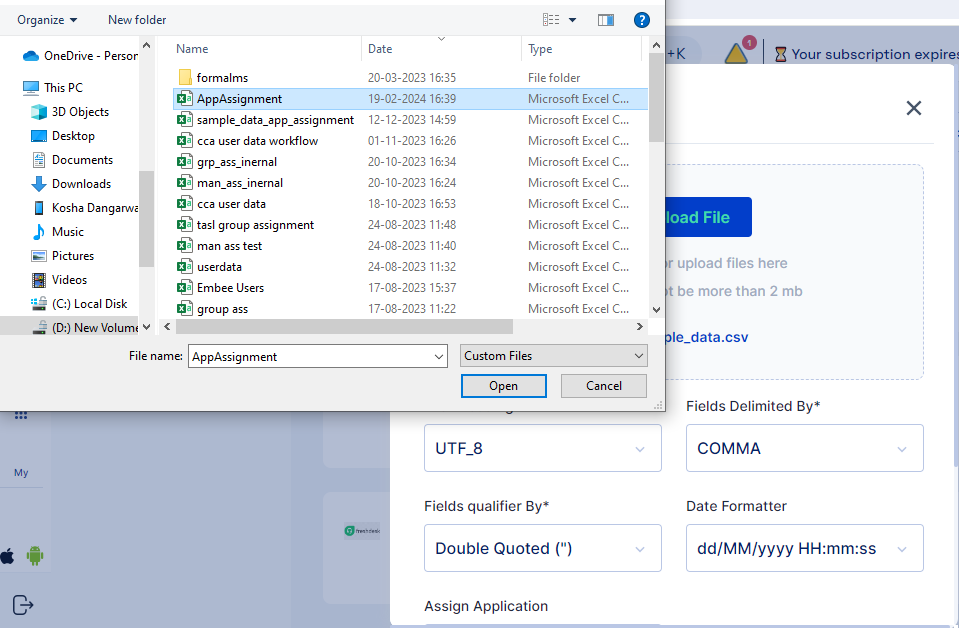
Click on the Upload File button and select the file you wish to import
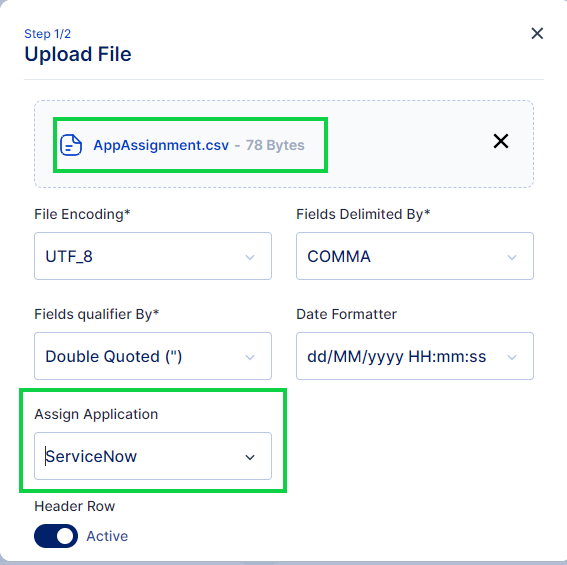
Once the file is selected ensure that the default parameters select match your requirement else you may change these parameters as per your requirement.
Once you have ensured the parameters are correct next select the application that needs to be assigned and click on Next button.
Match the Column names from the CSV file with the corresponding attributes using this File Info dialog box and click on the Import button.
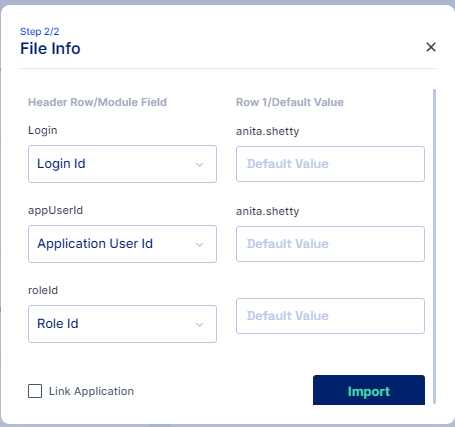
Note: The "Link Application" check box is available to provision the user in the target application
Once Imported results of successfully Imported Users, Duplicate Users or any error that occurred during import can be see in Logs > Import History page

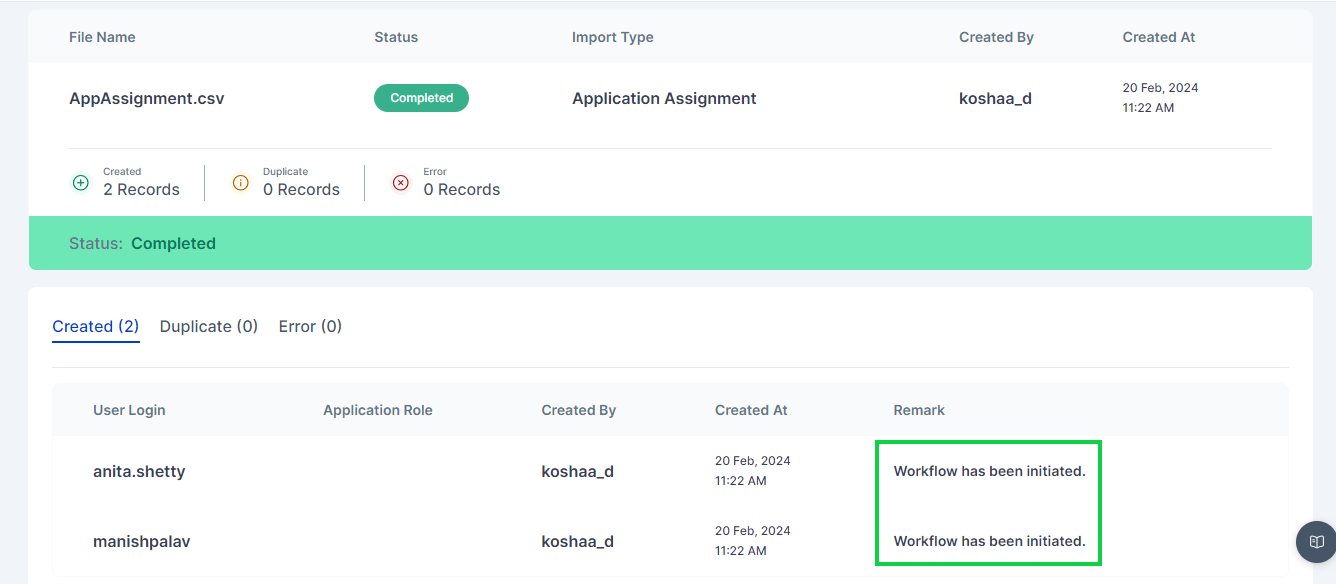
If any workflow is configured on the application provisioning then the corresponding workflow is triggered after the successful completeion of assignment as shown below:
Last updated