Google Workspace Provisioning
Google Workspace is a software-as-a-service platform (SAAS) that provides email, calendar, documents and other services. This connector uses the Google Workspace provisioning APIs to create, add, delete and modify user accounts and email aliases.
Note: 1. Only the Premium (paid) or Educational versions of Google Workspace provide access to the provisioning APIs. 2. Connector will not work on the free Google Workspace Domain
Configuration
For Configuring Google Workspace for provisioning we need to first obtain the client_secret.json file from the Google Workspace instance.
Create New Project
Go To https://console.developers.google.com/ and create a new Project if not already created. A new project needs to be created because it allows you to manage the credentials required to access Google APIs and services securely. A new project can be created by clicking on the New Project on top right or by clicking on the the Resource Dropdown
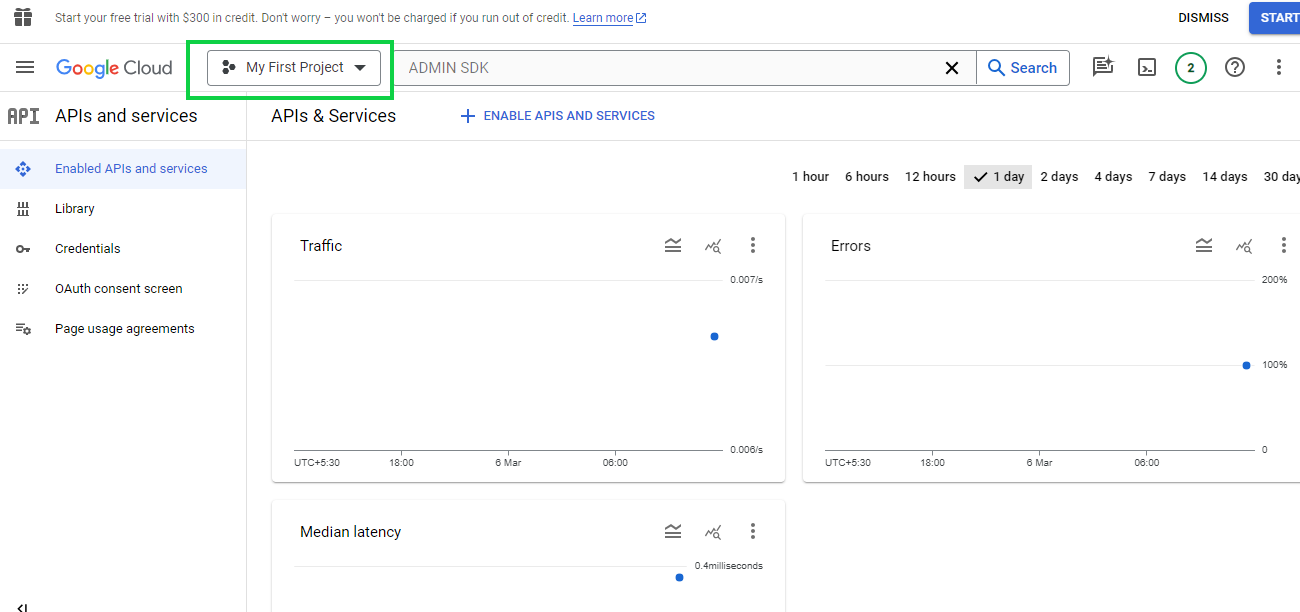
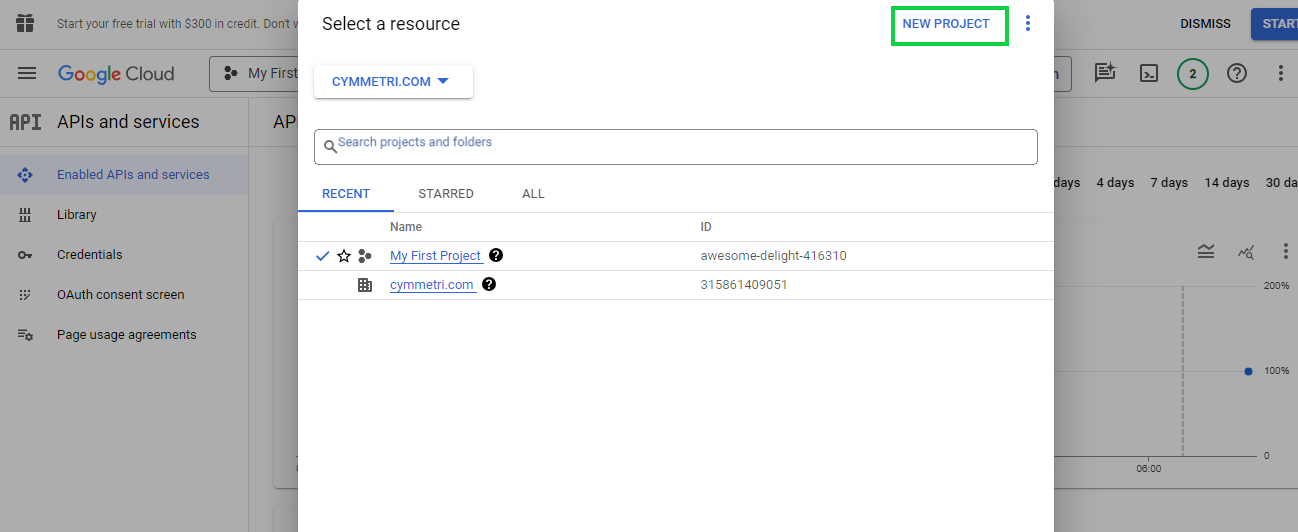
And the on the NEW PROJECT link on top right
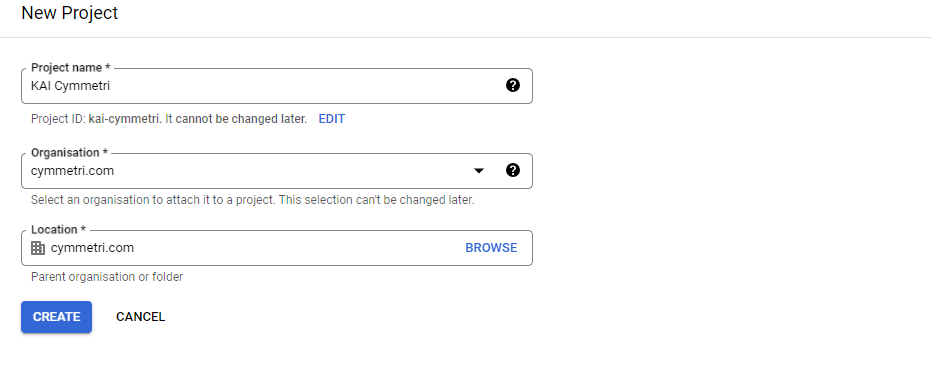
Next enter the Project name and select Organisation and Location as shown below and click on CREATE button
ADMIN SDK API:
The Admin SDK API is needed to programmatically manage and interact with various aspects of a Google Workspace domain, such as users, groups, organizational units, and settings. Here are some key reasons why the Admin SDK API is essential:
User Management: The Admin SDK API allows you to create, retrieve, update, and delete user accounts in your Google Workspace domain. You can manage user details such as name, email address, password, and organizational unit.
Group Management: You can create, retrieve, update, and delete groups within your Google Workspace domain using the Admin SDK API. This includes managing group members and settings.
Organizational Unit Management: The API enables you to manage organizational units (OUs) within your Google Workspace domain. You can create, retrieve, update, and delete OUs, as well as move users and groups between OUs.
User Reports: The Admin SDK API provides access to various reports about user activity, such as login activity, email sending/receiving activity, and more. These reports can help you monitor and analyze user behavior within your domain.
Settings Management: You can manage various domain-wide settings, such as email routing, calendar sharing settings, and device management settings, using the Admin SDK API.
Security and Compliance: The API provides features for managing security and compliance settings within your Google Workspace domain, such as 2-step verification, password policies, and audit logs.
To enable ADMIN SDK API click on Enabled API & Services and Search for Admin SDK API:
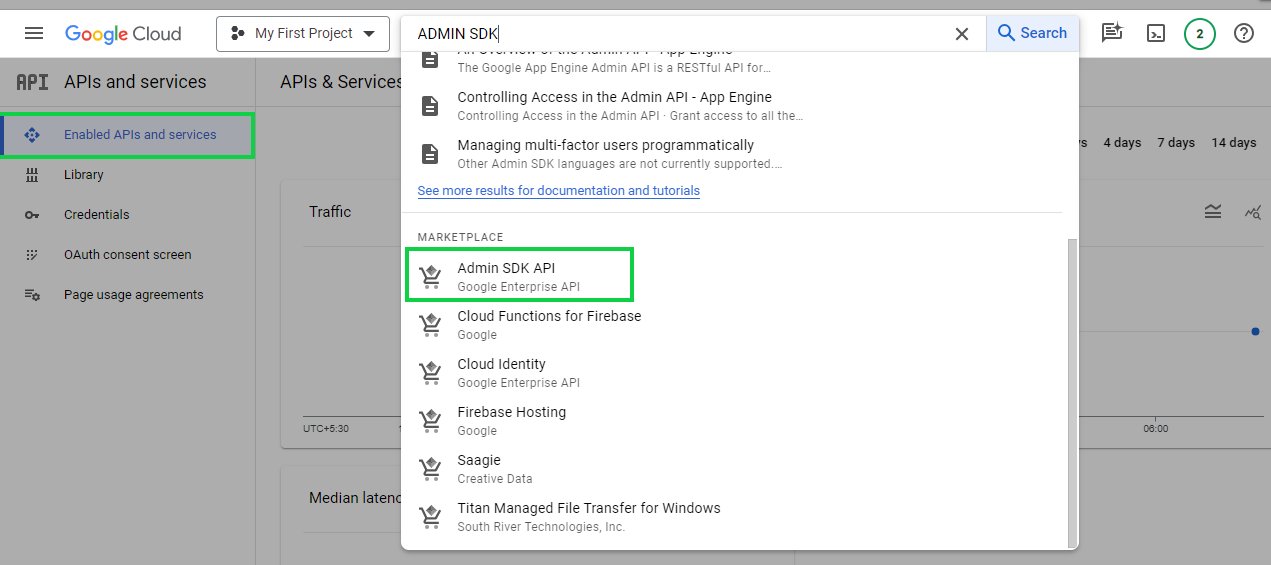
Click on Admin SDK API and then click on the Enable button
Once enabled, Click on CREDENTIALS tab

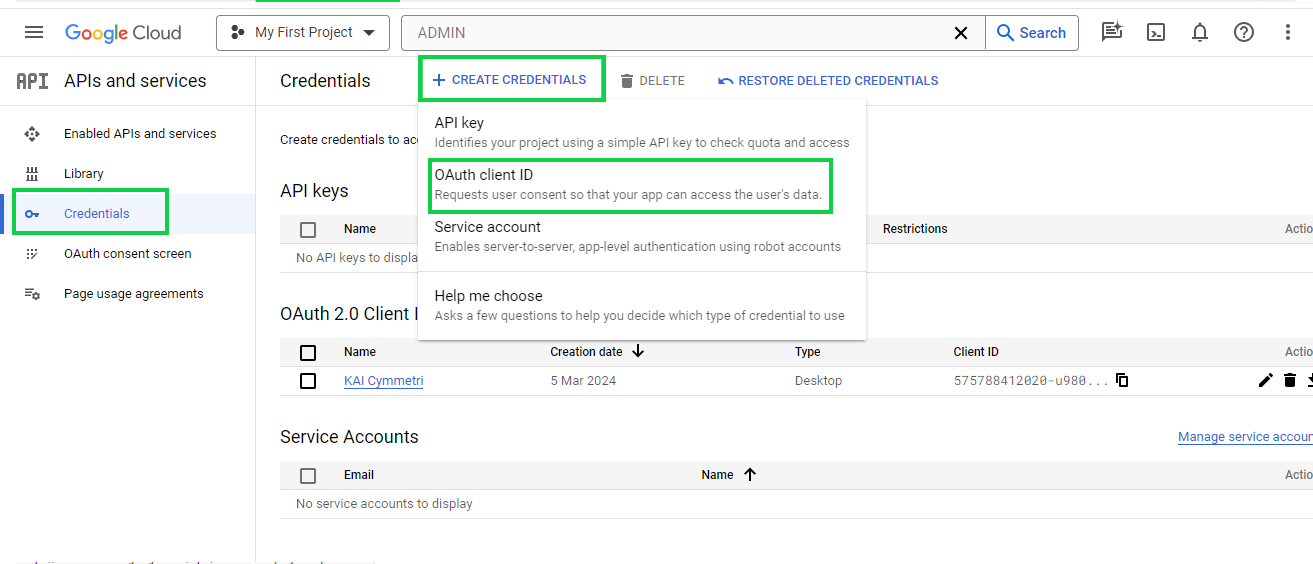
Now click on Credentials section and click on CREATE CREDENTIALS button and in that select OAuth client ID option
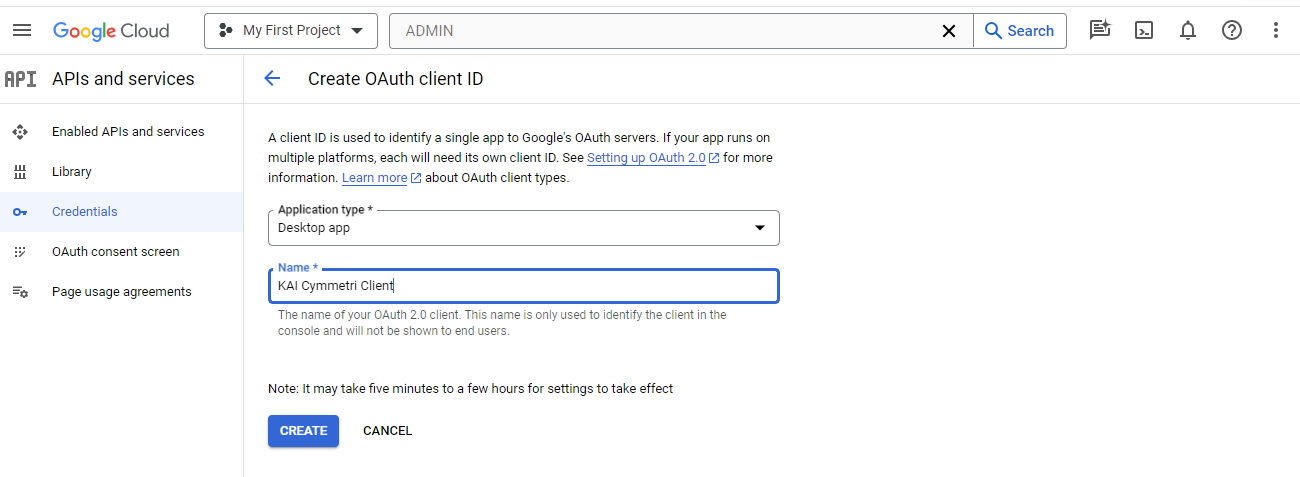
Select Desktop app as Application type, provide a name for the OAuth 2.0 client and then click on the CREATE button
A response screen is visible that shows that the "OAuth client created" It also displays Your Client ID and Your Client Secret. You may download the JSON here using the DOWNLOAD JSON option.

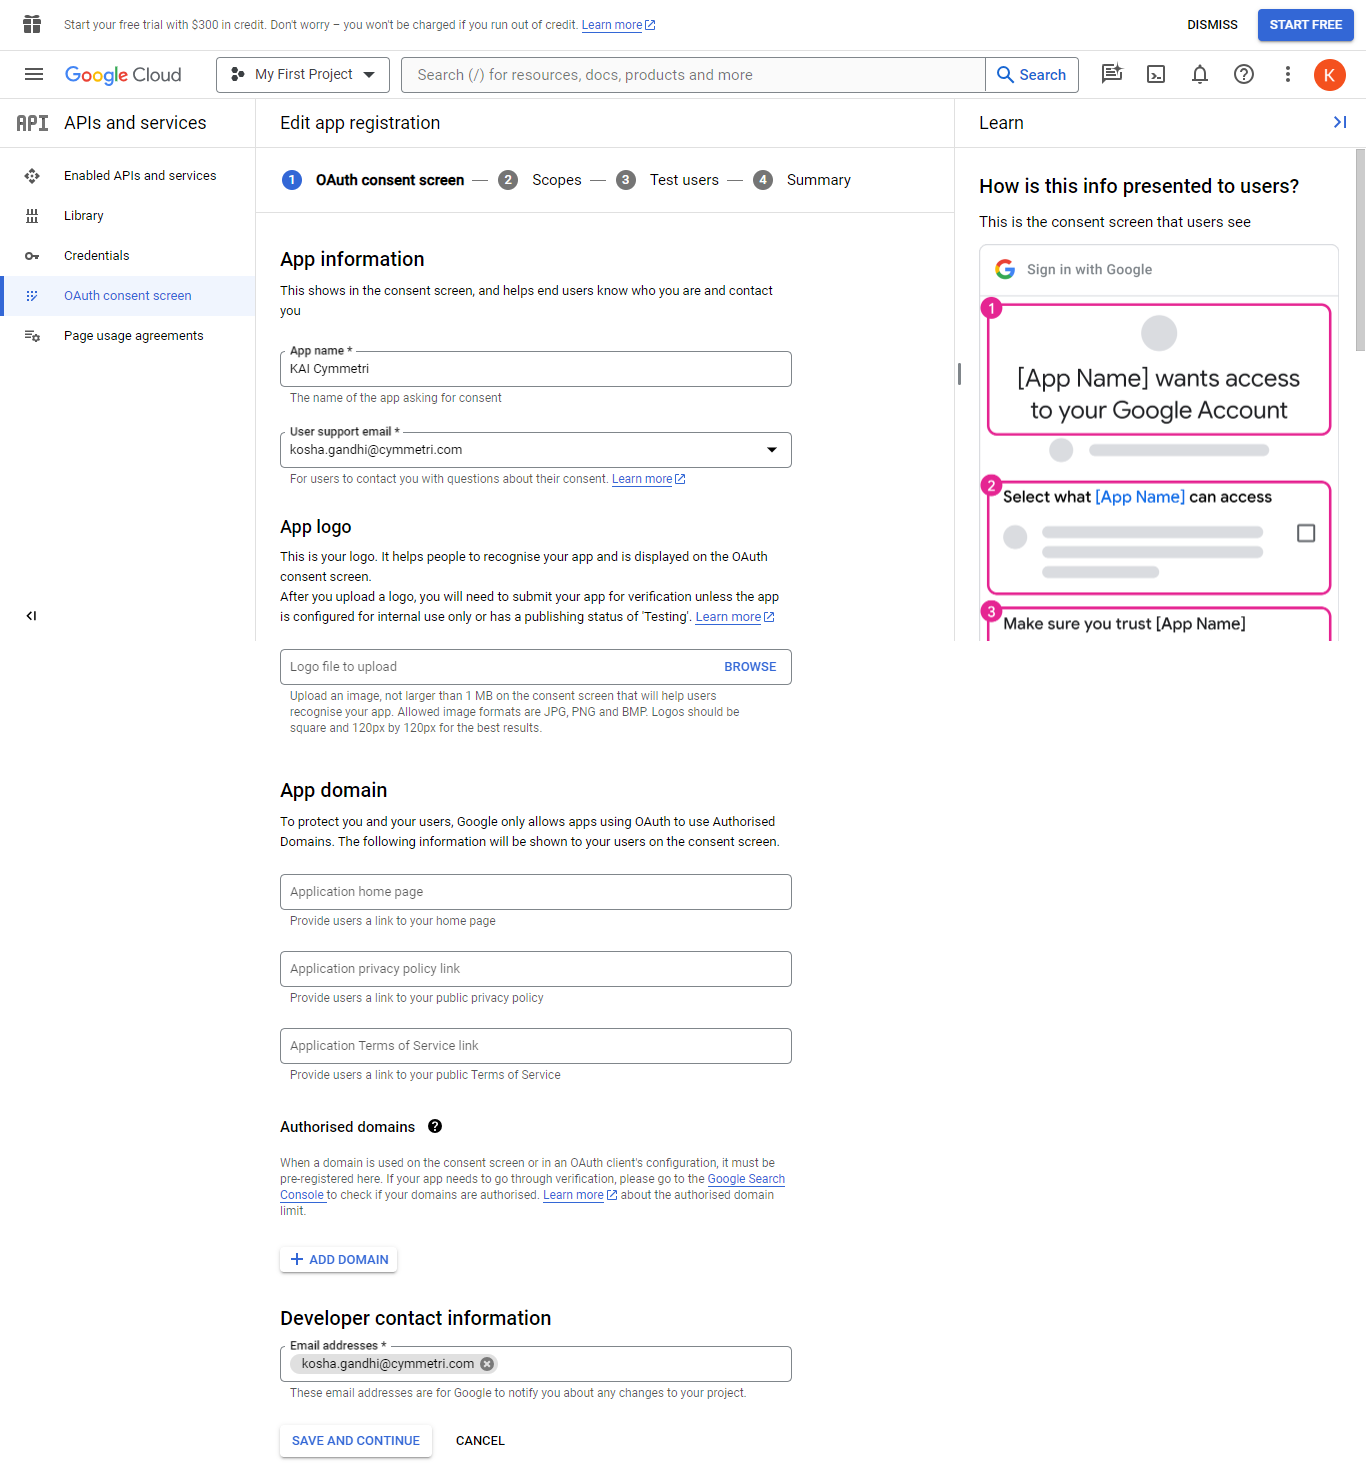
Click on OAuth consent screen and then Click on EDIT APP. Enter the required details and Click on SAVE AND CONTINUE button
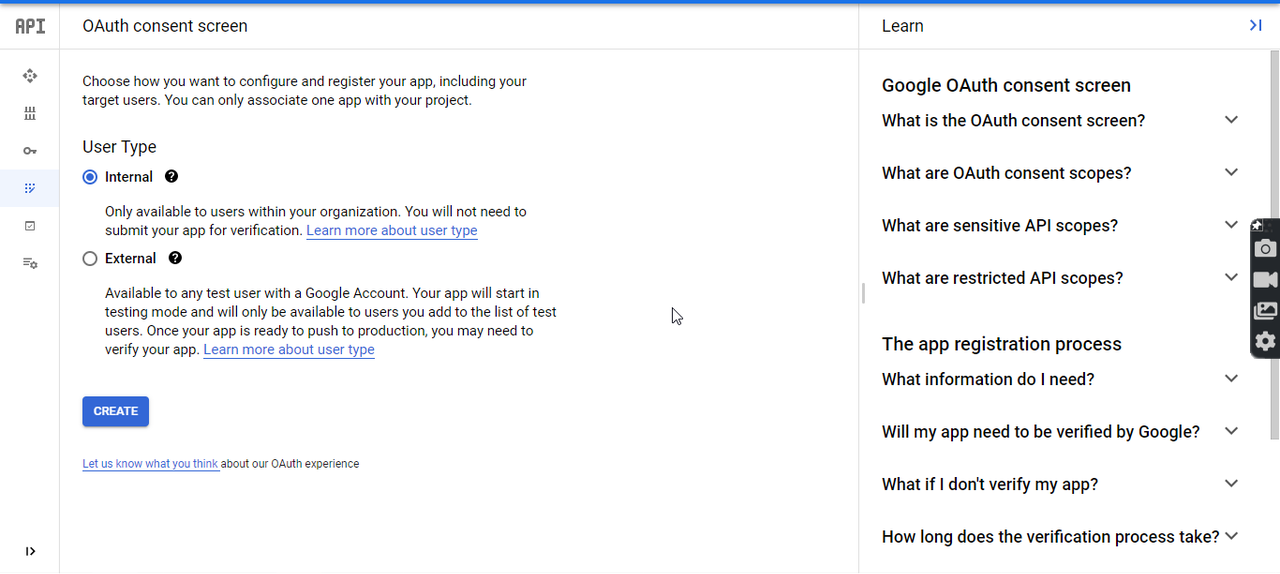
Select Internal as User Type if you want to restrict access only to the users of your organization.
Search for Admin SDK API on the Scopes screen and select scope for user: .../auth/admin.directory.user

Select the scope for group: .../auth/admin.directory.group

Next Click on Credentials section and downlaod OAuth client json file on your local machine by clicking on the Download OAuth client button.
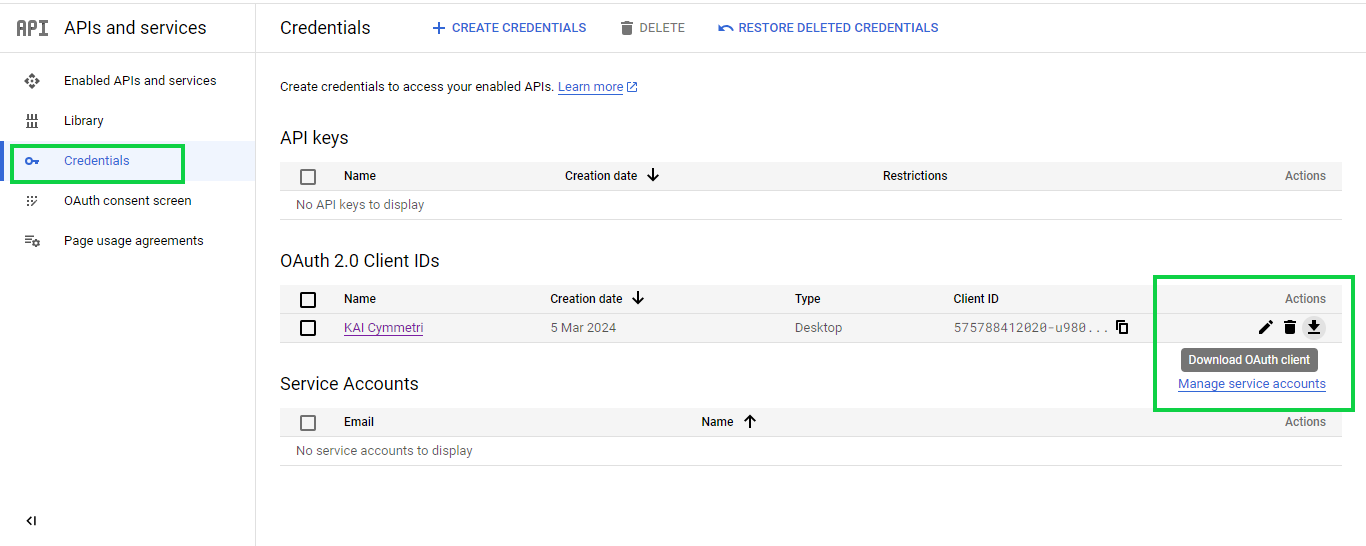
Next download thenet.tirasa.connid.bundles.googleapps-1.4.2.jarbundle for Google Workspace from the Connector Server website. Once downloaded open a new command prompt and change to the directory where you have downloaded the bundle and run the following command on the client_secrets.json file that you obtained earlier step:
This command opens the default browser, and loads a screen on which you authorize consent to access the Google Apps account. When you have authorized consent, the browser returns a code. Copy and paste the code into the terminal from which you ran the original command
A response similar to the following is returned.

Once the above information is obtained we need to configure the Google Workspace in Cymmetri with Server Configuration and User Configuration as shown below:
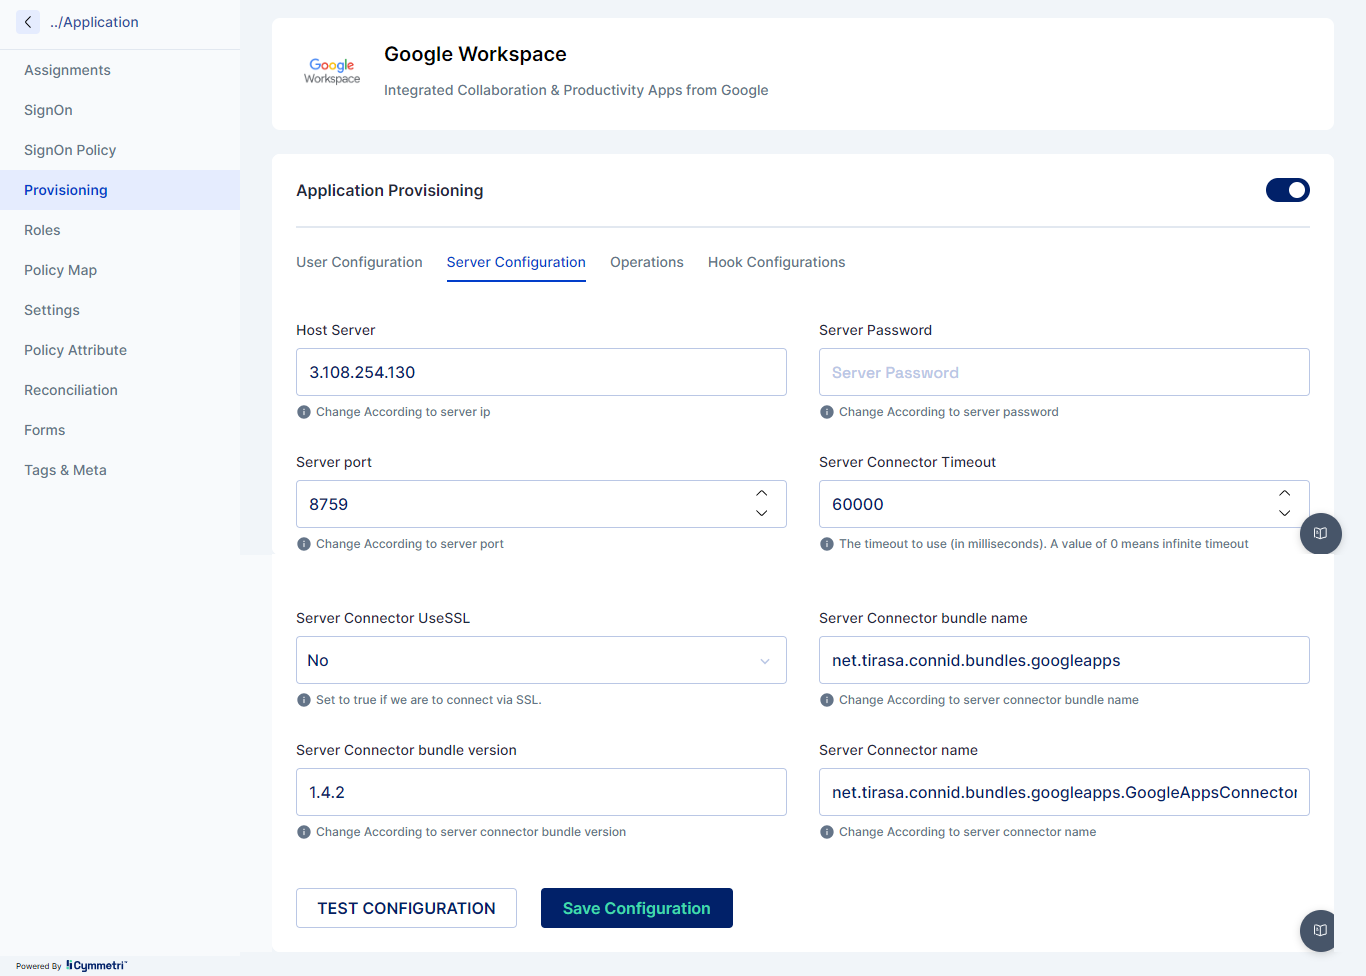
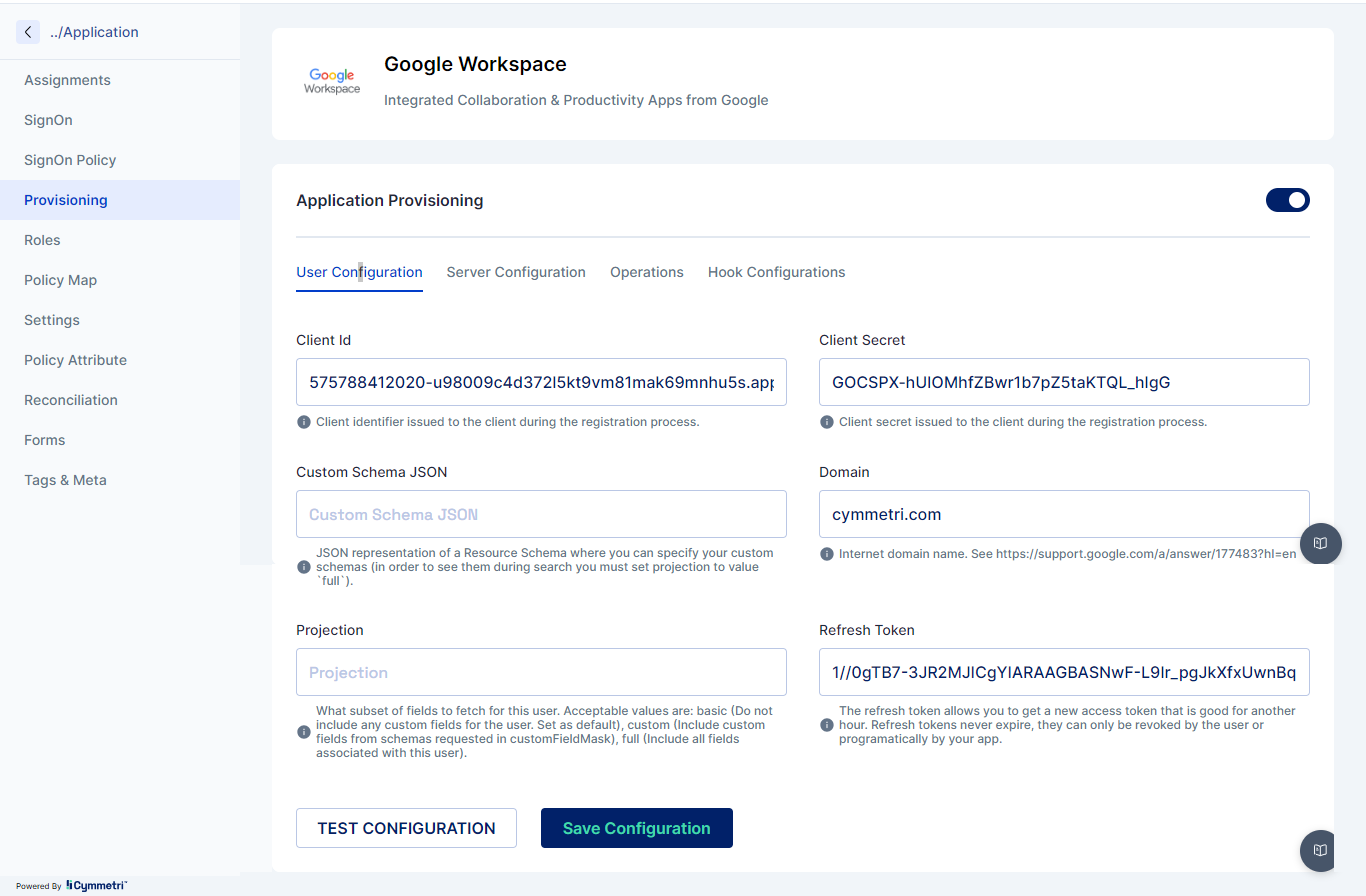
Once the configuration is done click on TEST CONFIGURATION button to check if the configuration is working.
Once the test is successful next go to the Assigments section and assign the application to a user as shown below:
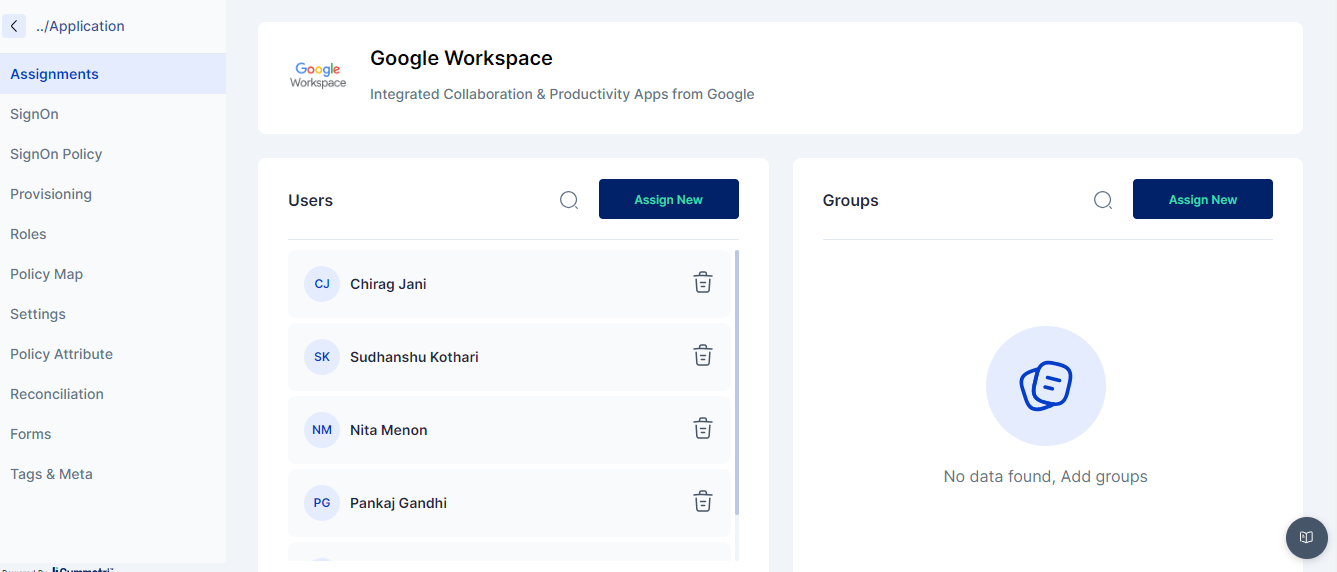
Once assigned ensure that the user is created in Google Workspace.